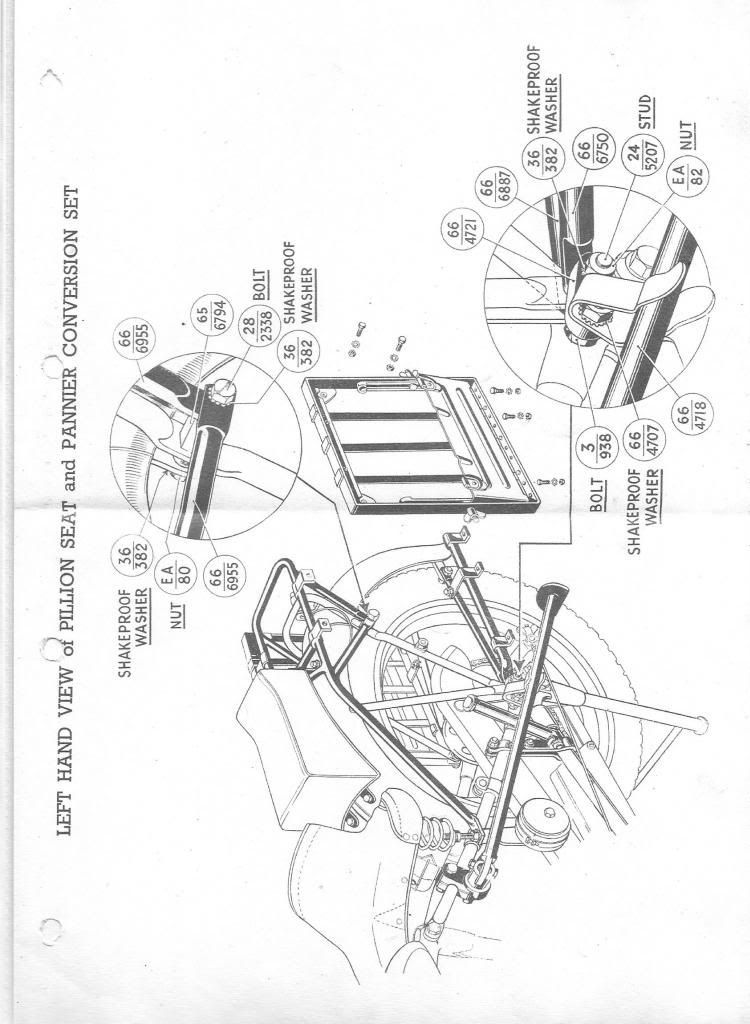
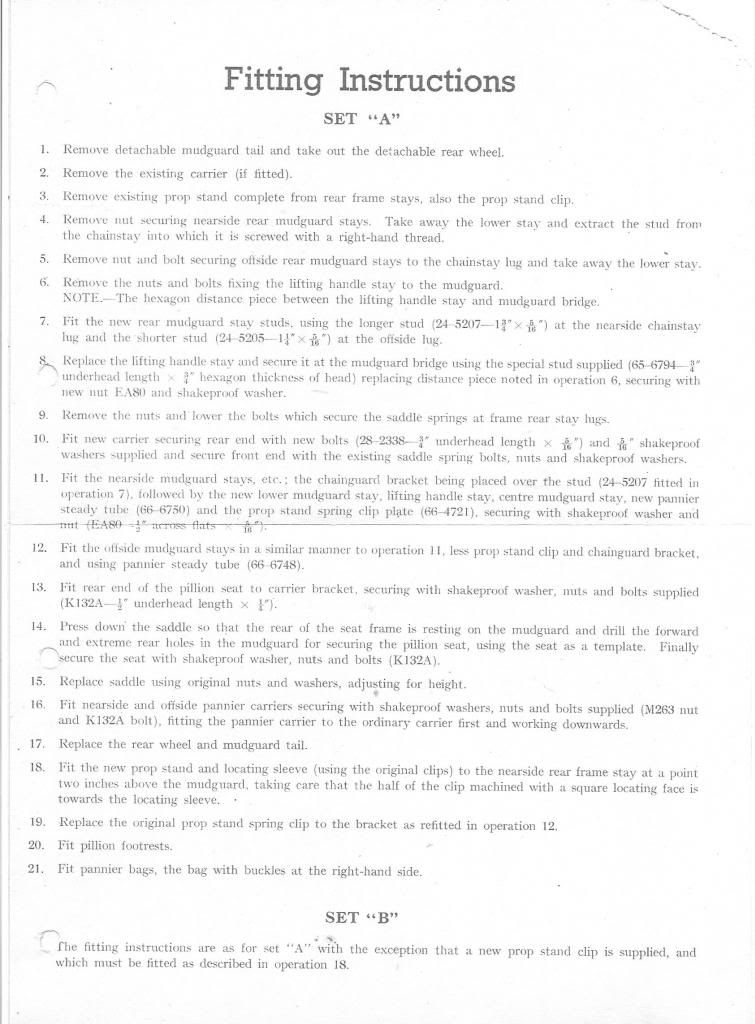
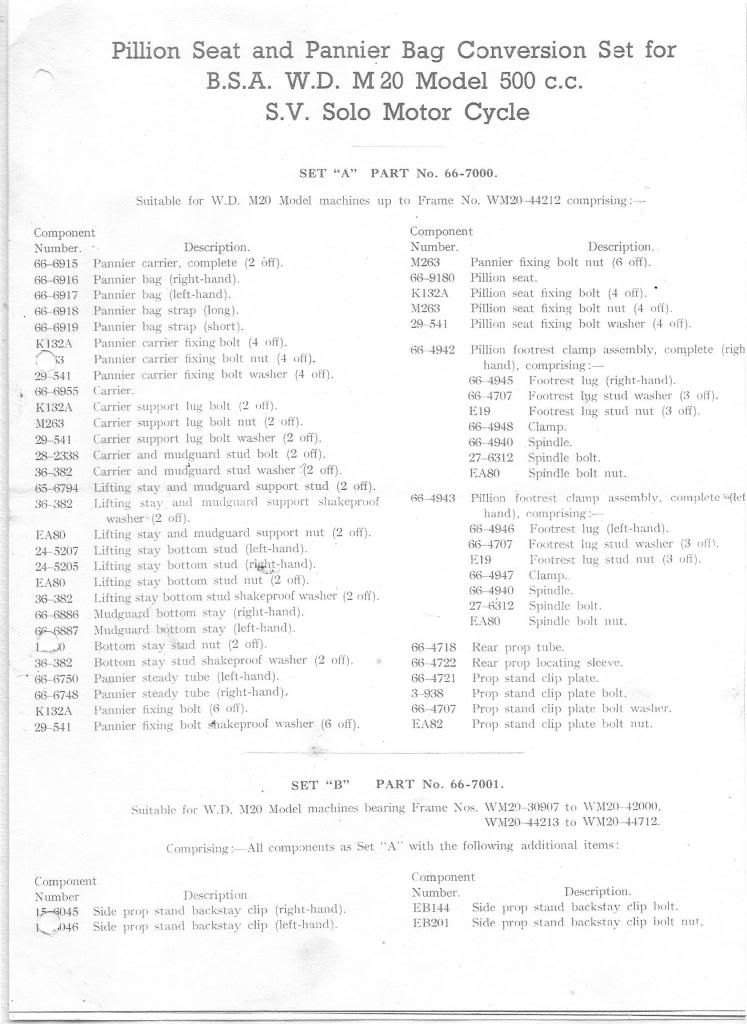
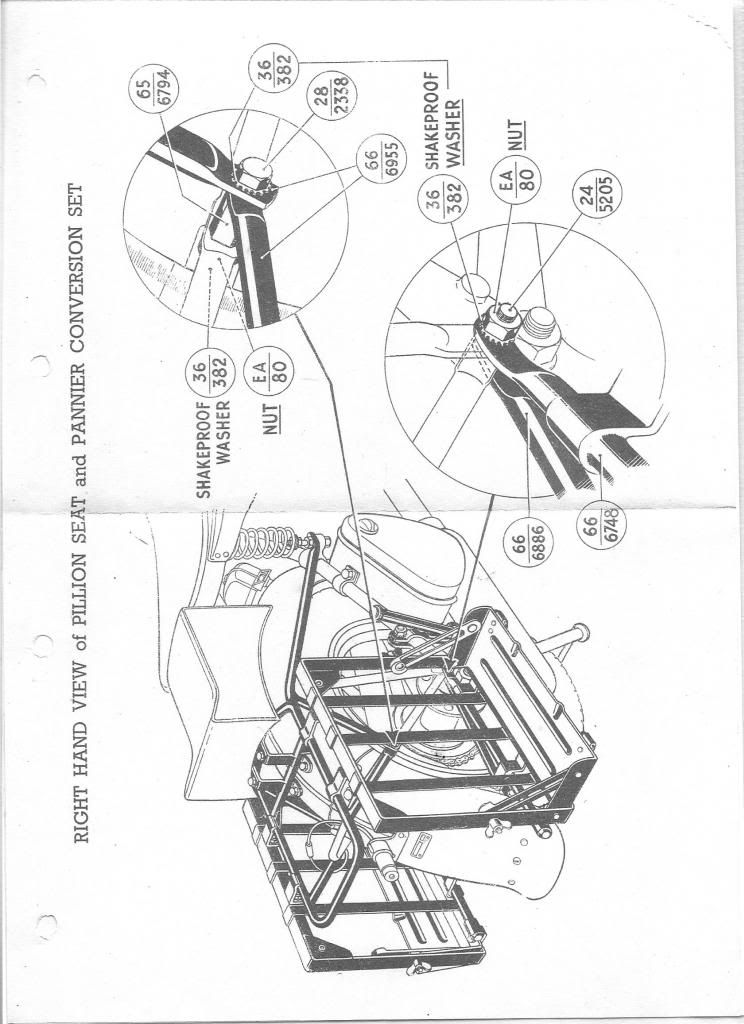
Due to my bike not having the pannier mounted correctly when I got the bike, can anyone help me in identifying what bolts I need to mount as original, I've seen the image below with the bolt configuration circled, which I think should go where the pannier mounts the lifting handle?

 .
.
Am I correct and if so can anyone help in identifying where can I get these bolts from?
email (option): 79aust@sky.com
My interpretation of your diagram is different to yours. My pannier frame does not have the two vertical mounting tabs coming up from the two front leg pieces, the ones either side of your circle. My 'take' on your diagram is that the circled bolts are associated with mounting through these two tabs. But what or where they are supposed to mount to I am not sure. Someone else with this specific frame can answer this. But having said that I also can interpret those parts as for doing the job you say. My frame mounts just the same as the setup in your top picture, but because nothing lined up between the repro side frames, bottom brackets and main piece it needed a lot of tugging and 'adjustment' to get it all to line up. I needed to fit a short tube spacer on a longer bolt either side of the handlestay to make up the gap between it and the main piece as there was no way it would 'spring in' with the pressure of the bolts. I just used standard thread, but longer, bolts to do this job. I don't know if there was ever such a thing as a correct 'factory kit' and set of part numbers for these pieces, but those in the diagram might just be the ones? Certainly in period and contemporary photos you can see similar arrangements so I reckon it has always been an issue.
email (option): cruiserchooser@hotmail.co.uk
Thanks for your response, I have exactly the problem you describe where I was looking at the assembly and saw the gap between the pannier and the lifting handle is almost 3/4" each side, it will require a bit of tugging as you mention to get it true to the frame.
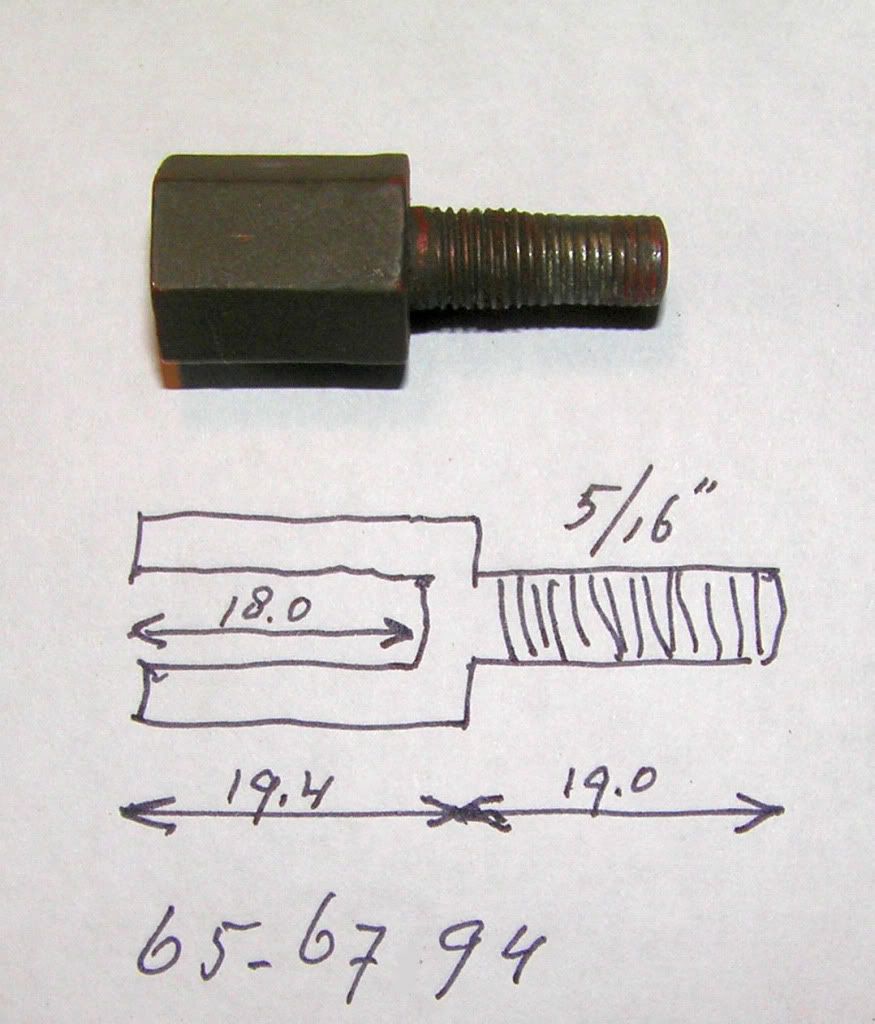
The stud/bolts shown in the diagram I think should fit our frames as I also don't have those upright tabs, I believe there should be a 5/16" tapped hole in the back of the spacer to accomodate a 1/2"-3/4" long bolt that would go through the mudguard and lifting arm then screw straight into this spacer with the male stud on the spacer therefore locating throught the pannier frame with a 5/16" BCT nut and washer on the opposite end.
I've just found a bit of hex bar that I think I could use to machine from and may do the job, I just hope my HSS BCT plug tap will cut the thread cleanly?
Julian

email (option): 79aust@sky.com
Hi Julian...The part shown by Hans is what you need and it fits between the lifting handle and the carrier as you suggested in your original post...The assembly diagram is a 'red herring' in that it only serves to confuse matters...I have never seen a carrier with those vertical brackets and if you did have them they don't line up with anything on the bike...What you do need as well is the two pannier support tubes (shown in the illustration) which fit between the lower rear mudguard stay and the bottom edge of the bag carriers and give the carriers some extra support..The support tubes mount to the stud that holds all the mudguard stays to the frame and the stud that is welded to the top of the lower mudguard stay..They are also then bolted to the bottom edge of the bag carriers...Ian
email (option): ian@wright52.plus.com
That is absolutely superb Hans, thank you very, very much.
I do have the tubes you mentioned Ian, it was purely this spacer/tie bolt that is missing, the drawing I detailed was the only one I've found and although I've been trawling through images of others BSA M20 bikes I hadn't seen anything for this part clearly.
I guess it's a late night on the lathe tonight (can't wait to assemble it, LOL).
Kind regards,
Julian
email (option): 79aust@sky.com
I think Julians drawing is from a postwar spare parts list.
Rob
email (option): robmiller11@yahoo.co.uk
Draganfly catalogue 
email (option): viaconsu [at] planet [dot] nl
Original diagram came from Draganfly as it was all I could find at the time,
Due to the fantastic info provided through this post I now have managed to machine the 2 spacers beautifully, if anyone else has to turn the 26 tpi CEI thread it is worth noting that a modern 1mm pitch Metric insert cuts the thread form perfectly.

Many thanks for all the info provided, this is what makes this forum so great.
Julian.
email (option): 79aust@sky.com
Just out of interest, what does the hexagon measure? Is it 1/4 or 3/8 spanner size?
email (option): davmax@ntlworld.com
The only hex bar I had available was 16mm a/f, the hex size may not be correct but I'm not really that finicky, the spacer is 3/4" long, spot on and fits between my lifting arm and carrier perfectly.
I can see now why my father never got around to restoring the bike, as it has taken a bit of machining to re-place some missing parts and also he never had any engineering background.
email (option): 79aust@sky.com
Dummy mounting of the rear mudguard before sending the spacers off to the powder coaters with the saddle mounts along with the spacers between the guard and the lifting handle. Amazing how such a small part can make such a transformation to the back end of the bike. When I stripped the bike apart I was very tempted to leave the carrier off, as I thought it looked unsightly how it was originally presented, really glad I've machined these spacers as I seemed to have become attached to the carrier now as well.


Again thank you for all your support.
Julian
email (option): 79aust@sky.com
