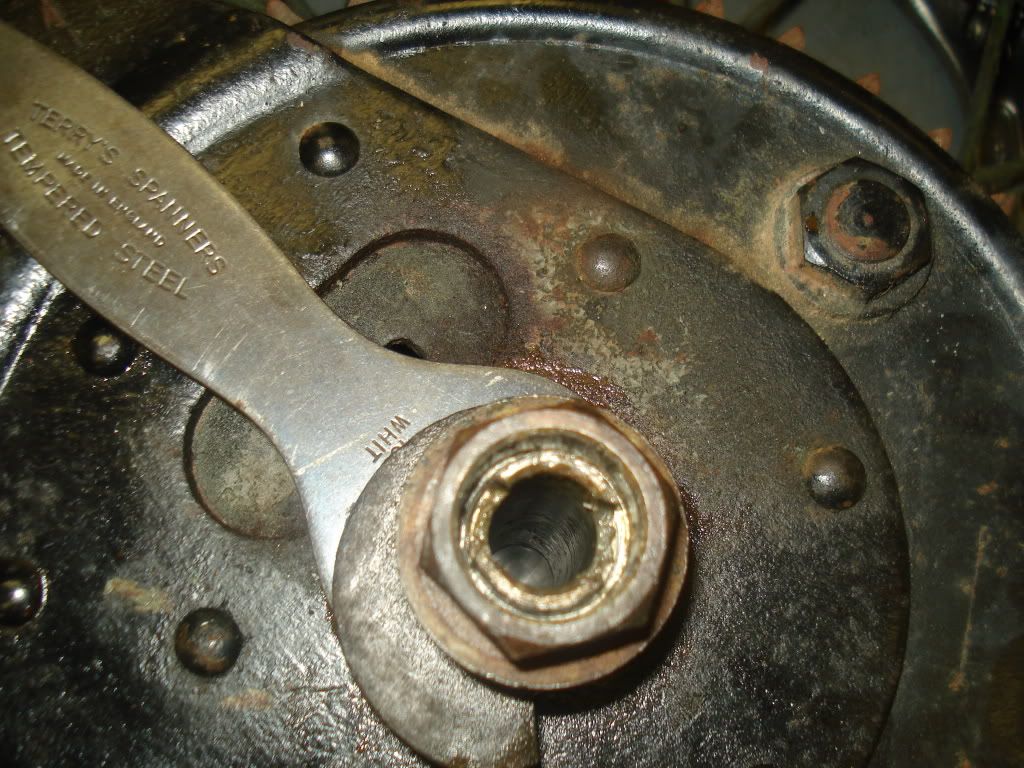
I've spent the day on various projects on my bike and it's been the proverbial two steps forward and three back. The drive side stub axel and nut are giving me fits on this damn bike. The issue is that the inner axel has a castellation under the nut. This castellation engages into a castellation on the stub axel. All well and good, however I don't see how you can tighten the inner axel and avoid spreading the stub axel apart. The problem when that stub axel is spread... it will tear up all the threads inside the nut when you try to remove it!
I've spent the day on various projects on my bike and it's been the proverbial two steps forward and three back. The drive side stub axel and nut are giving me fits on this damn bike. The issue is that the inner axel has a castellation under the nut. This castellation engages into a castellation on the stub axel. All well and good, however I don't see how you can tighten the inner axel and avoid spreading the stub axel apart. The problem when that stub axel is spread... it will tear up all the threads inside the nut when you try to remove it!
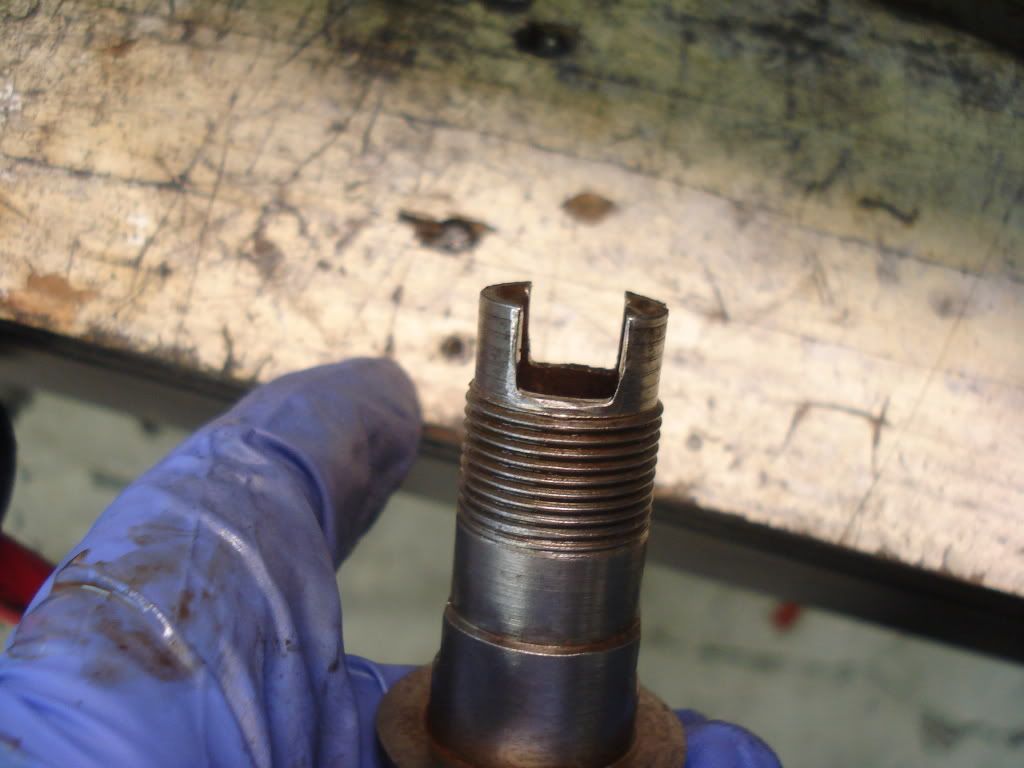
Here's a picture of the stub axel after I destroyed/removed the nut:

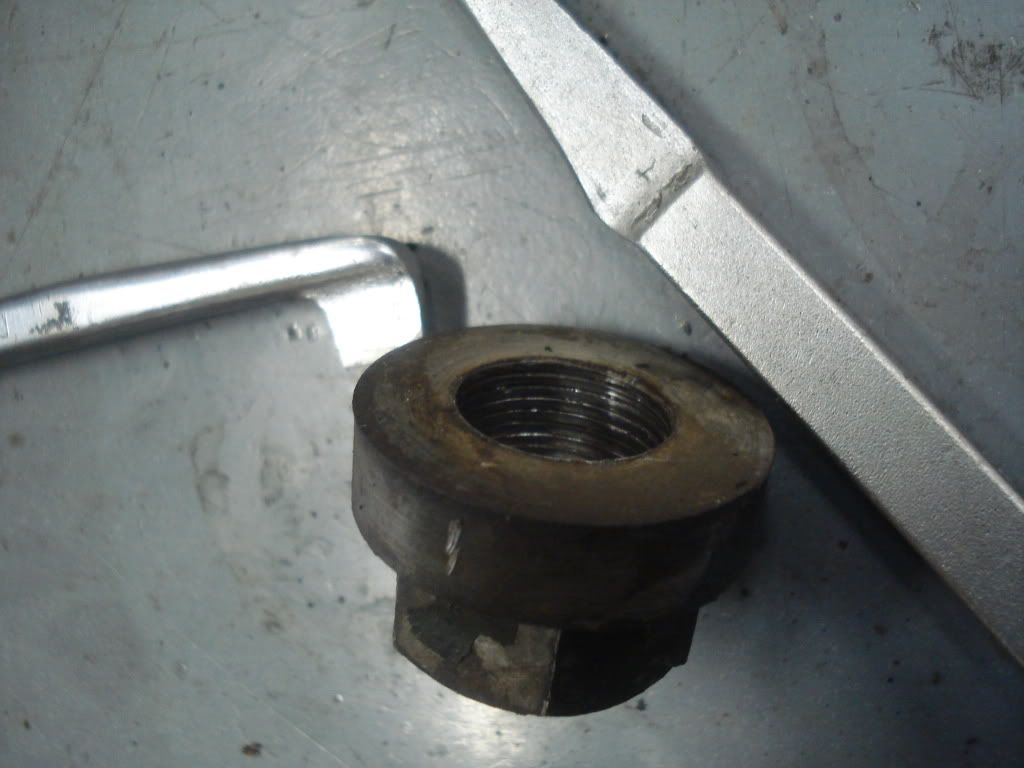
Here's the nut, showing flattened threads:

I have a spare wheel. I thought "well, I'll just remove that nut and be good to go." Not so fast! That wheel also has a stub axel with a spread end.

Since I knew what to expect from my previous experience, I thought some judicious excertion of a screwdriver and taps of hammer could persuade the stub axel back to it's original shape. Nope! The nut still hung up at the last bits of thread.
Time was getting short and I had to pick up my toddler at daycare, so I decided to put the spare wheel back on the bike so I could wheel it around the shop. But nooooOOOOOoo! The inner axel would not fit now since the inner diameter on that stub axel was now too small!
Surely, the guy who came up with this rear wheel mouting is spending eternity in the 9th circle of hell with the a$$hole that decided to put a bush on the timing side of a BSA unit twin!!

So, anyone got some ideas or experience of preventing the stub axel "spreading disaster"?
Thanks,
Kevin
Hi Kevin..The design of the stub axle assembly is fundamentally sound..Problems with the set up always stem from previous abuse where the wheel adjustment/fitting procedures have been misunderstood and incorrectly executed..
Firstly you have to rectify any problems with the stub axle before attempting assembly.
The cause of the problem is always the same and the I'll explain reasons for that further on.
The two sides of the stub axle slot get spread out and these need to be squeezed together to make them parallel. They are a close fit through the inside of the nut that holds the stub axle to the frame but it is important they pass through the nut without 'snagging' on the inside diameter of the nut thread. So, squeeze the the two sides until you get them as parallel as you can. If the nut will still not pass over without snagging you must either mount the axle in a lathe and turn a little off the outside diameter of the axle tangs (the castellated part).. or, alternatively, you can remove the material by filing it down carefully by hand.
Remove the minimum amount of material to allow the nut to freely pass over this part and engage the threaded portion.
Having done that check the fit of the wheel spindle through the stub axle. If that will not pass freely through the axle you will have to run a drill through it to restore the correct inside diameter at the 'castellated end' where it will have closed in.
The spindle diameter is 1/2". If you don't have access to the correct drill, again you can ease out the inside using a round file where the spindle is 'sticking'.
Finally, check the fit of the wheel spindle head into the stub axle slot..after squeezing it you may need to ease the slot with a file to ensure a good fit.
Now you should have the spindle sliding freely through the stub axle, the large nut should fit easily over the castellated part and be simple to screw onto its thread and the spindle head should fit easily into the axle slot..
Next assemble the stub axle into the sprocket, fit the brakeplate and wheel adjusting cam and put the whole thing into the frame. The adjustment cam locates on the two flats machined onto the outside diameter of the axle.. Now fit the large nut on the outside and tighten it up against the frame.
Next fit the rear wheel and bolt the hub to the back of the drum, lightly tightening the 3 retaining bolts.
Fit the wheel spacer between the hub and the inside of the frame on the opposite side to the stub axle.
Now take the spindle and slide it through the axle, hub, spacer and frame, carefully turning it to correctly engage the underside of the spindle head with the slot in the stub axle. Then refit the nut on the opposite end of the spindle.
To tighten the wheel first fully tighten the stub axle nut..check that the spindle head is still correctly engaged and then tighten the nut on the opposite end..Use a spanner on the spindle head to prevent it exerting any load on the stub axle slot whilst tightening the other nut.
The damage to the stub axle is always done when the wrong procedure is followed when adjusting the rear chain. To do this first slacken the nut off on the opposite end of the spindle to the stub axle..next slacken the stub axle nut..Then turn the head of the spindle..this turns the stub axle (via the castellated slot) which in turn moves the wheel adjustment cam and the chain is slackened or tightened.
DO NOT attempt to turn the wheel spindle head before slackening BOTH nuts...this exerts excessive load on the (still tightened up) stub axle and spreads the end of the stub axle...and there is the problem.
In conclusion I would say there is nothing wrong with the design if the correct procedures are followed..Note I have detailed the spindle assembly in the description without reference to the rear brake torque arm, rear brake rod, chain and wheel adjustment screw...I omitted those details to focus on the problem...Ian


email (option): ian@wright52.plus.com
Ian thank you so much for your very clear explanation. I appreciate it very much.
If it can last 70yrs, get abused by several owners & still be repaired quickly for free, surely that's a good design isn't it ?
Adjustment procedure is fully explained in owners manual.
Adjustment procedure is fully explained in owners manual.
Hi Fred, I don't have a copy of the owner's manual, would you mind scanning and posting that section out of it? Thanks,
Kevin
Kevin, Thanks for sharing your rear wheel challenge.
Ian, Thanks for the great explanation. I'm saving this thread for when I dive into my rear hub.
cheers, Scott
That's one of the many things that is so great about this forum. People here are so generous with their time and knowledge. If I can give back a little bit and help someone else avoid my frustration, I'm very happy to do so. Thanks for the various contributors of wisdom and experience!
I'm all embarrassed now..
 ..but thanks for the positive comments..Ian
email (option): ian@wright52.plus.com
The search function on the forum still works just great! And I again learned something useful. Repeat after me- Both rear axle nuts must be loosened first- BOTH nuts must be loosened!!
Thanks. again!!
email (option): vinver@ns.sympatico.ca
On re reading my own post I realise I also should have mentioned...slacken the nut on the toolbox side first, then the one on the brake side...Ian
email (option): ian@wright52.plus.com
Hi All
Thanks Ian and to Henk and all those who respond on the forum. I have saved the thread (and many others) as I have looked at the service sheets dealing with the rear hub and so far havent delved into it - looks very complicated!! My rear wheel (rim & spokes) looks in reasonable condition but has been driven with only 2 bolts (loose) in the hub so dont know what it will be like when I get it off.
Does anyone have ann exploded view of the axle assembly? Like the front one that was posted recently.
Rgds
Doug W
email (option): watsond @ xnet.co.nz
Anyone know why 15-7045 can be found in two different thicknesses?...Ian
email (option): ian@wright52.plus.com
Thanks Henk
Doug W
email (option): watsond @ xnet.co.nz


