
I thought I started this before, but I can't find a trace.
This build is from a pile of bits that I either traded for or obtained by some other expensive means.
I still think for anyone wanting an old bike, buying a complete one that runs is the answer. Then spend lots of time and money fixing it, despite it being sold as "perfect"
I think the frame I have has changed hands many times, and unfortunately been subjected to "fixing" and modifying.
After lots of stress I think I've finally got it to a condition where it should be rideable.
Some of the errors in alignment of the rear frame could only be down to dangerous enthusiasts.
I did have it shot blasted in the hope of making it easier to repair.
The company I used had this done for me then kindly coated it in primer! So it had to be blasted again.
This has made it very difficult to "wet" the steel whilst bronze welding or brazing.
I think this poor frame has even been subjected to being held in a tree whilst straightening due to the dent in the top tube. For now it can stay.
I first noticed there was an issue with the rear wheel lugs as the Robb Nortier Alignment spindle was awkward to tighten. Not only did the faces not look at each other, hollows had formed from years of retightening the wheel spindles.
I faced these hollows with nickle bronze as it is quite hard, then filed them flat using the original castings as a gauge.
A seat lug had been cut off, so that needed replacing. Also where the field stand had been fitted the tube was crushed. This was also built up with nickle bronze.
I still need to make a new rear foot peg mount and repair the other.
The stop pin for the left hand wheel adjuster was cut flat so that had to be removed.
Quicker to type than do, I think I spend about 10 hours getting it in shape. I have a Motorliner Jig, but the workshop isn't big enough at the moment to use it. I think it would have been easier to have used it.
Not the nicest of pictures, but I never like to mislead by only showing the pretty stuff.
The next task will be to see how well the rack and panniers fit.


Please feel free to criticise ;)
email (option): pes.sales@btconnect.com
Hello Mark,
I'd say this project was coming along very nicely! Good work!
Allan
email (option): allanmatchless@yahoo.com
Unhappy with the rear frame alignment I decided better accuracy was required, so I made three 300mm pins. 3/8", 7/16" and 3/4"
This enabled me to take better measurement. Unfortunately where the rear frame had been damaged from the field stand clamp my simple fix shrank the tube by what appeared to be 3mm.
At these times you have to be bold. Out with the hacksaw :(
Spreading the frame proved the issue as the alignment that I didn't like was corrected.
This gave me the opportunity to cut out the bad area of tubing and replace it with some T45 tubing.
Then just a bit of metal glue applied using the TIG welder.
As the rear mudguard is of Indian origin I think I will fit the rear wheel and build the structure over the wheel to avoid any contact with the tyre.
Ah, tyres! Thats another thing to try and make my mind up over.


email (option): pes.sales@btconnect.com
Did you Tig braze the T45 tube?...Ian
email (option): ian@wright52.plus.com
It's bonded with a pipe welding grade steel wire Ian, the same as what I use for my new frames. It flows like mud but is stronger than the mild steel everyone else uses.
I've never tried TIG brazing, but I really must. From experience the heat of TIG tends to boil the Zinc out of the Brass.
I asked how that's overcome and was told it's a specific alloy used for TIG brazing.
email (option): pes.sales@btconnect.com
Yes, I looked into it as I have to make some alterations to a Wasp frame which is a mixture of T45 and 4130 tube...My understanding was that the 4130 can be tig welded as normal using a steel filler rod whereas the T45 should be brazed using a specific grade of filler rod...Still more homework to do before any work takes place...Ian
email (option): ian@wright52.plus.com
4T45 is basically drawn from EN14. It was developed during WW2 for making airframes. It can be fusion welded or non fusion welded without subsequent heat treatment. It is also more forgiving for semiskilled welders. All my frames are TIG welded T45
When I had connections with Wasps in the late 70's early 80's I think they were using CDS or CDS2 seamless mild steel tubing. I'm sure they were flux flame bronze welded. It was a long time ago. The sidecar chassis were only good for about half a season before they started fracturing.
People do TIG weld 4130 with mild steel wire without post weld heat treatment. The idea is the weld stretches before the tube cracks. personally I would never use 4130. I seen many frames fail using this method.
When I moved into the Car world making Chassis and suspension parts the Chassis were Nickle Bronze welded, much stronger than Brass but harder to work with. Also they insisted on a raised deposit for RAC inspection. The suspension parts were TIG welded Mild Steel with Mild Steel Mig Wire, the fashion then was full penetration miniature welds. I can't see well enough to do them anymore. What shocked me was the fact the wheels were supposed to come off in a crash to consume some of the impact energy.
Just remember, penetration is everything in fusion welding. Very few welders seem to manage it.
If you need any help or advice Ian, please feel free to ask. (sadly I'm even qualified to design and inspect welds)
email (option): pes.sales@btconnect.com
I have to add a few not particularly load bearing brackets to the frame (side panels, electrical component mountings and the like...)..Wasp are the only name in the game for the type of frame I'm after and were very accommodating regarding the modifications I requested, so I've got to go with that...It's for a road bike so not quite as highly stressed as a competition frame....I have a friend who's run the same Wasp frame in pre 65 scrambling without any cracking issues after a number of seasons, so fingers and everything else crossed for this one...
As a toolmaker I never got into the welding side (most toolmakers avoid it if possible due to inaccuracies caused by distortion!). I have access to the services of a professional welder who does most of his work in, predominantly, stainless steel but also aluminium and mild steel..Wasp have said I can help myself to offcuts for experimentation when I pick up the frame..All the factory applied brackets are mild steel...
As this subject is off topic for this forum I'd better not get into too much of a discussion over it...Thanks for the offer of advice...Ian
email (option): ian@wright52.plus.com
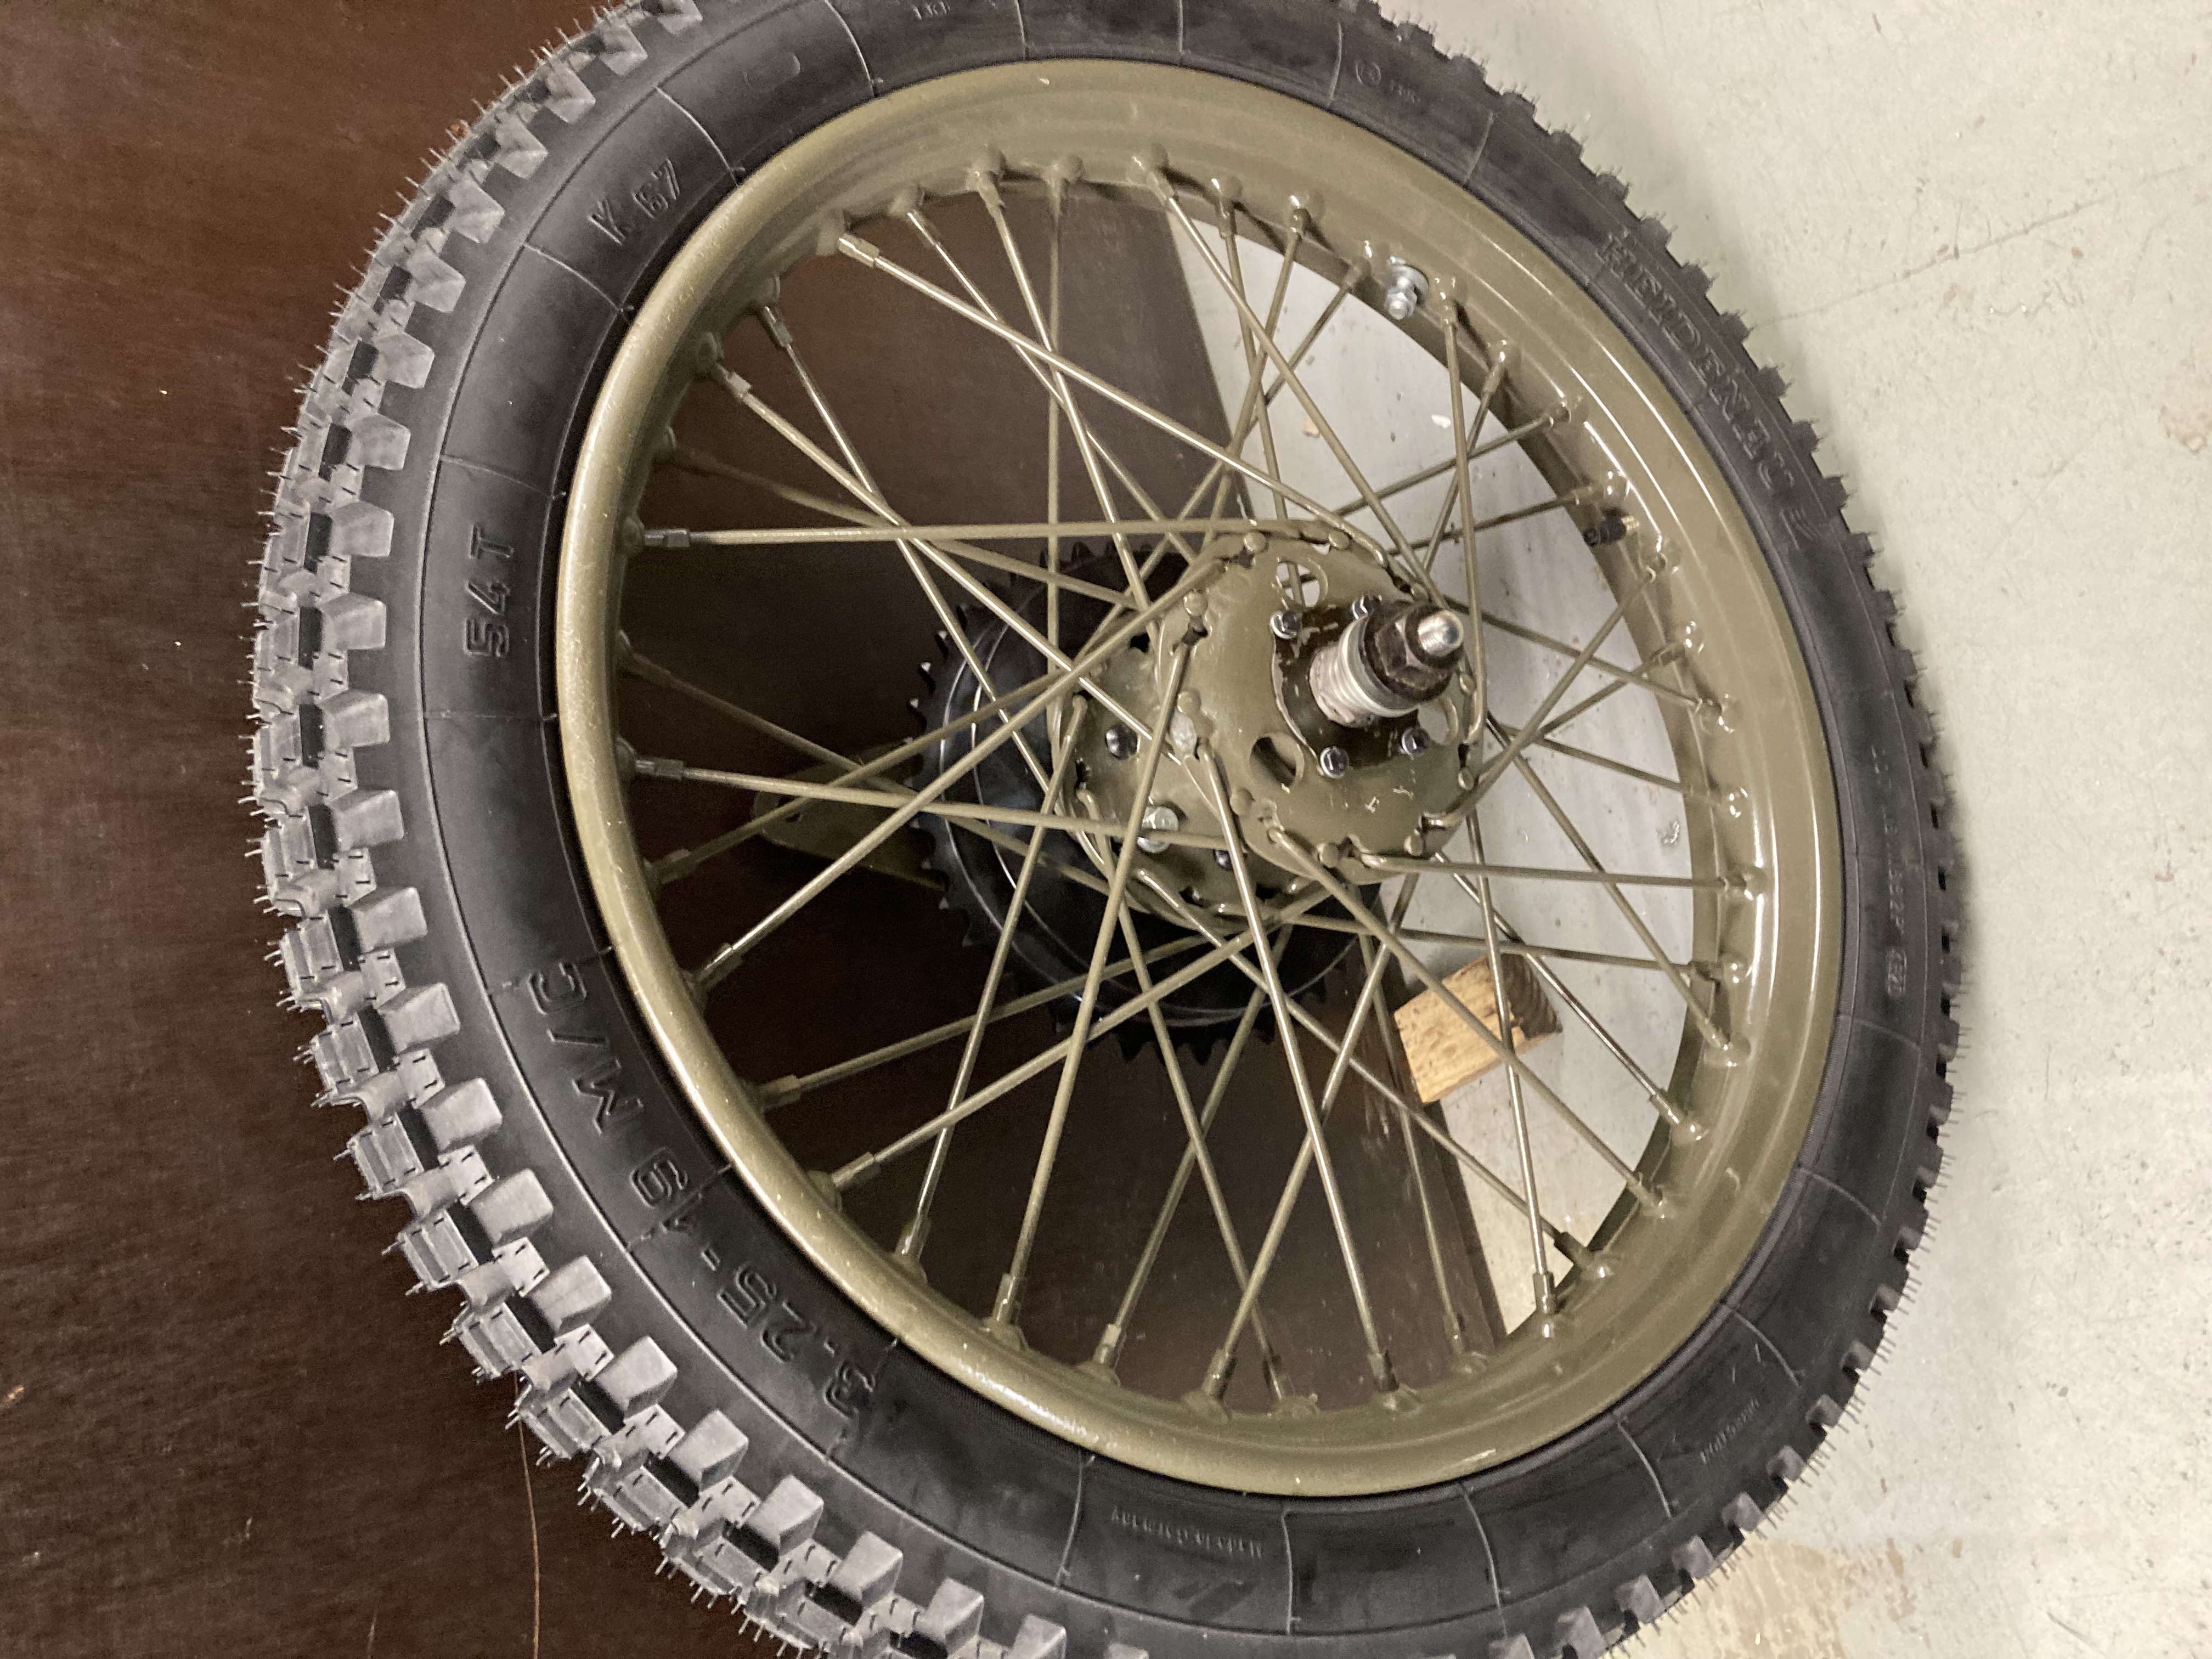
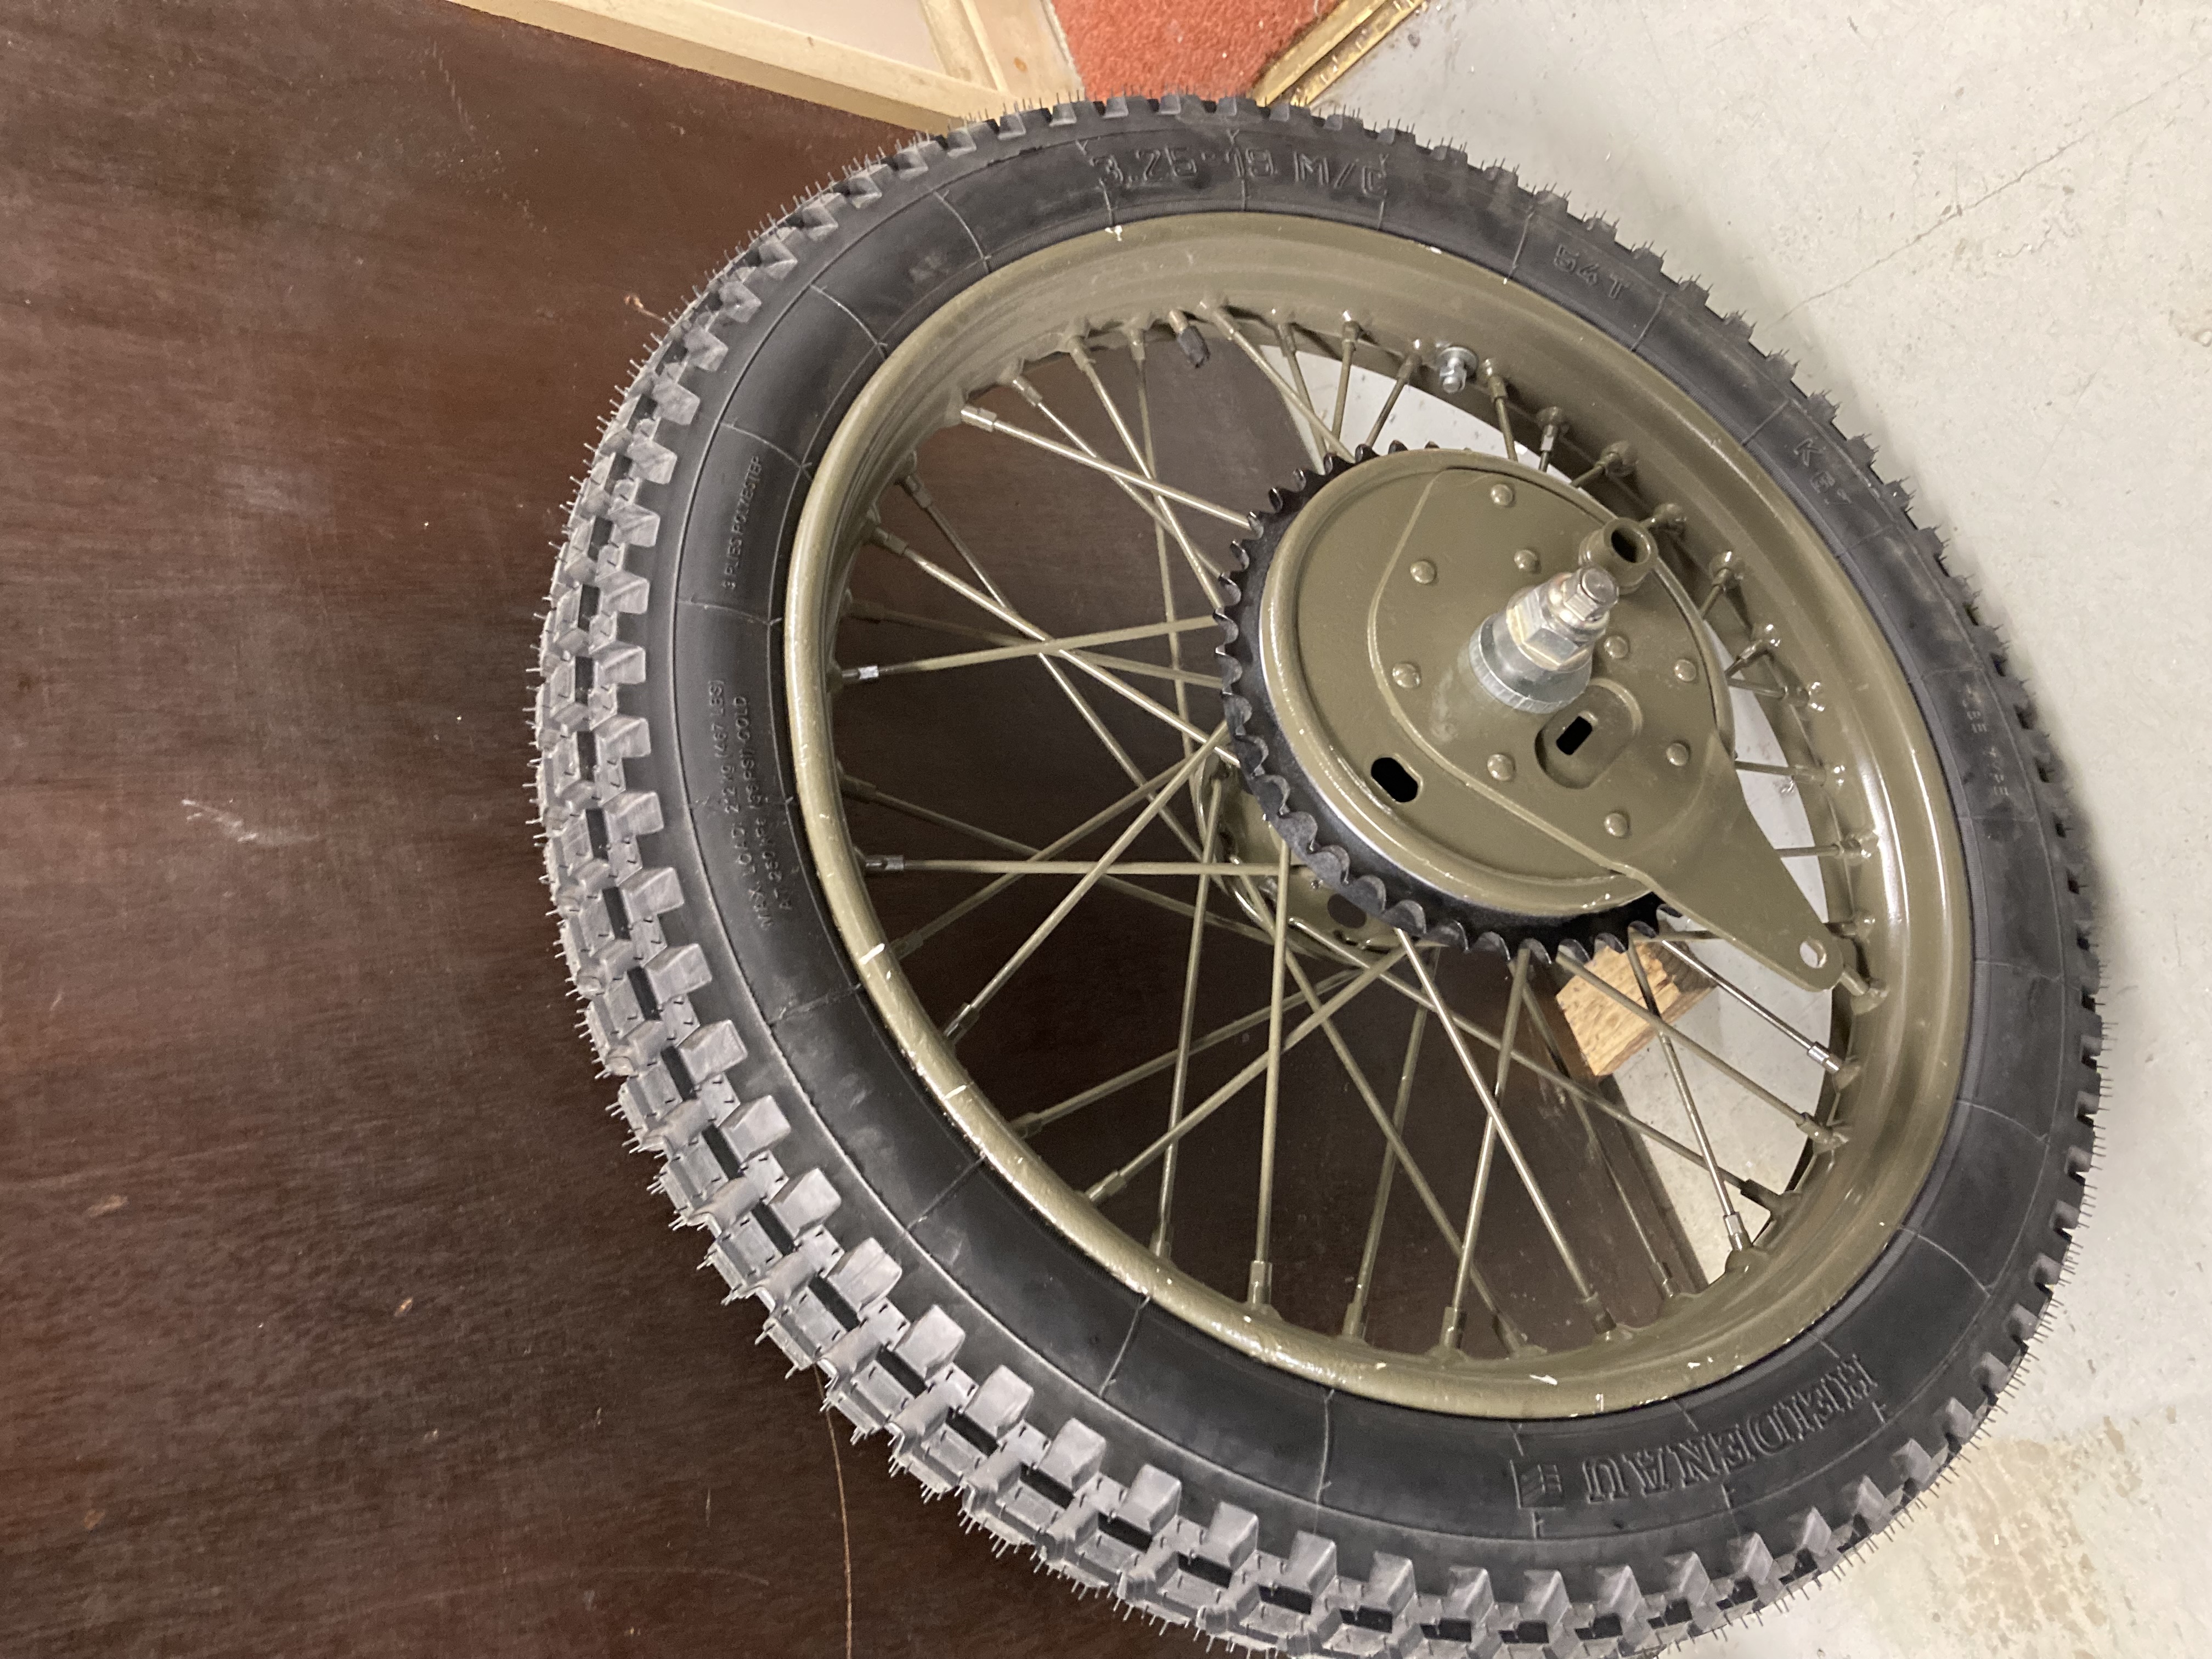
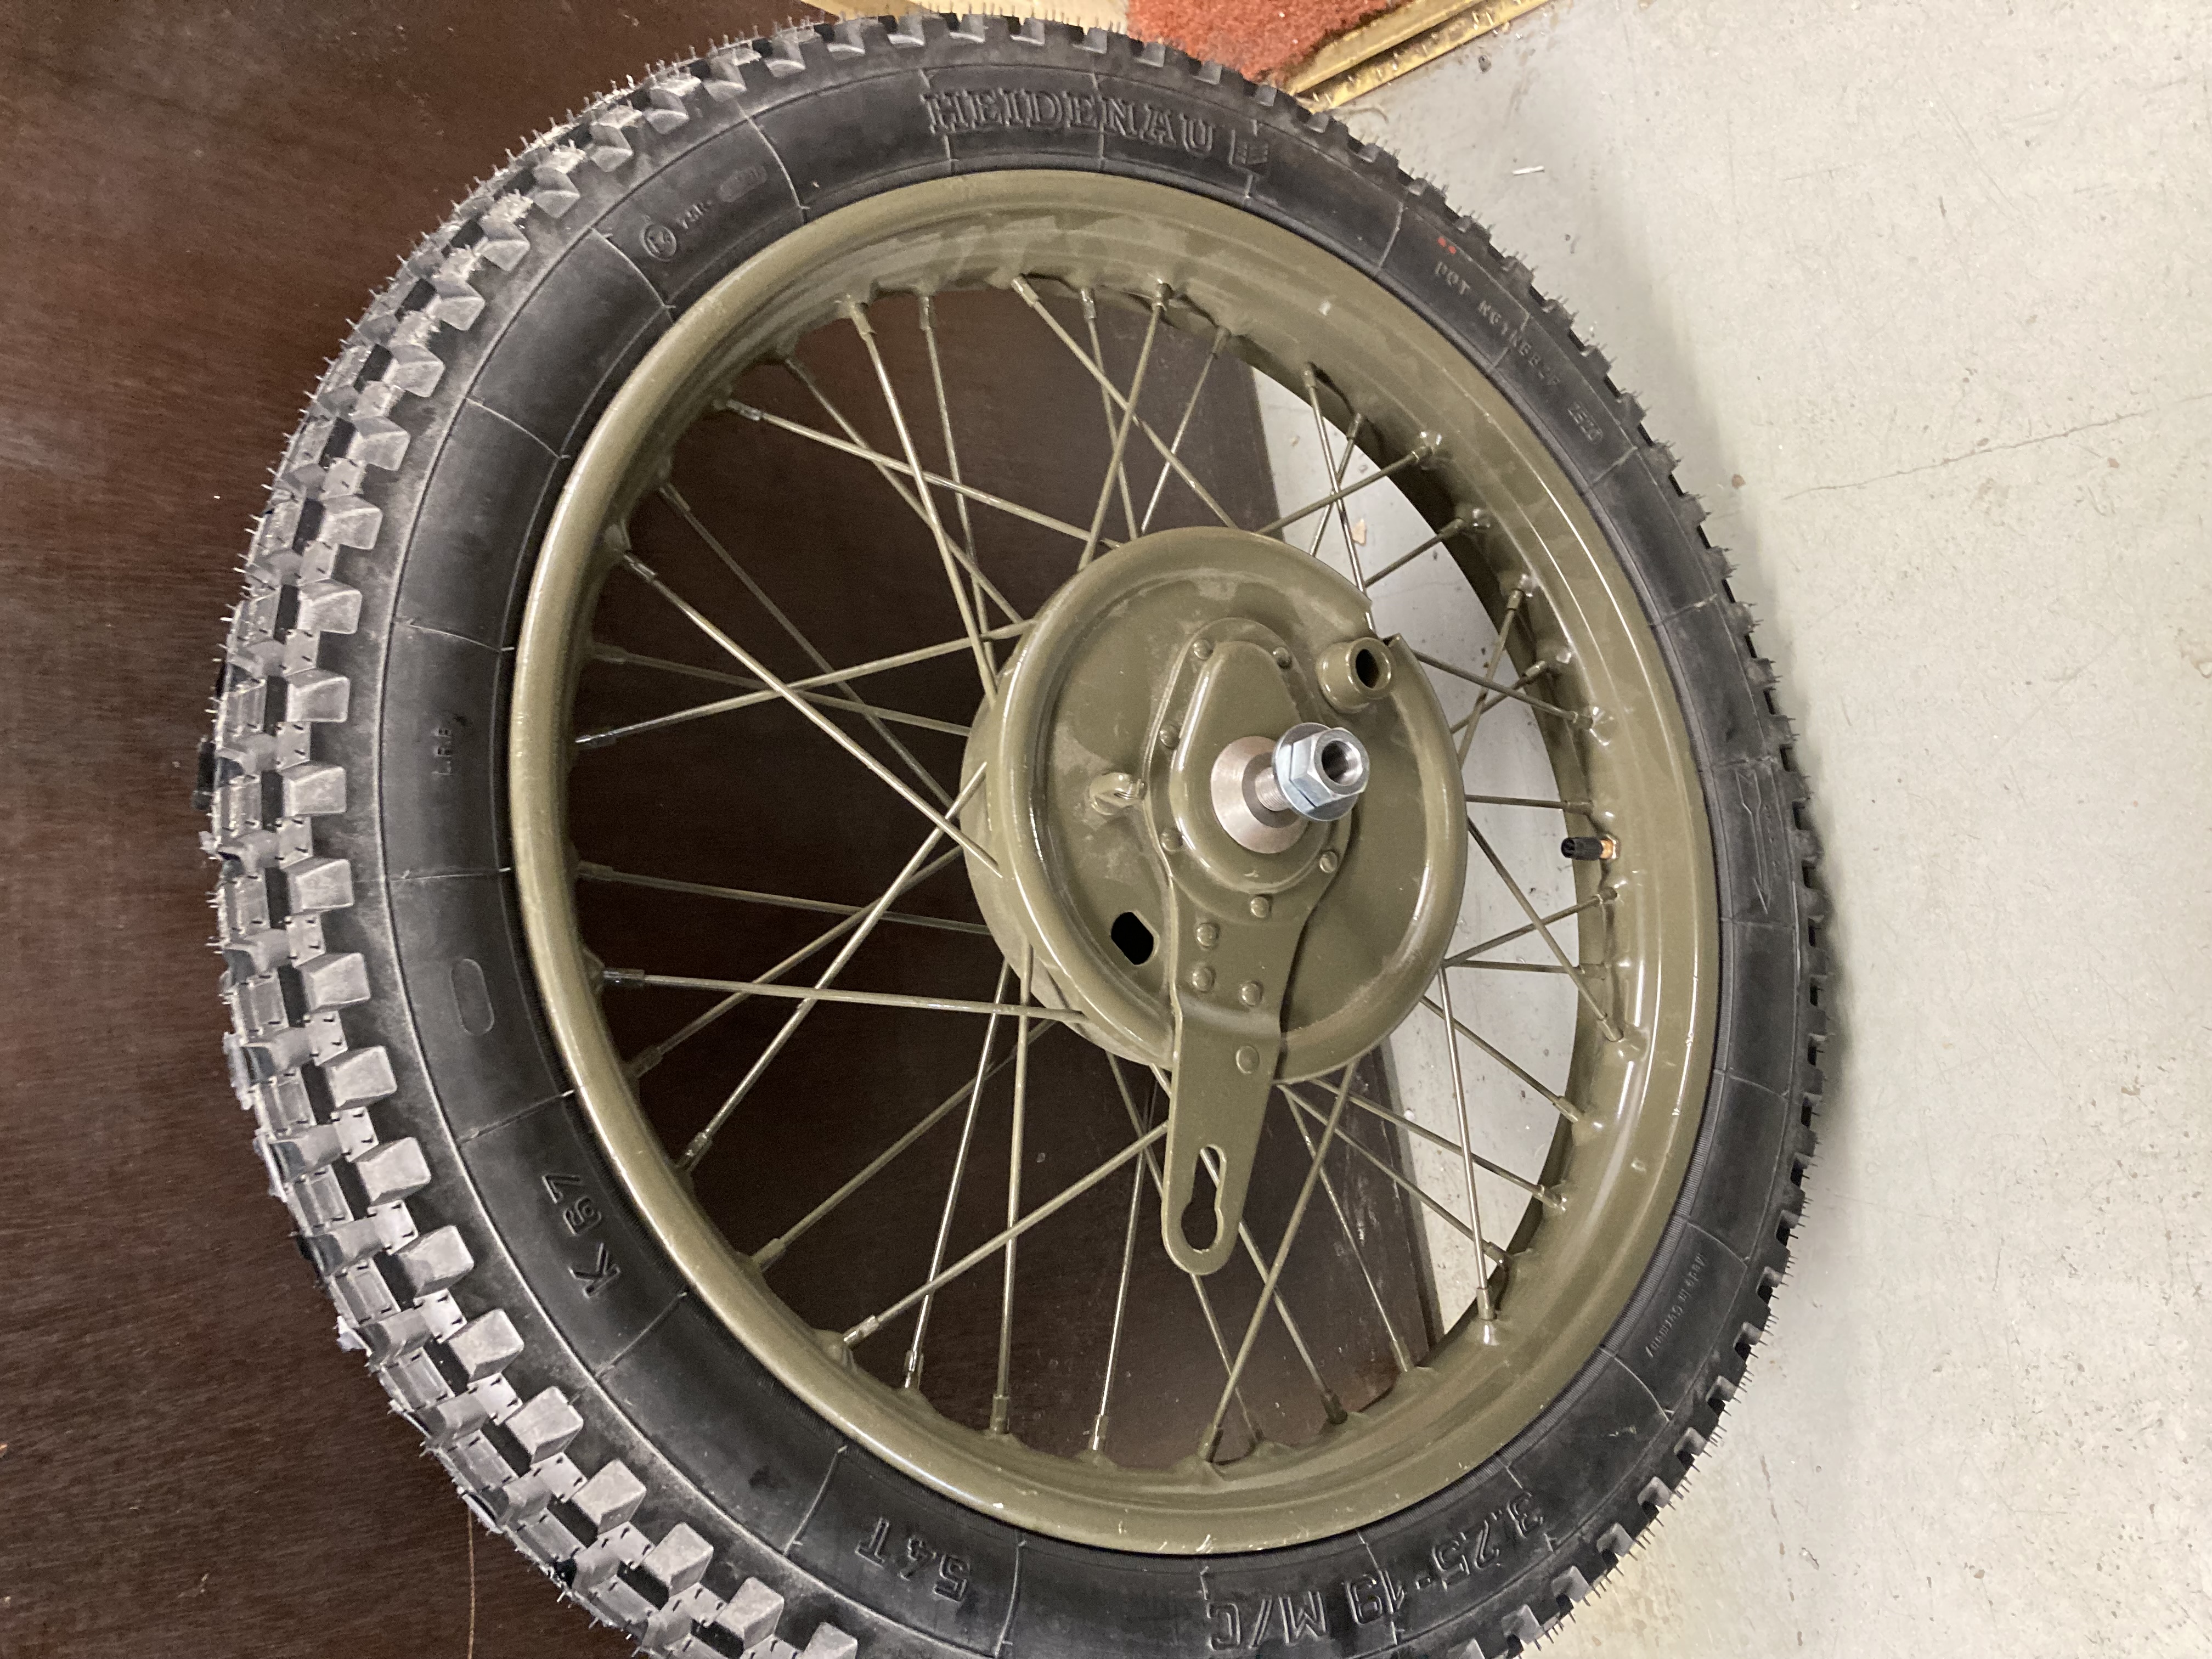
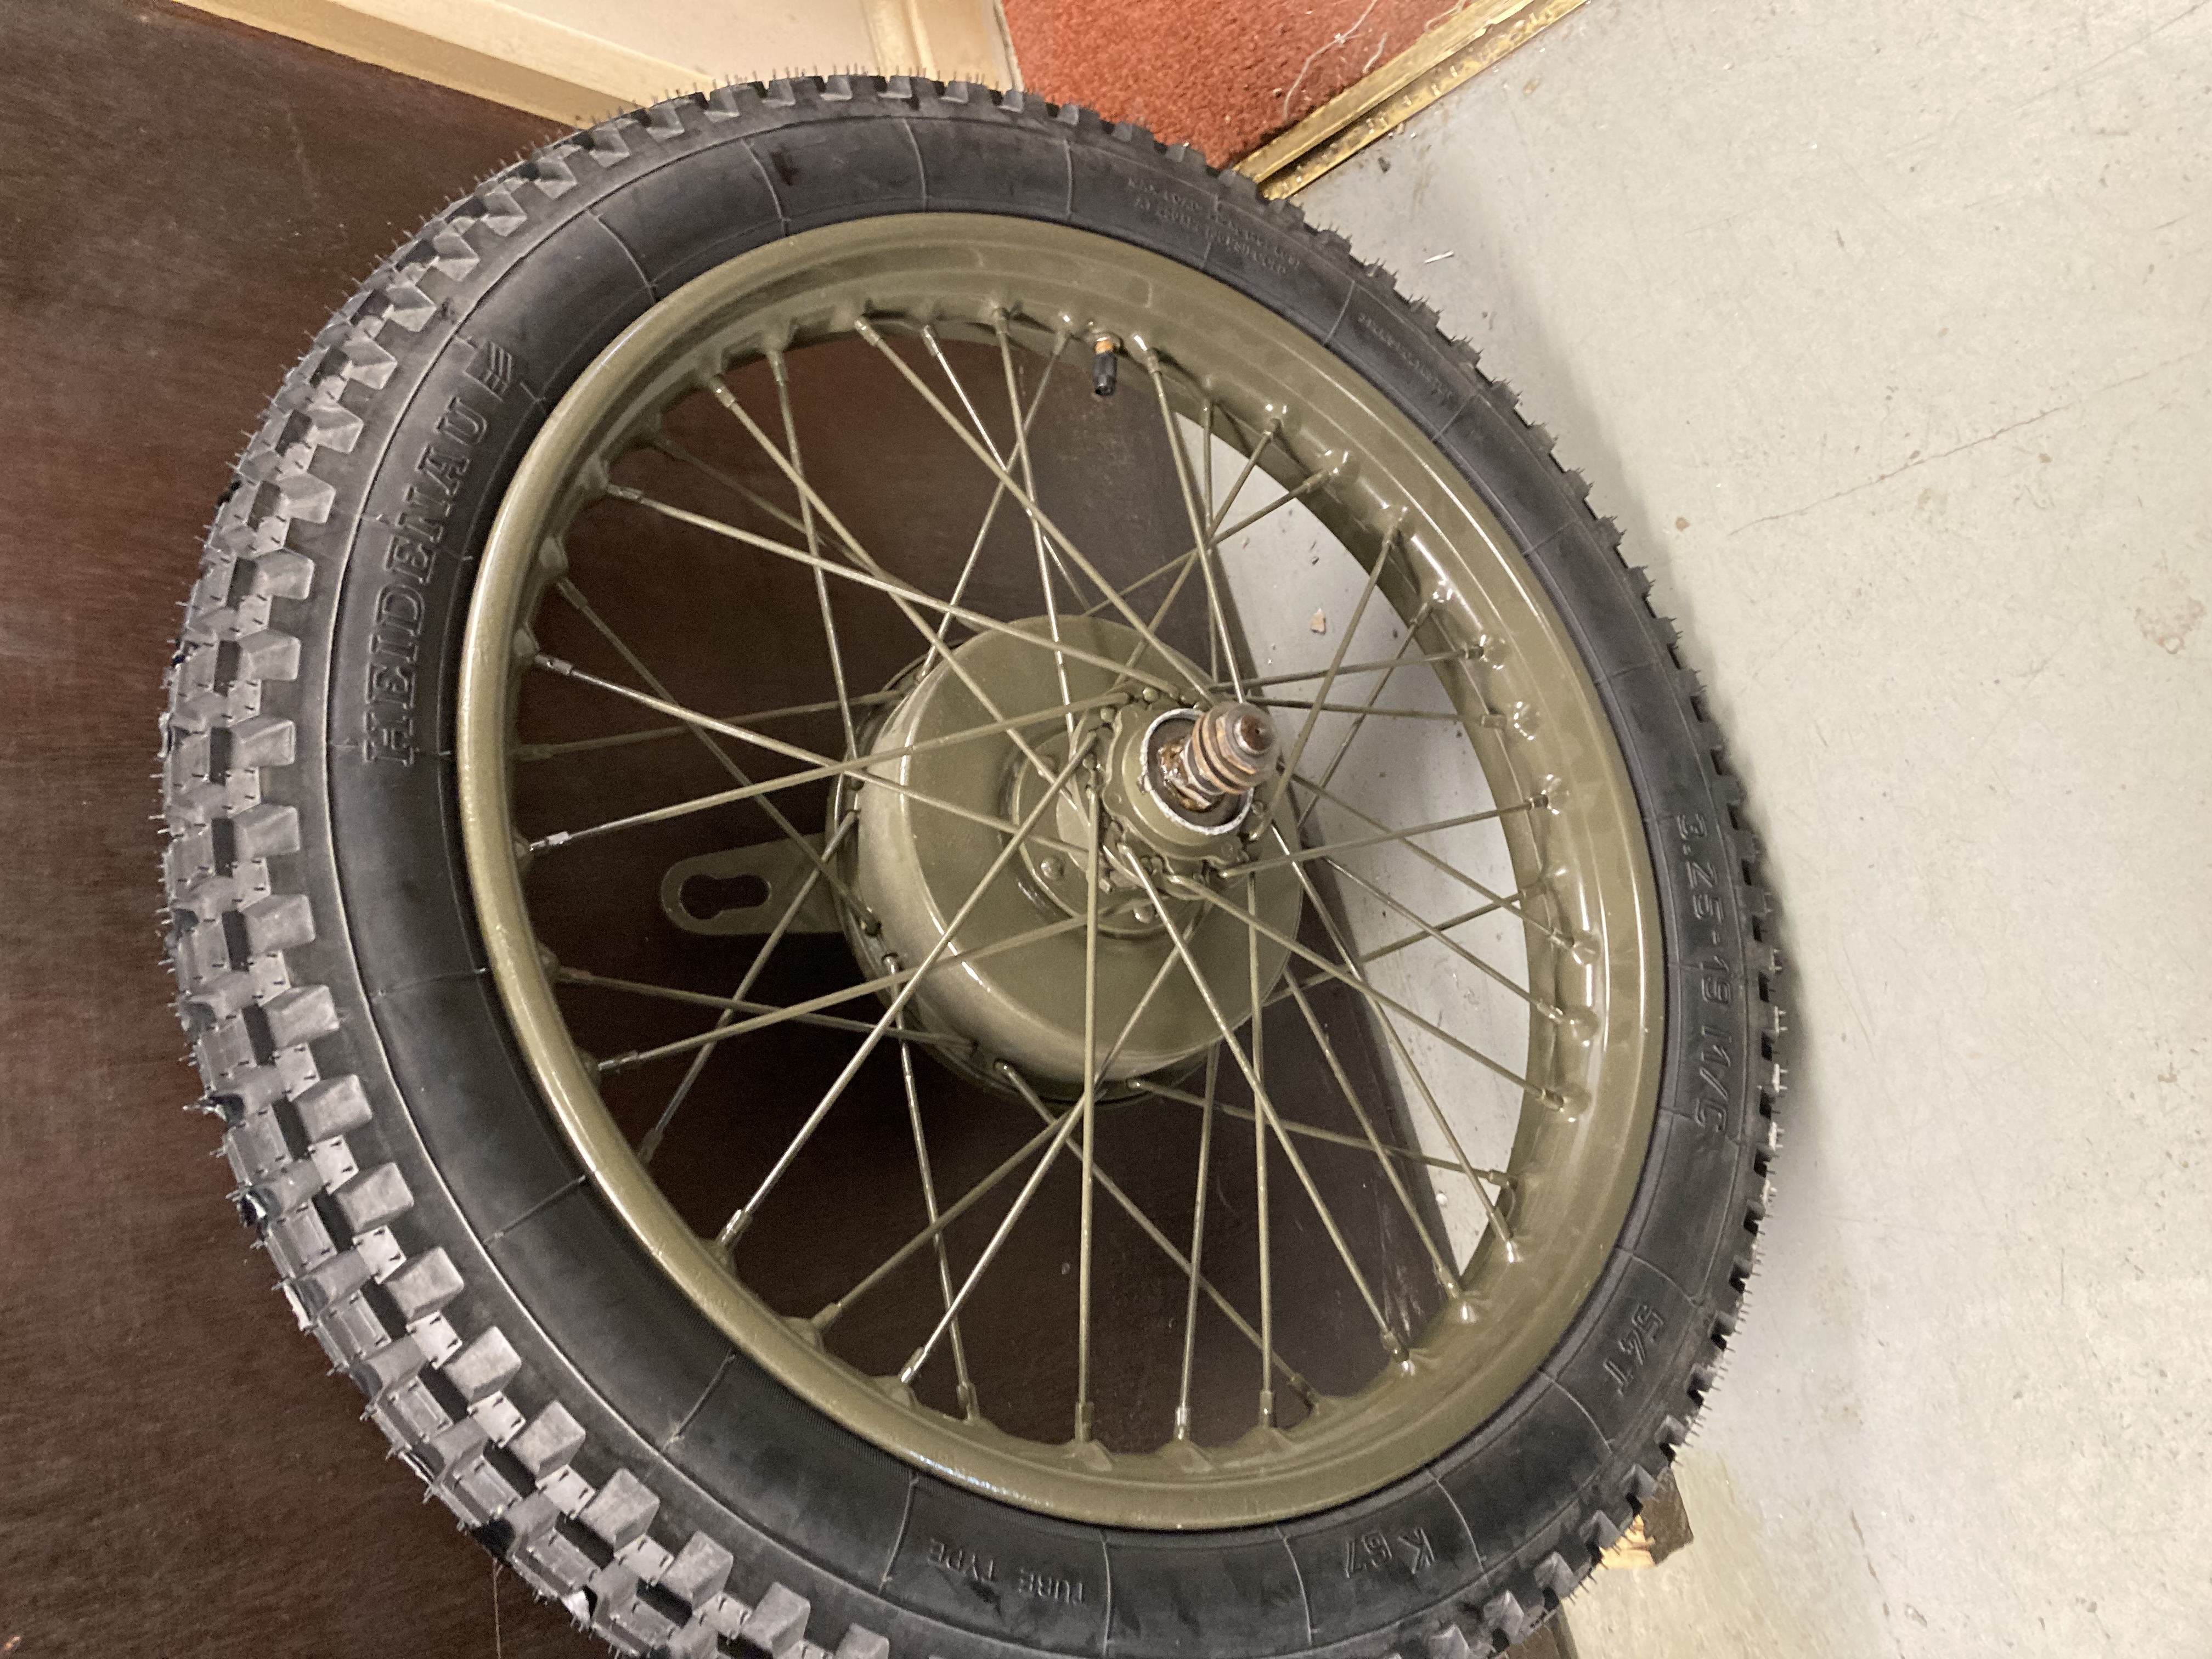
Progress is slower than I hoped, I have a pair of useable wheels. I just needed to get rid of some silver paint splashed over them.
Many ideas were tried, each better at removing the wrong paint. In the end I left them soaking in the ultrasonic clearer allowing the heat to soften the paint. The wheels proved to have been painted many times in many colours. Still unhappy with the results I think I'll have to upgrade the bead blaster and remove the final traces of paint and rust.
So much for a short cut to getting it on the road faster.
I will epoxy prime these and paint with a semigloss 2k paint.
Being premature I even have German tyres for it now. (made in china I expect)

email (option): pes.sales@btconnect.com
I look forward to hearing more of your build since I also have a 43 project... Pictures are great . Keep them coming
email (option): wadeschields@mindspring.com
I’m ashamed to admit so late that there is some progress with this. I upgraded my bead blaster to a pressure pot type. It uses compressed air as if it were free. That said it’s so much faster, and doesn’t ruin the parts like commercial blasting can.
Some months ago when it was warmer I painted the wheels, I was assured that Satin was the same as semigloss. No! satin is textured :rage: After months of pondering I decided to fit the tyres today. My first attempt with painted rims. It did not go well. Short of using a tyre fitting machine has anyone got a good way of doing it by hand?
Mark
email (option): pes.sales@btconnect.com
I have no experience of Heidenaus...the last set that I fitted were Ensigns and they go on easily enough with judicious use of the knees and a piece of old washing-up bottle to protect the rim as the last inch is eased over with a lever.
I use the plastic rim protectors made for the job...Ian
email (option): ian@wright52.plus.com
My last 2 rear tyres have been Heidenaus. I'm happy with them though I've found them a bit harder than usual to fit. And those hundreds of little moulding pips they come with...
I never knew the things existed; I must really get out more.
Mark
email (option): pes.sales@btconnect.com
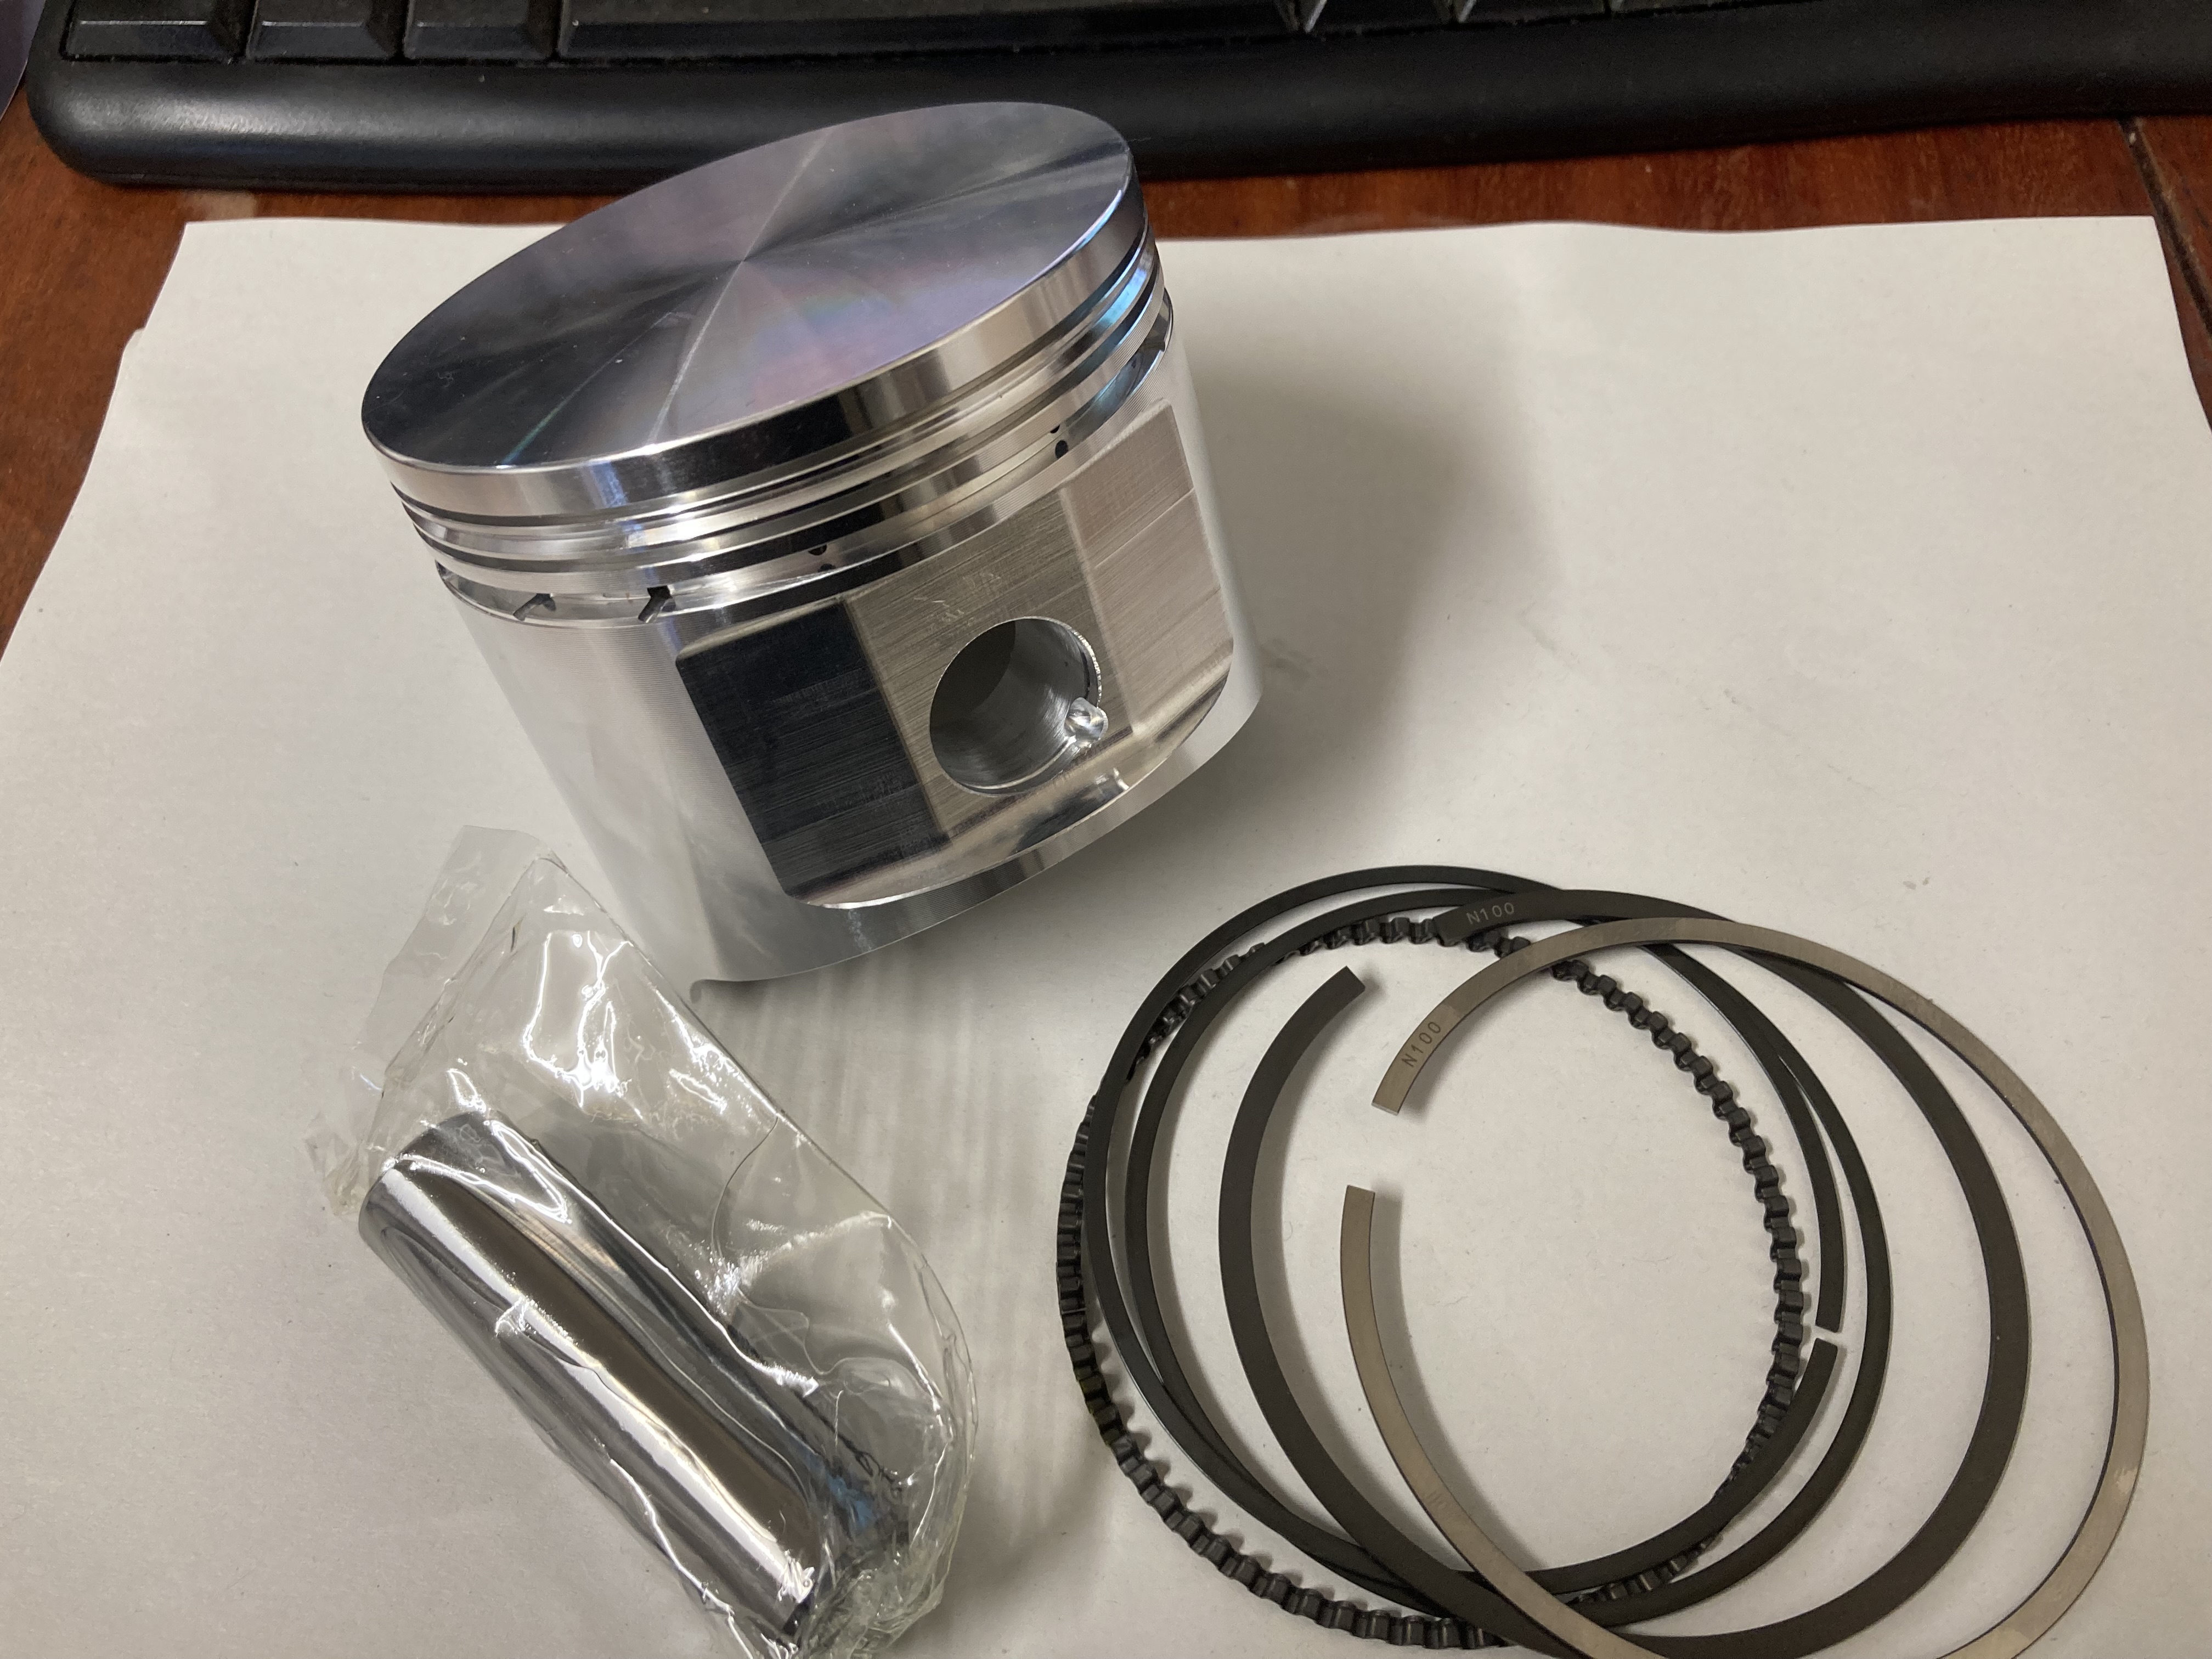
Finally, after a very long wait my forged M20 pistons turned up.
The complete assembly, piston, rings, clip and pin weight 457 grams.
This will allow me to repair and dynamically balance my crankshaft.
If anyone wants a high-quality standard size (82mm) piston kit, we have them in stock.
I'm out of M20/M21 cylinder liners at the moment so I will machine some spares.
Mark
email (option): pes.sales@btconnect.com
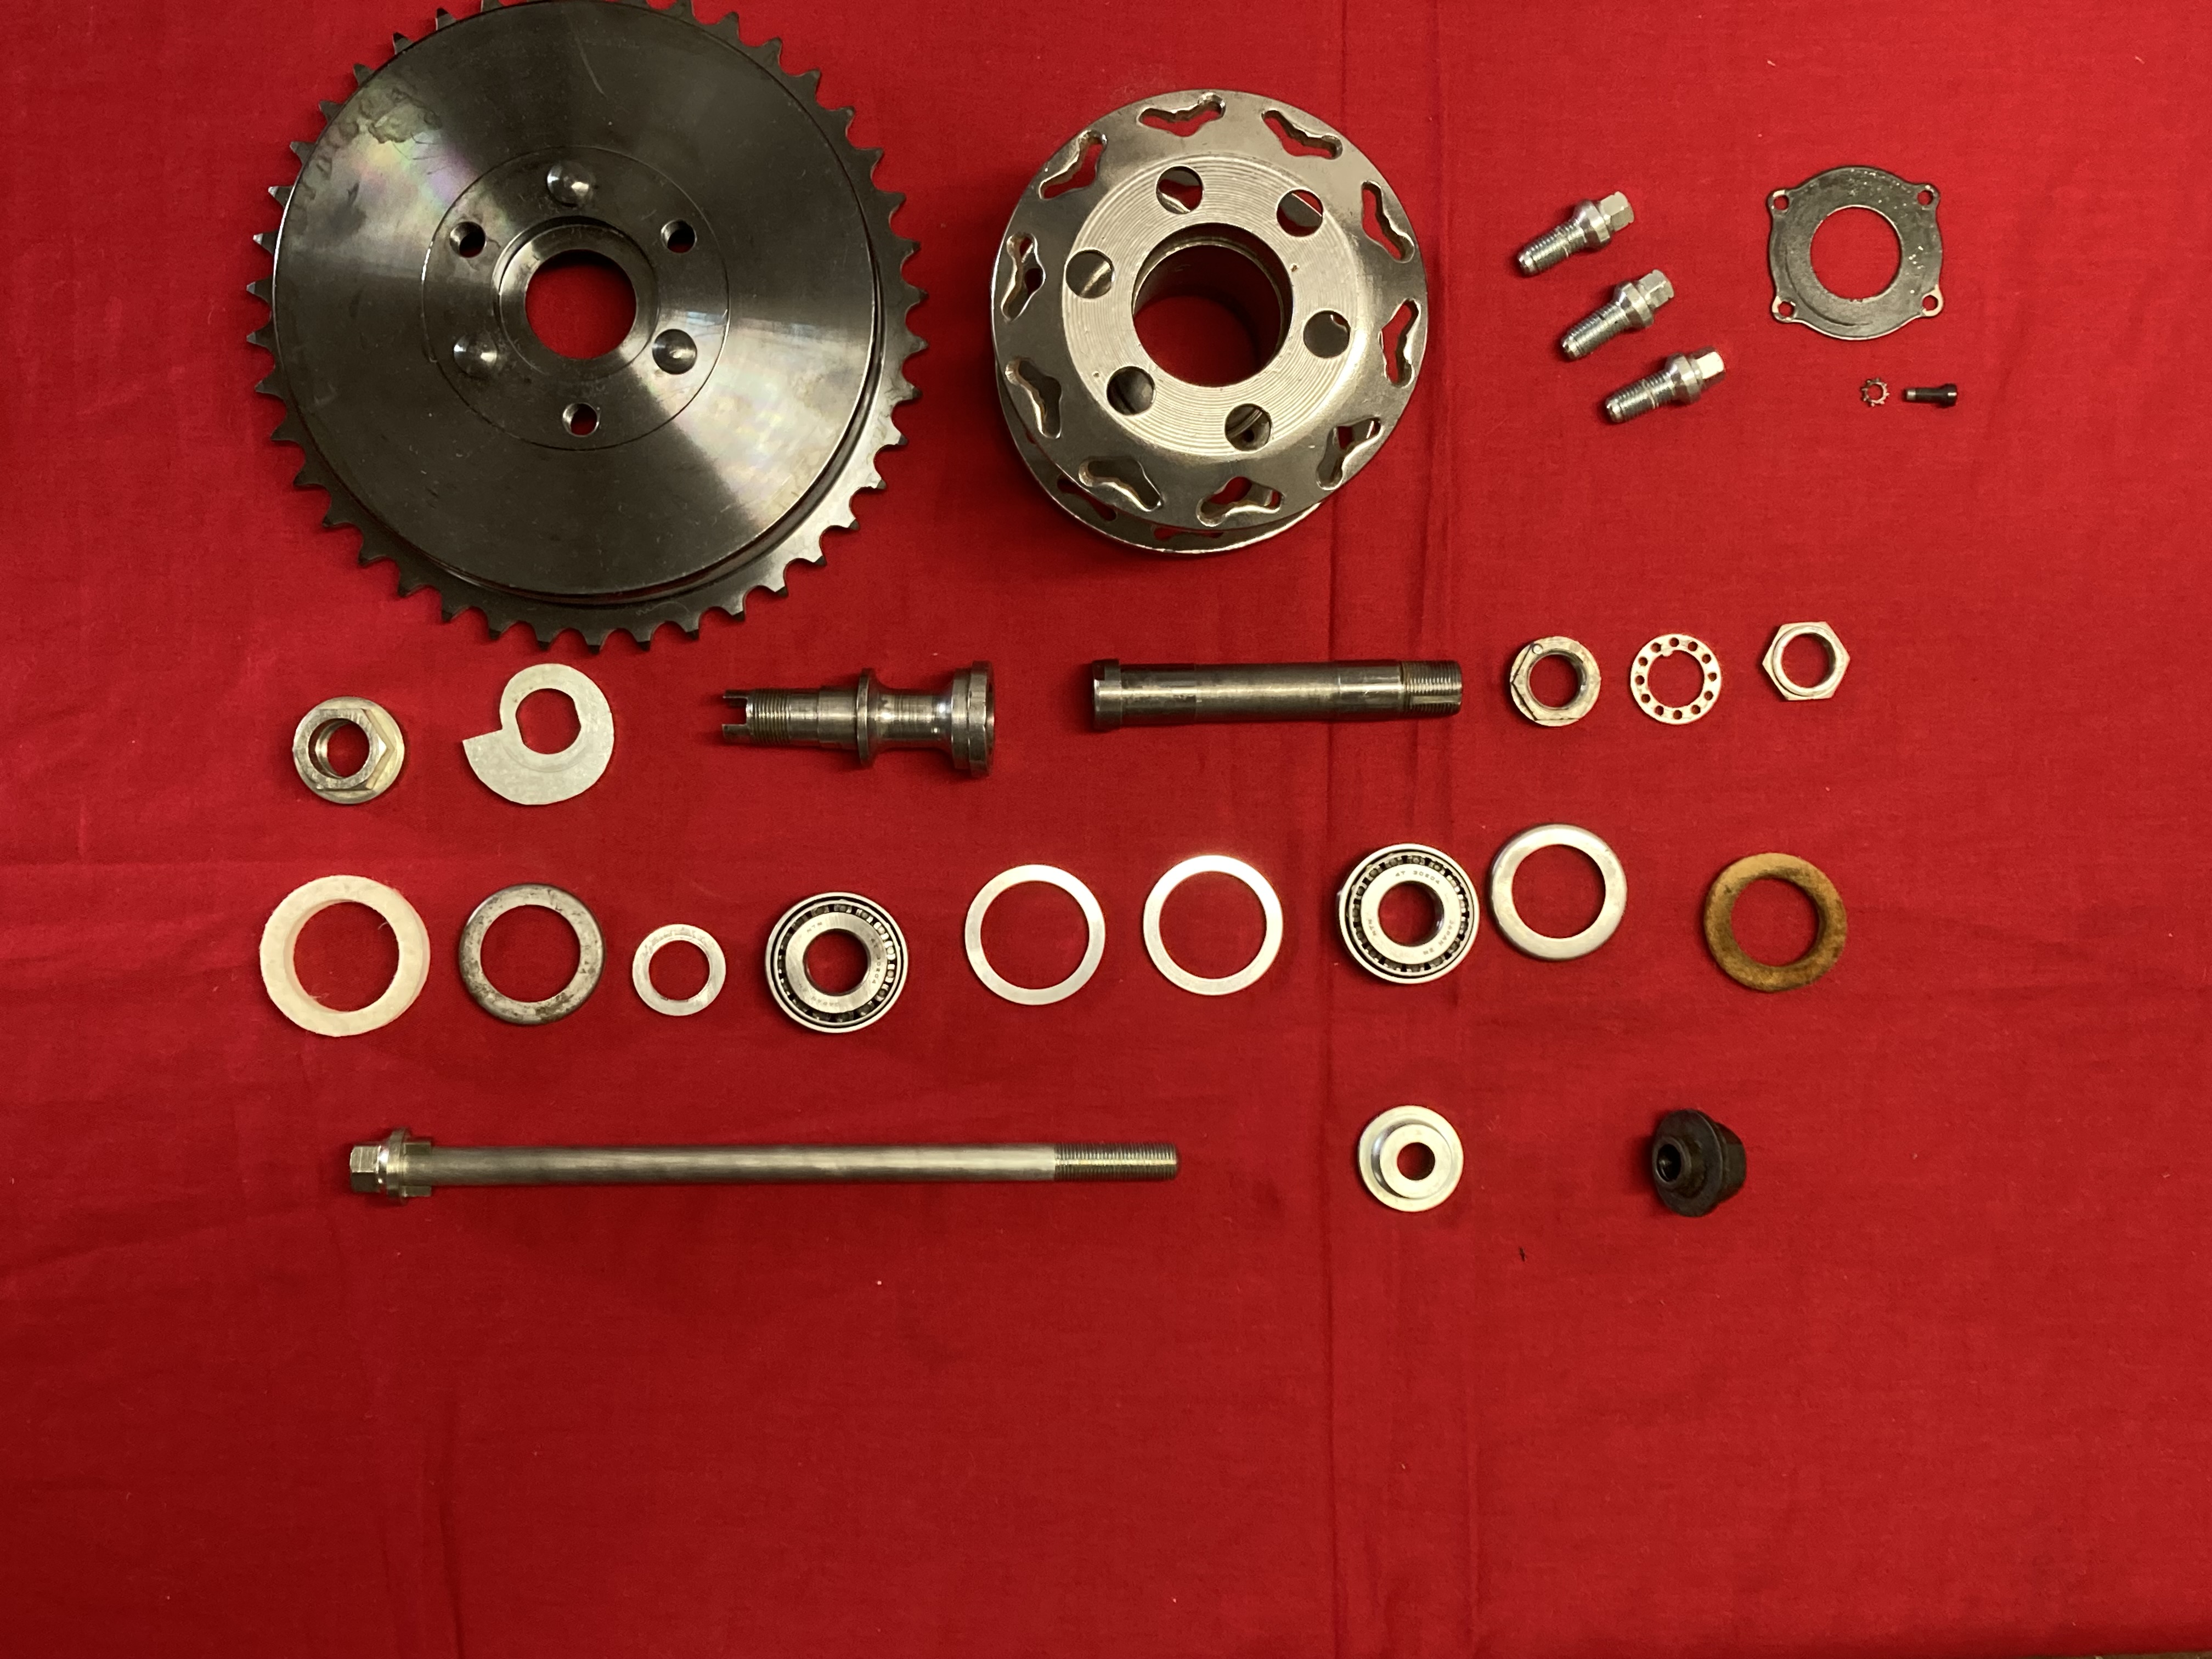
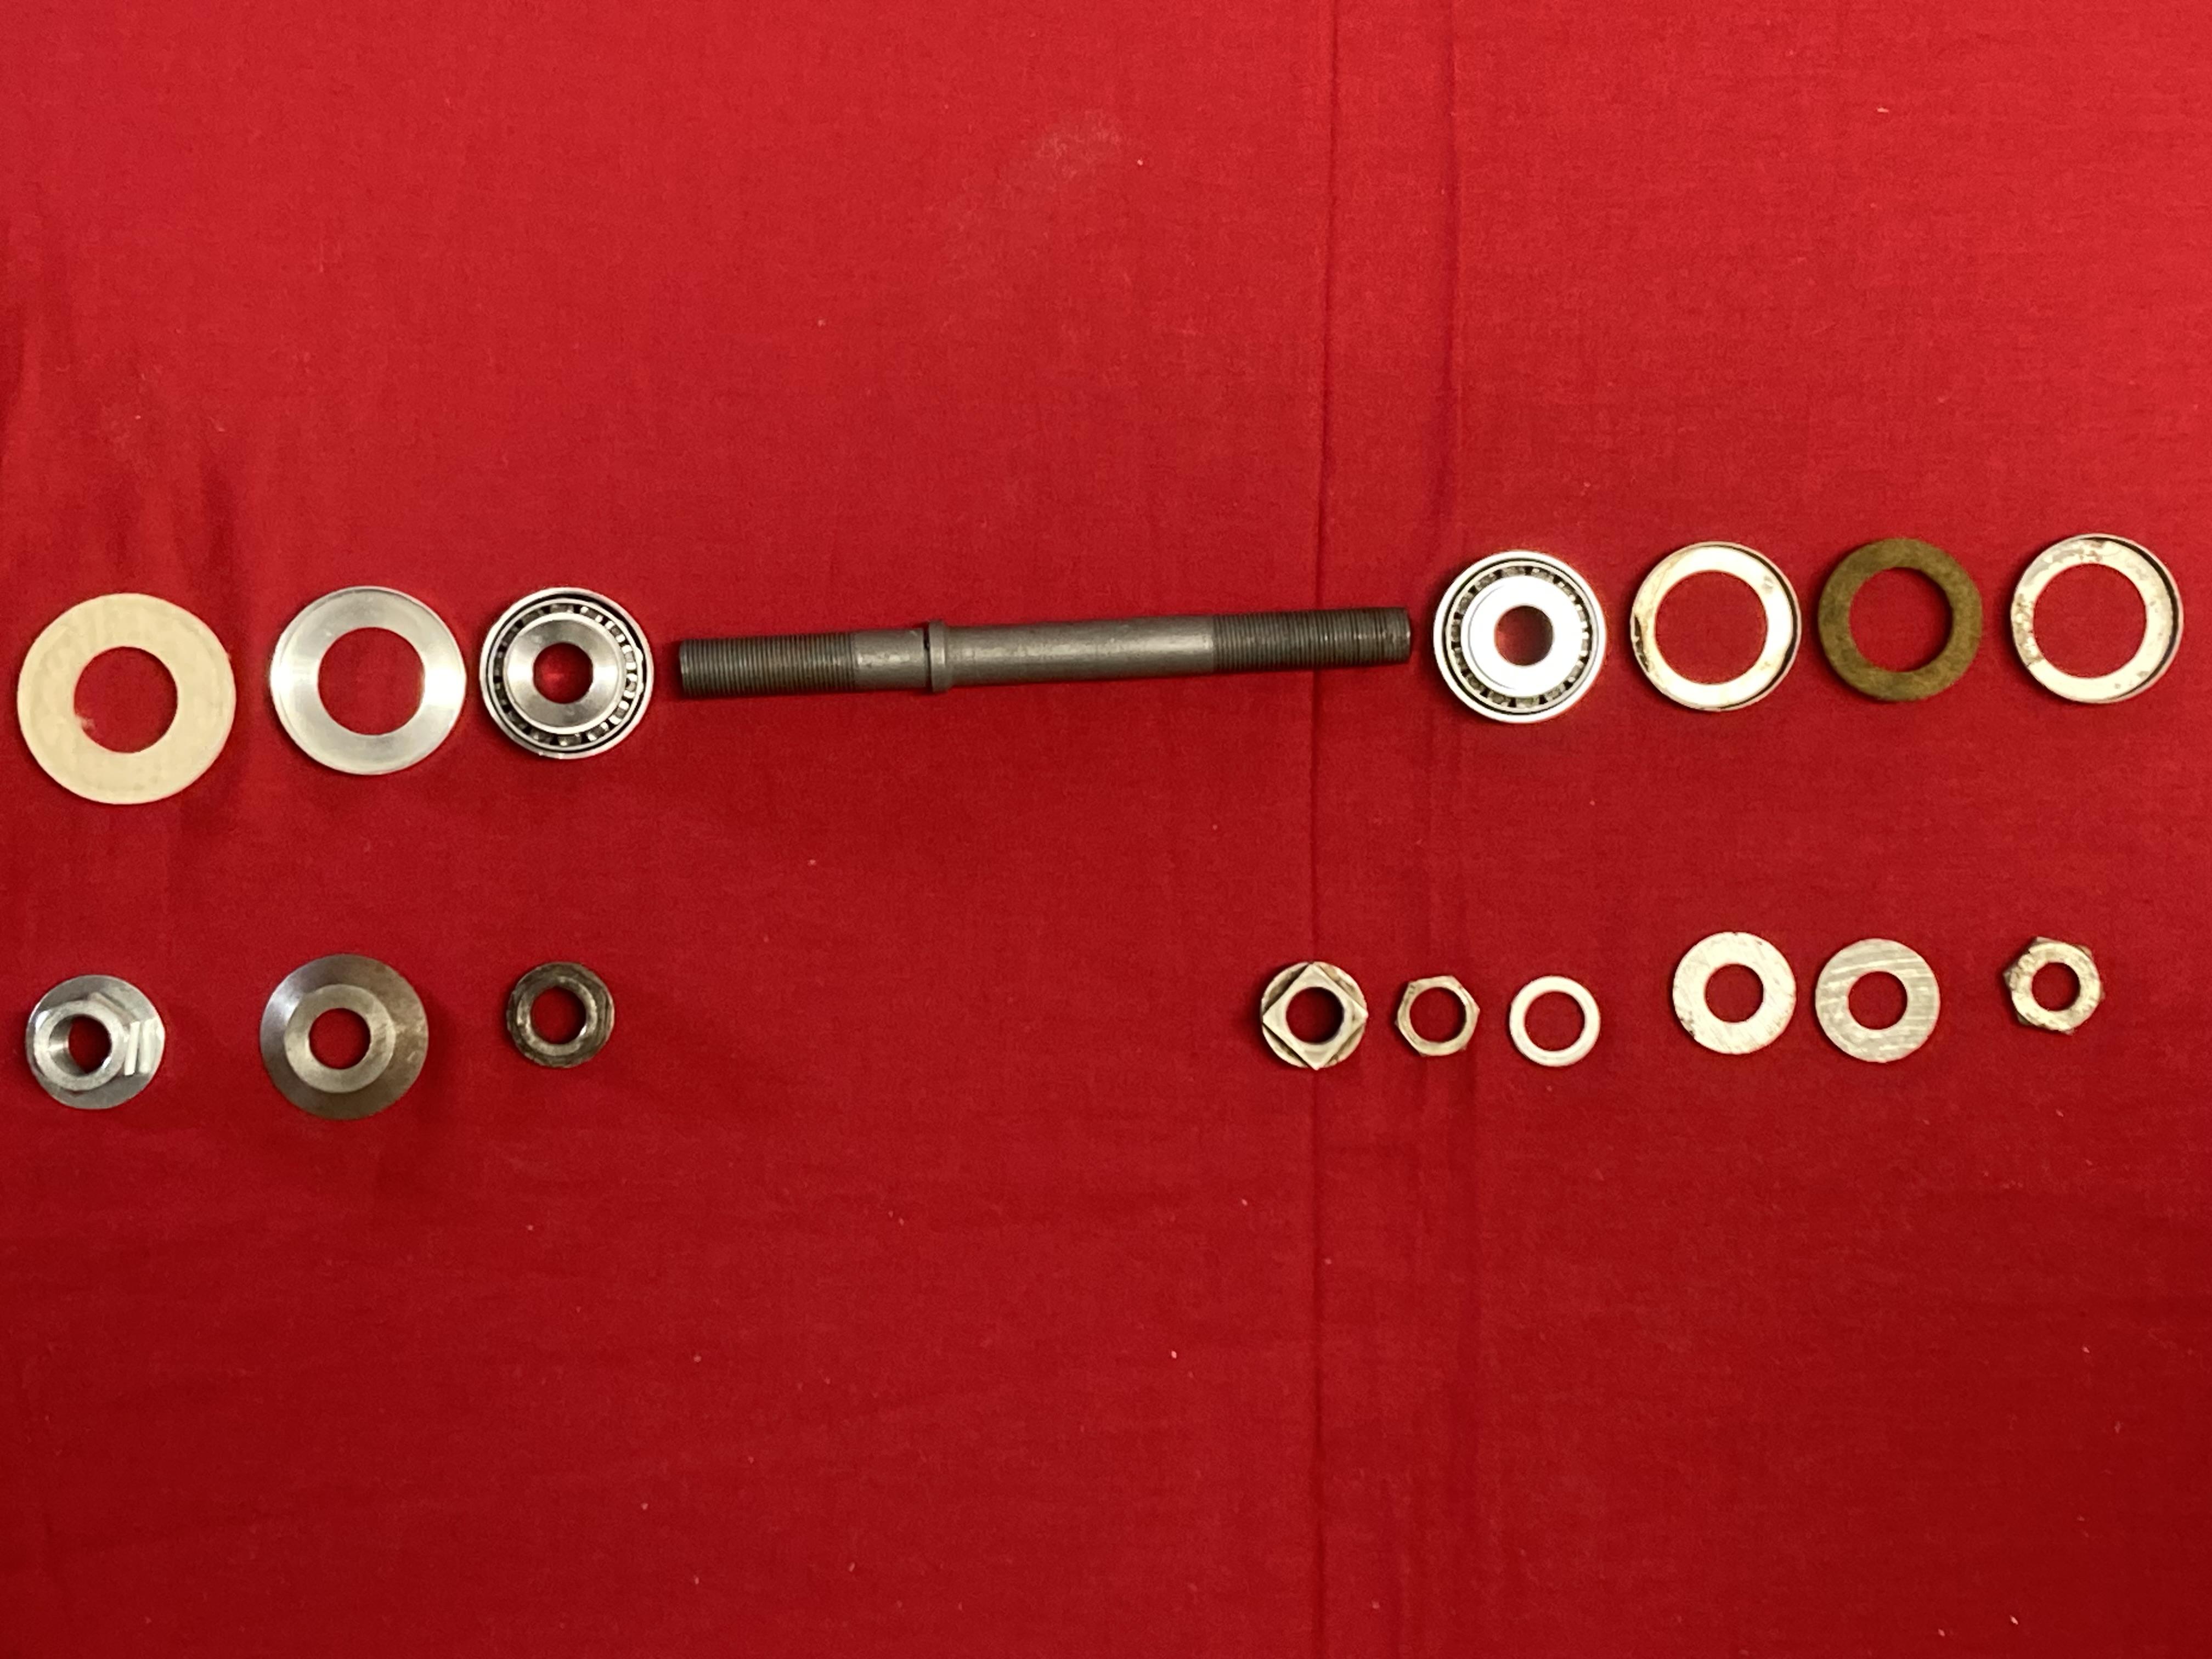
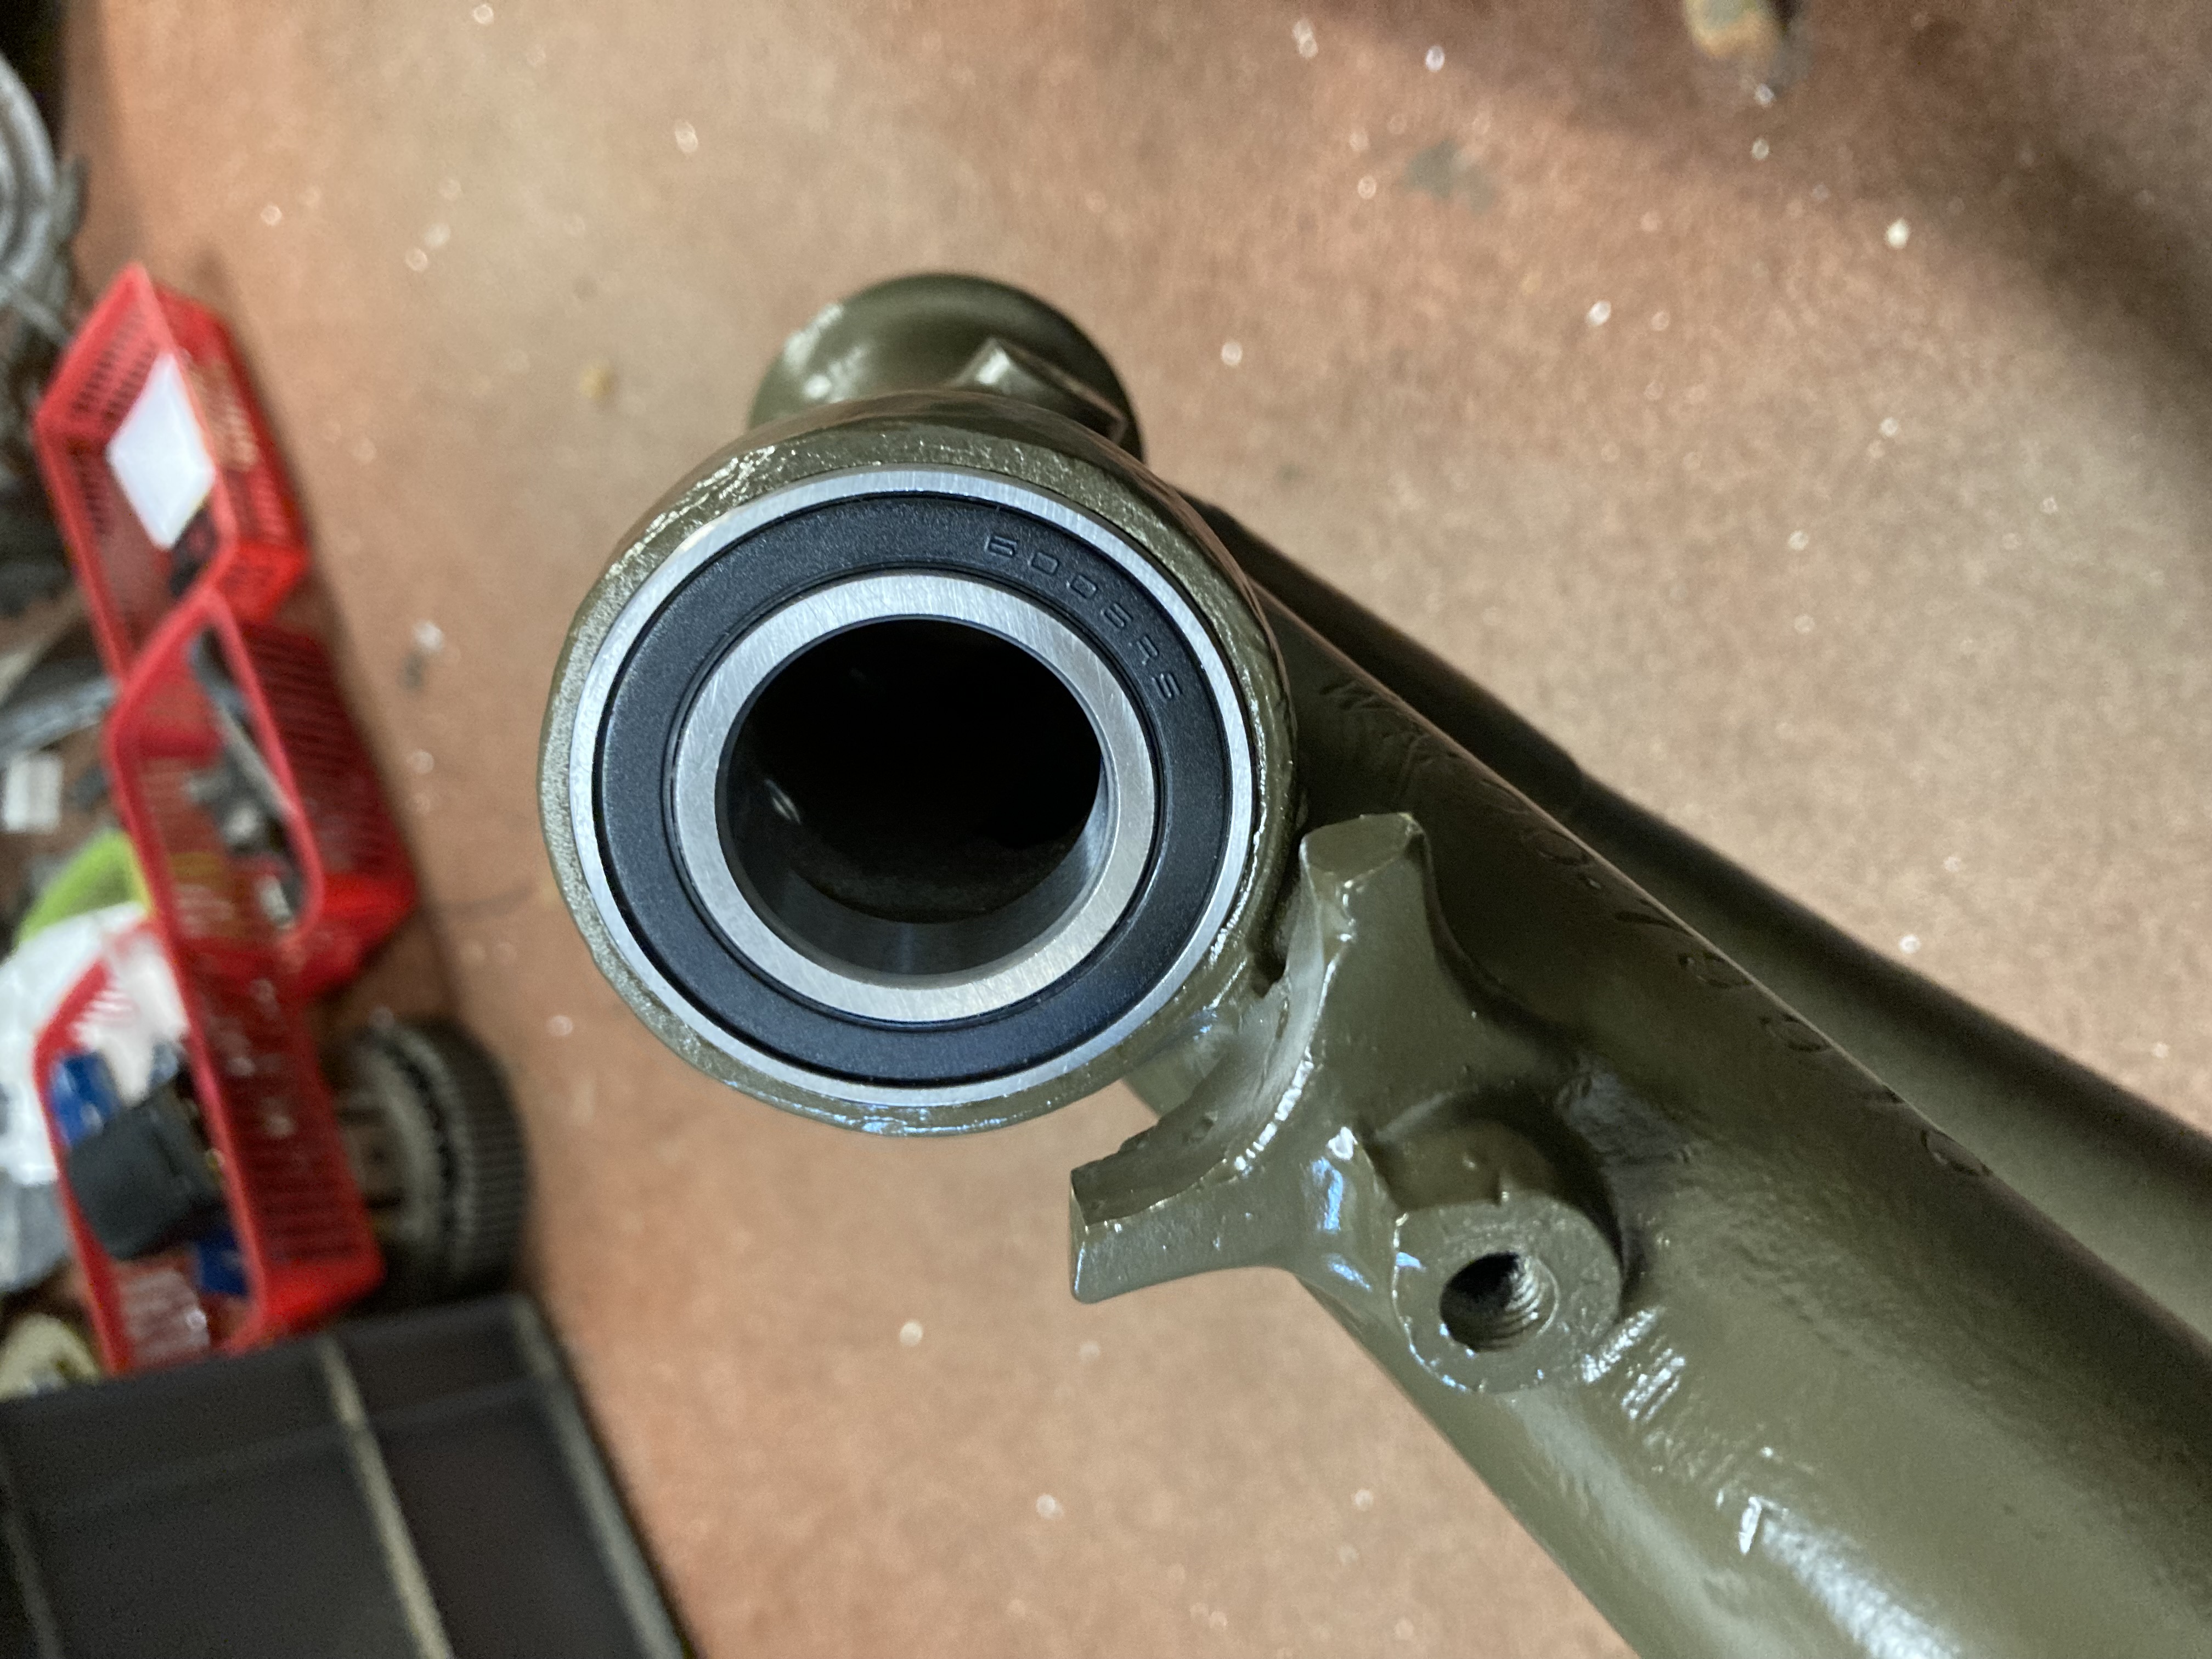
A slight change of direction, in an attempt to make more space in the workshop I thought I'd make another attempt at resolving my wheel hub problems .
Rear wheel first.
The first problem of the expensive wheel bearings has been solved for everyone.
https://pesltd.uk/?product=26-6890
I now have the correct size brake drum felt 15-7059. 15-7048 remains a problem with all the versions I have purchased being wrong. Fortunately I had a used good one. Remember it's only on the front hub that the felt goes inside the oil retaining cap.
My pan head screws 24-7065 are a little long, so I'll source some better ones.
Please excuse the paint, I will deal with that later. Having all the parts laid out makes it so much easier to assemble.
Front wheel next.
Mark
email (option): pes.sales@btconnect.com
Well done Mark !
Thank you for sharing your progress report with us all.
Keep up the good work !
It will be worth all the blood sweat and tears … I promise 😊
Look forward to some further updates.
Kind regards,
Mark
email (option): Towersmark84@yahoo.co.uk
Thanks for your kind words Mark.
Sunday was dry, so no playing with bikes. Bricklaying took priority :(
The front wheel was not much better than the rear, many NOS parts not really fit for purpose and again no felt washers the correct size.
My front hub was the first victim of my modified taper roller bearings. Typical the housing was over size and the outer ring was loose. Fortunately I was able to make an oversize one to take up the slack.
Everything bolted together in the end with the only horror being the outer wheel nuts. Aftermarket ones. Looking good, but not fitting.
I guess I'll make some that fit.
I can't see the brake plates causing trouble, but time will tell. I'll ask my man about bonding the lining on, as if he can it will give a better brake.
Mark
email (option): pes.sales@btconnect.com
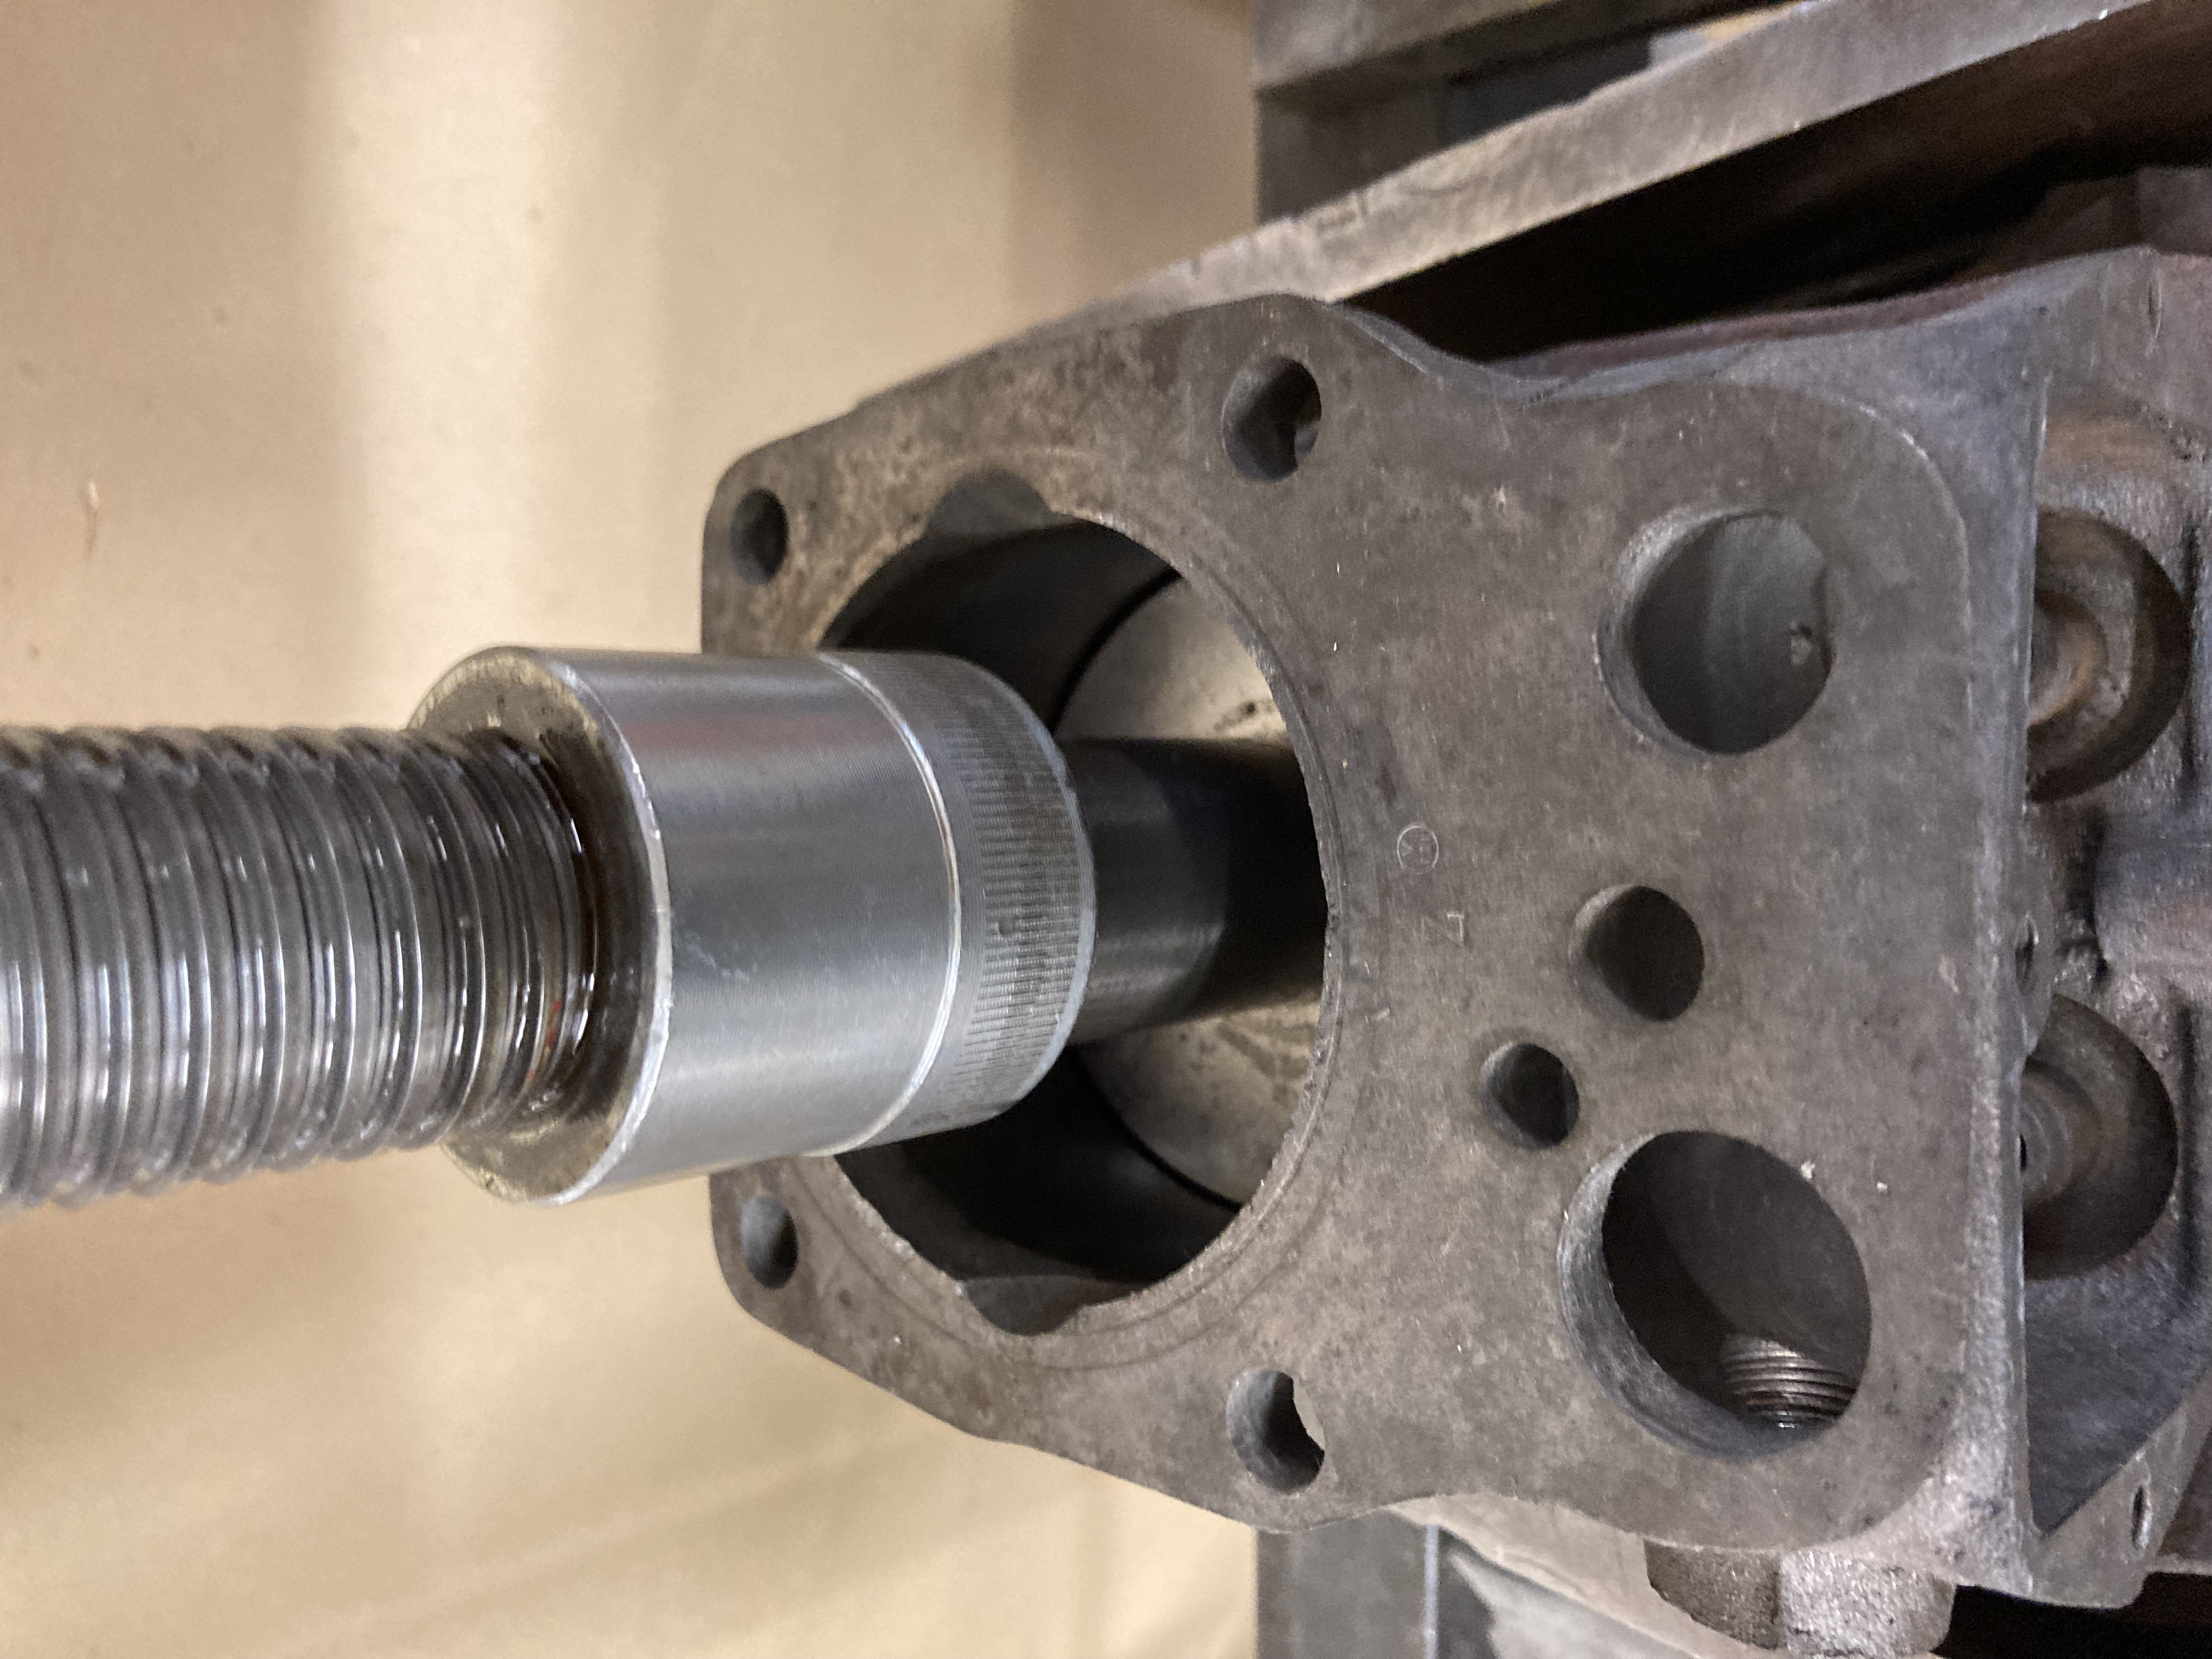
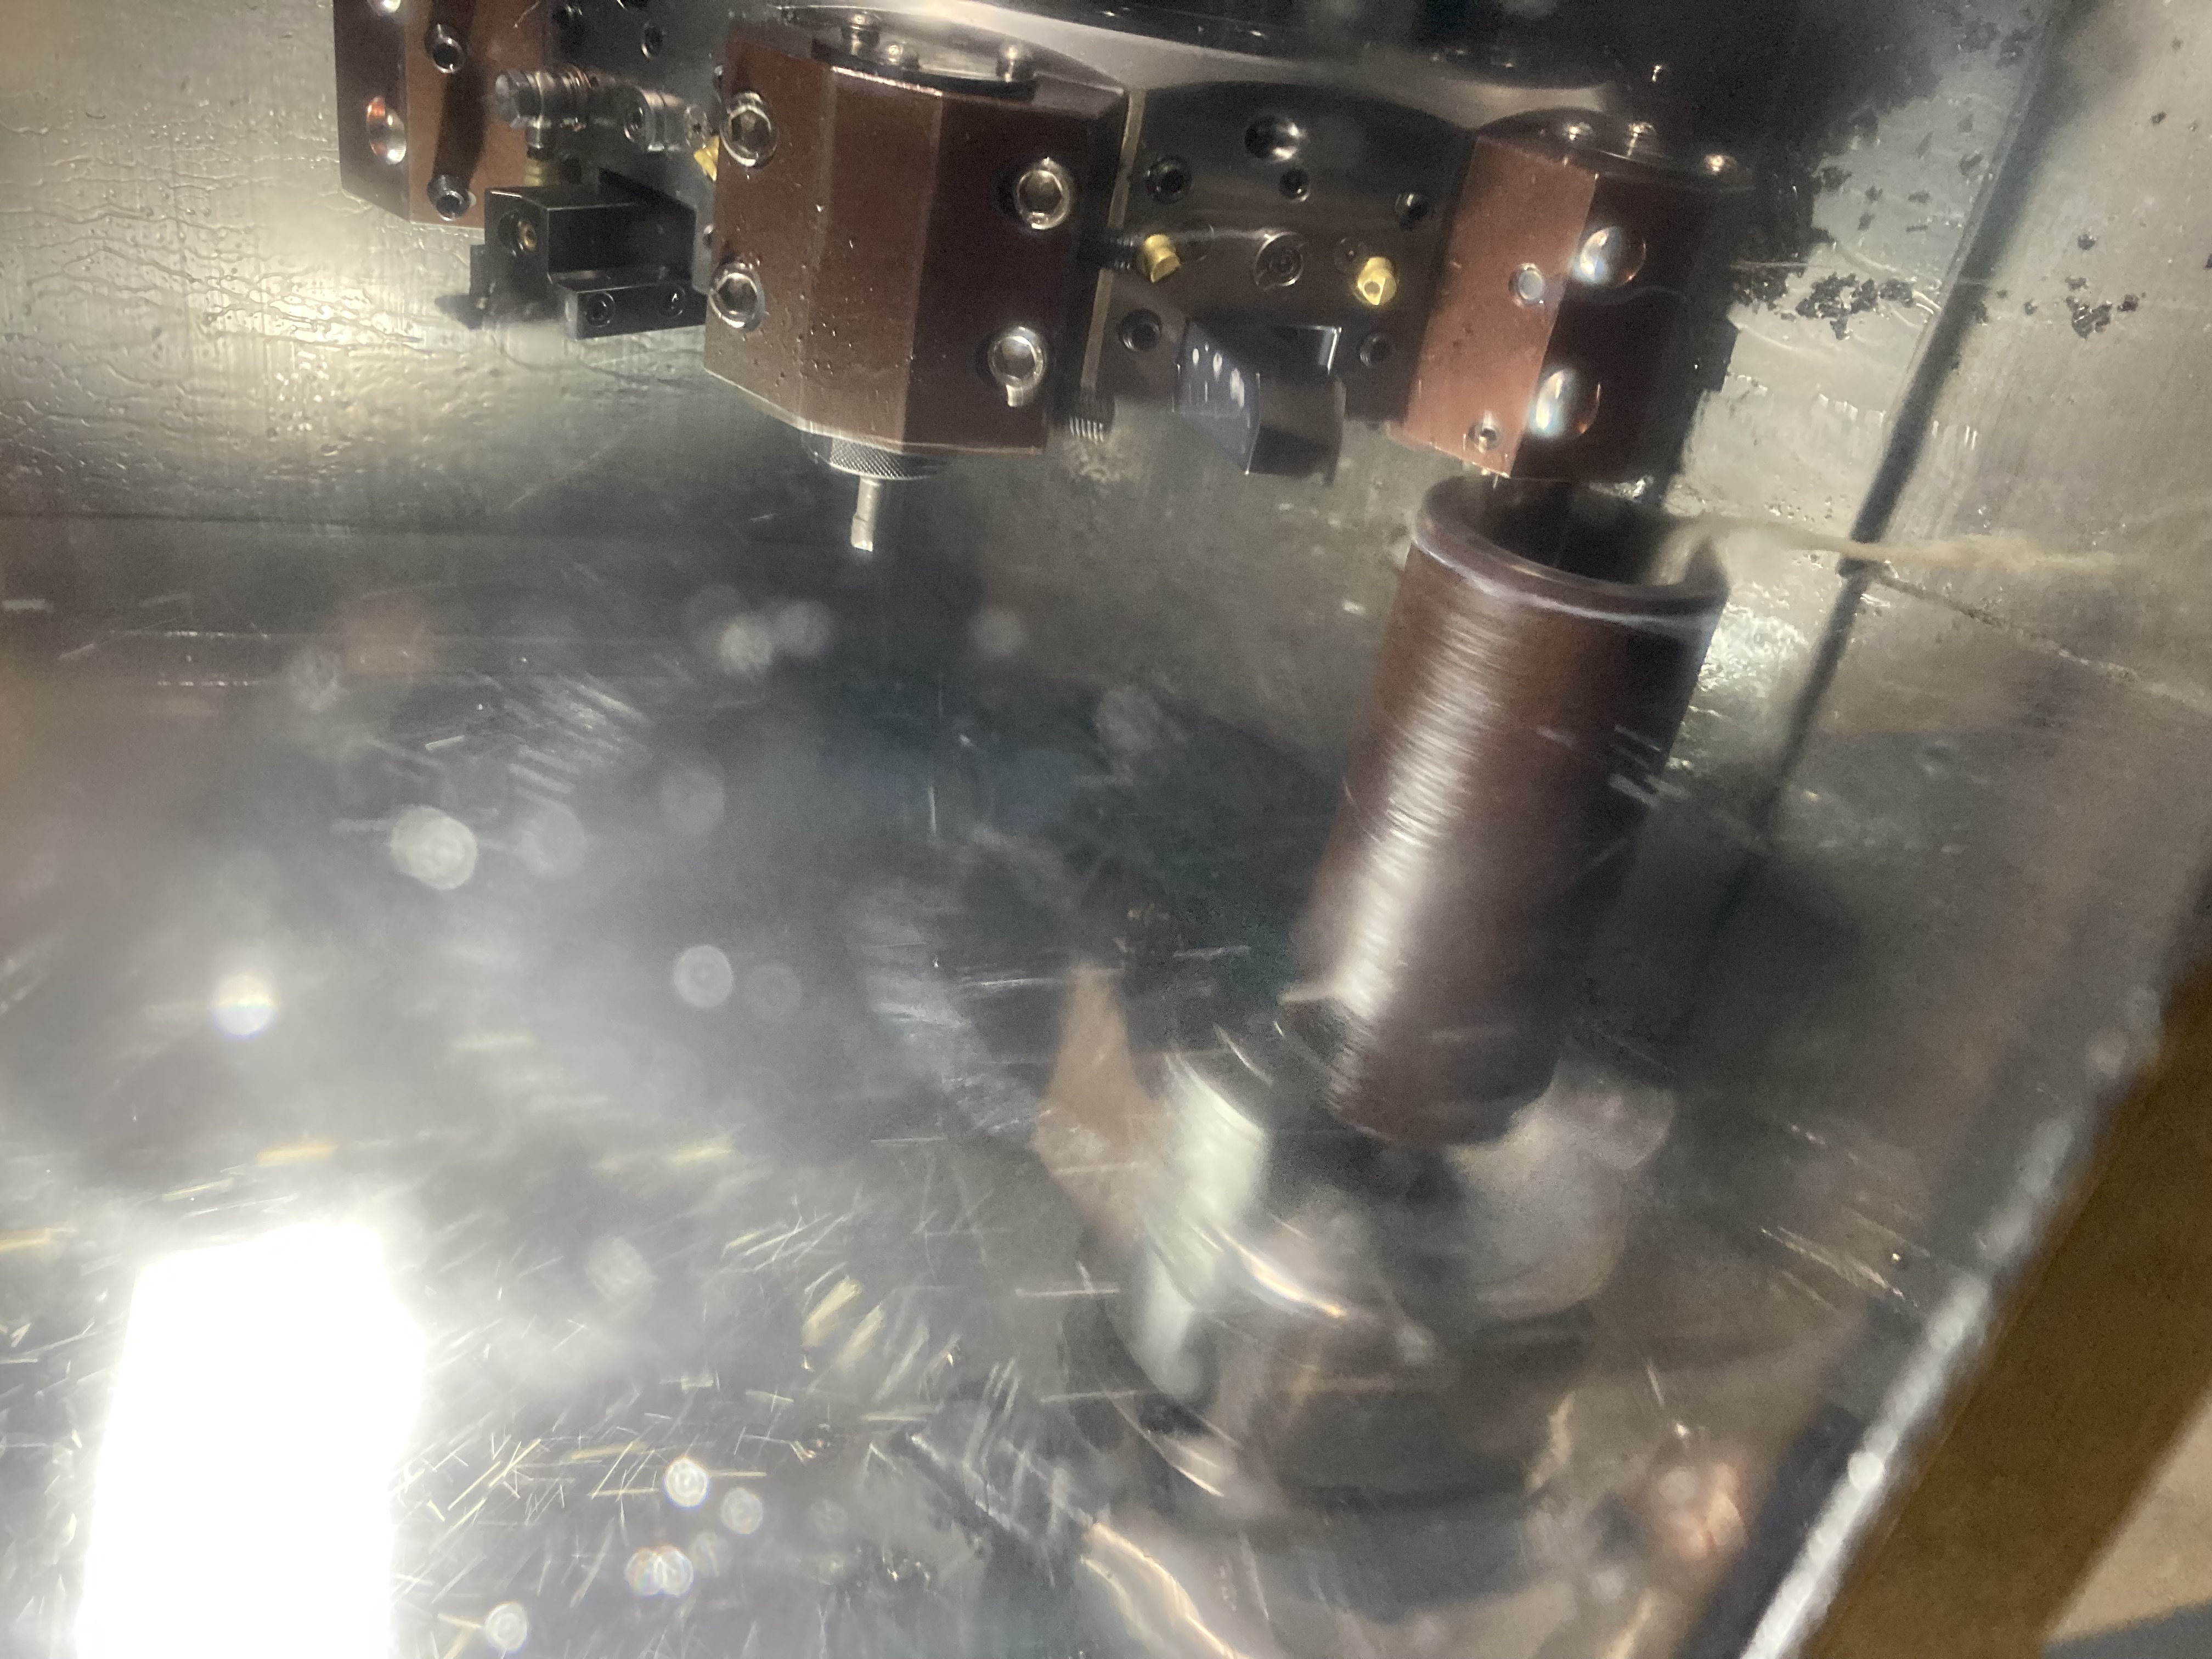
Very very slow, but there is progress.
The picture below shows the liner being pressed out.
Below that, the early stages of a new liner being made.
The material is centrifugally cast iron made by Mahle.
Mark
email (option): pes.sales@btconnect.com
Not being happy with the condition of the Barrel casting I decided to get a better one. So back to that later.
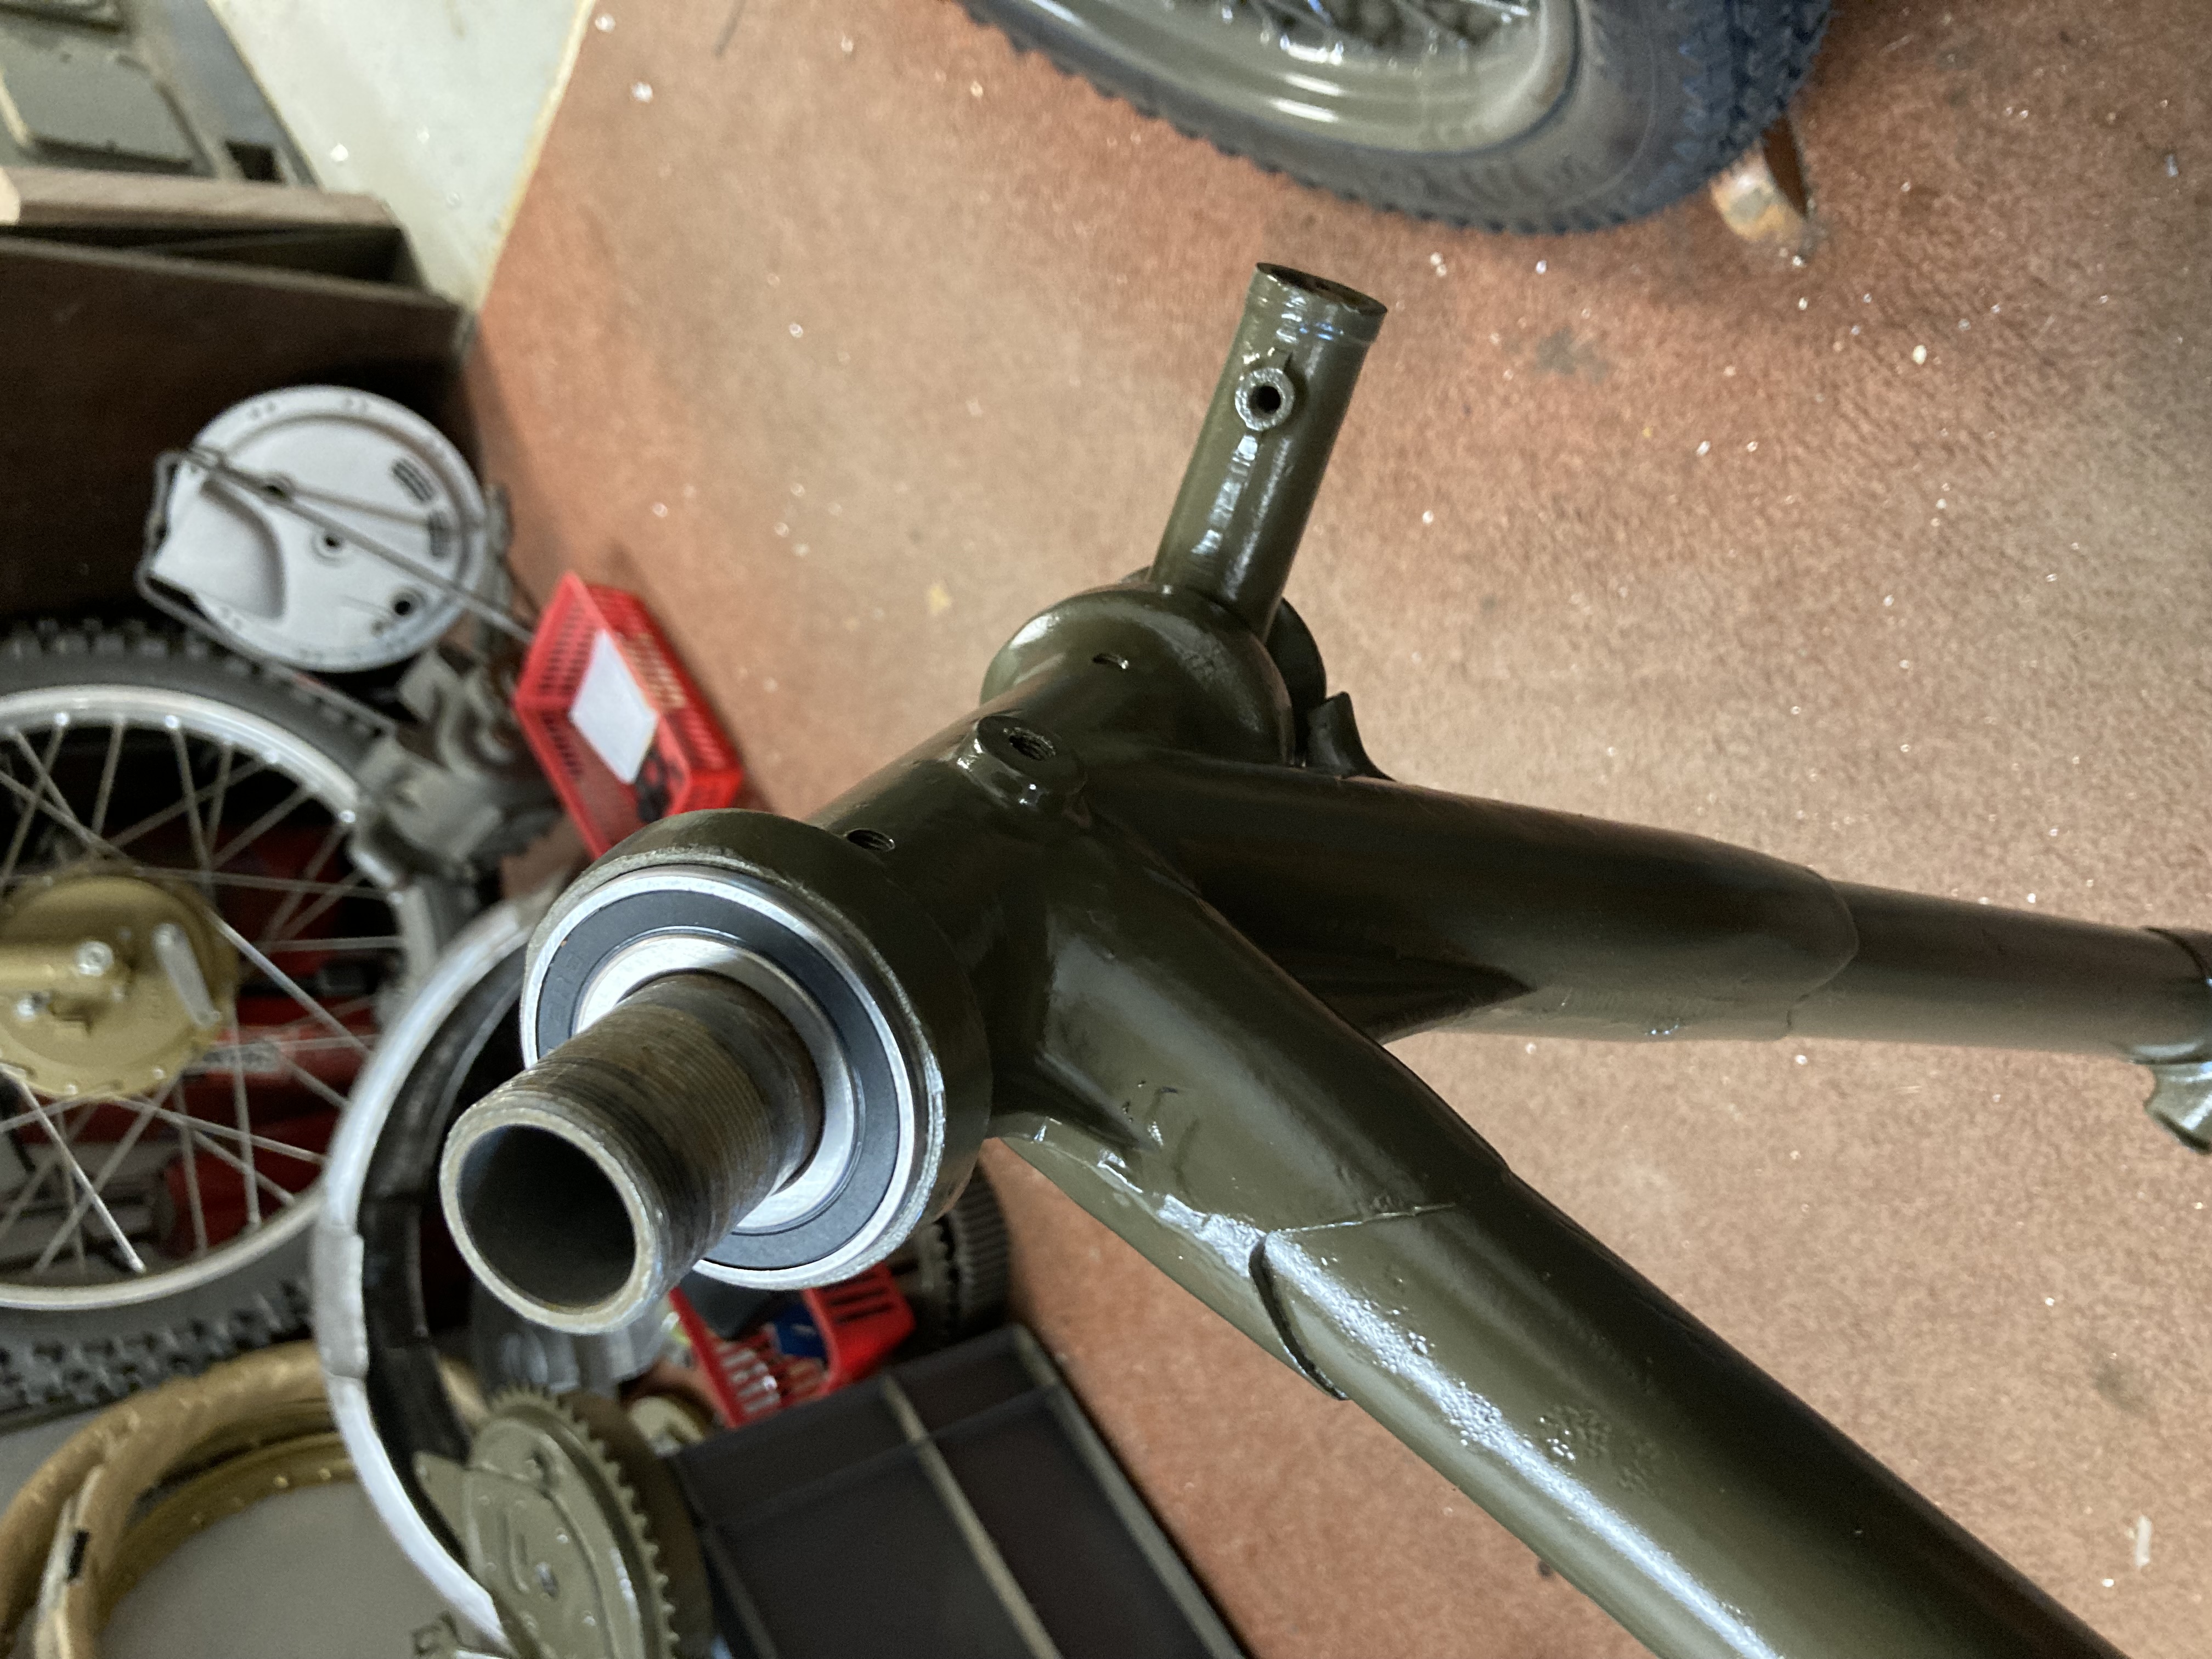
Some paint has been applied to a few parts enabling some simple assembly.
The steering stops had to be made up in weld as someone had cut them up. They could be a little long now.
I should have wrapped the fork spring in a towel as I have now made a right mess of the paintwork.
Mark
email (option): pes.sales@btconnect.com
Nice job Mark!
email (option): wd.register@gmail.com
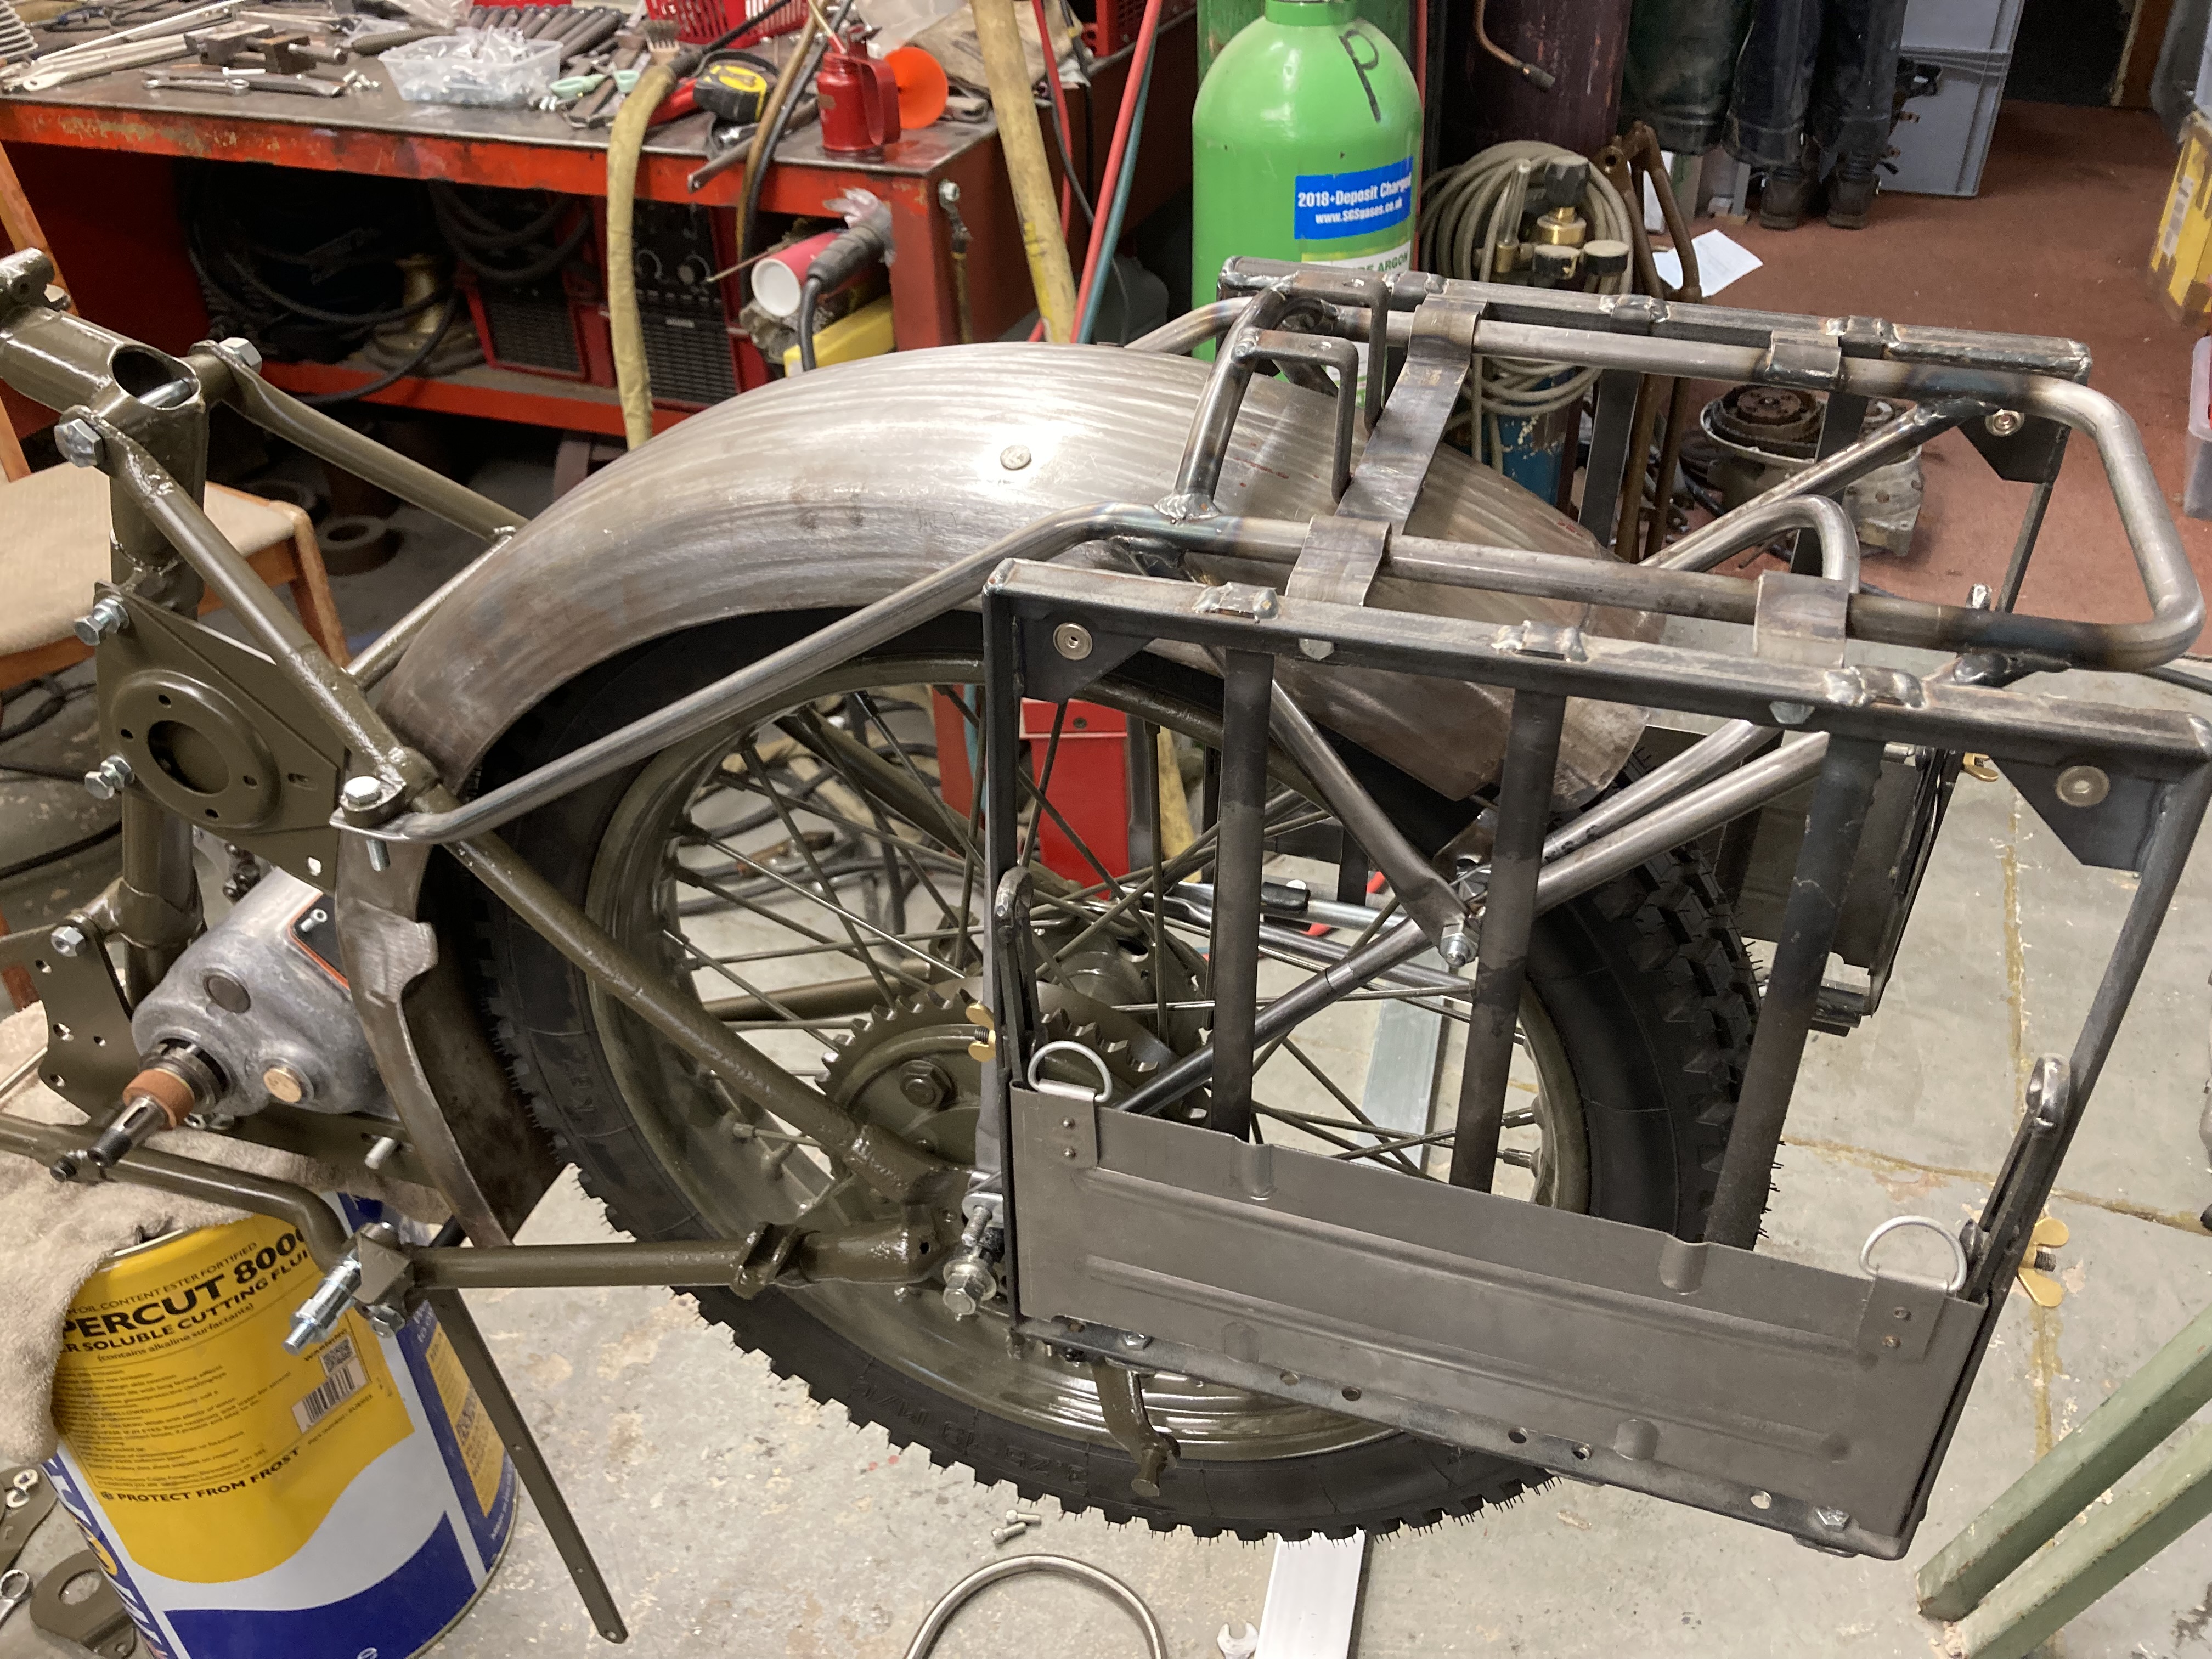
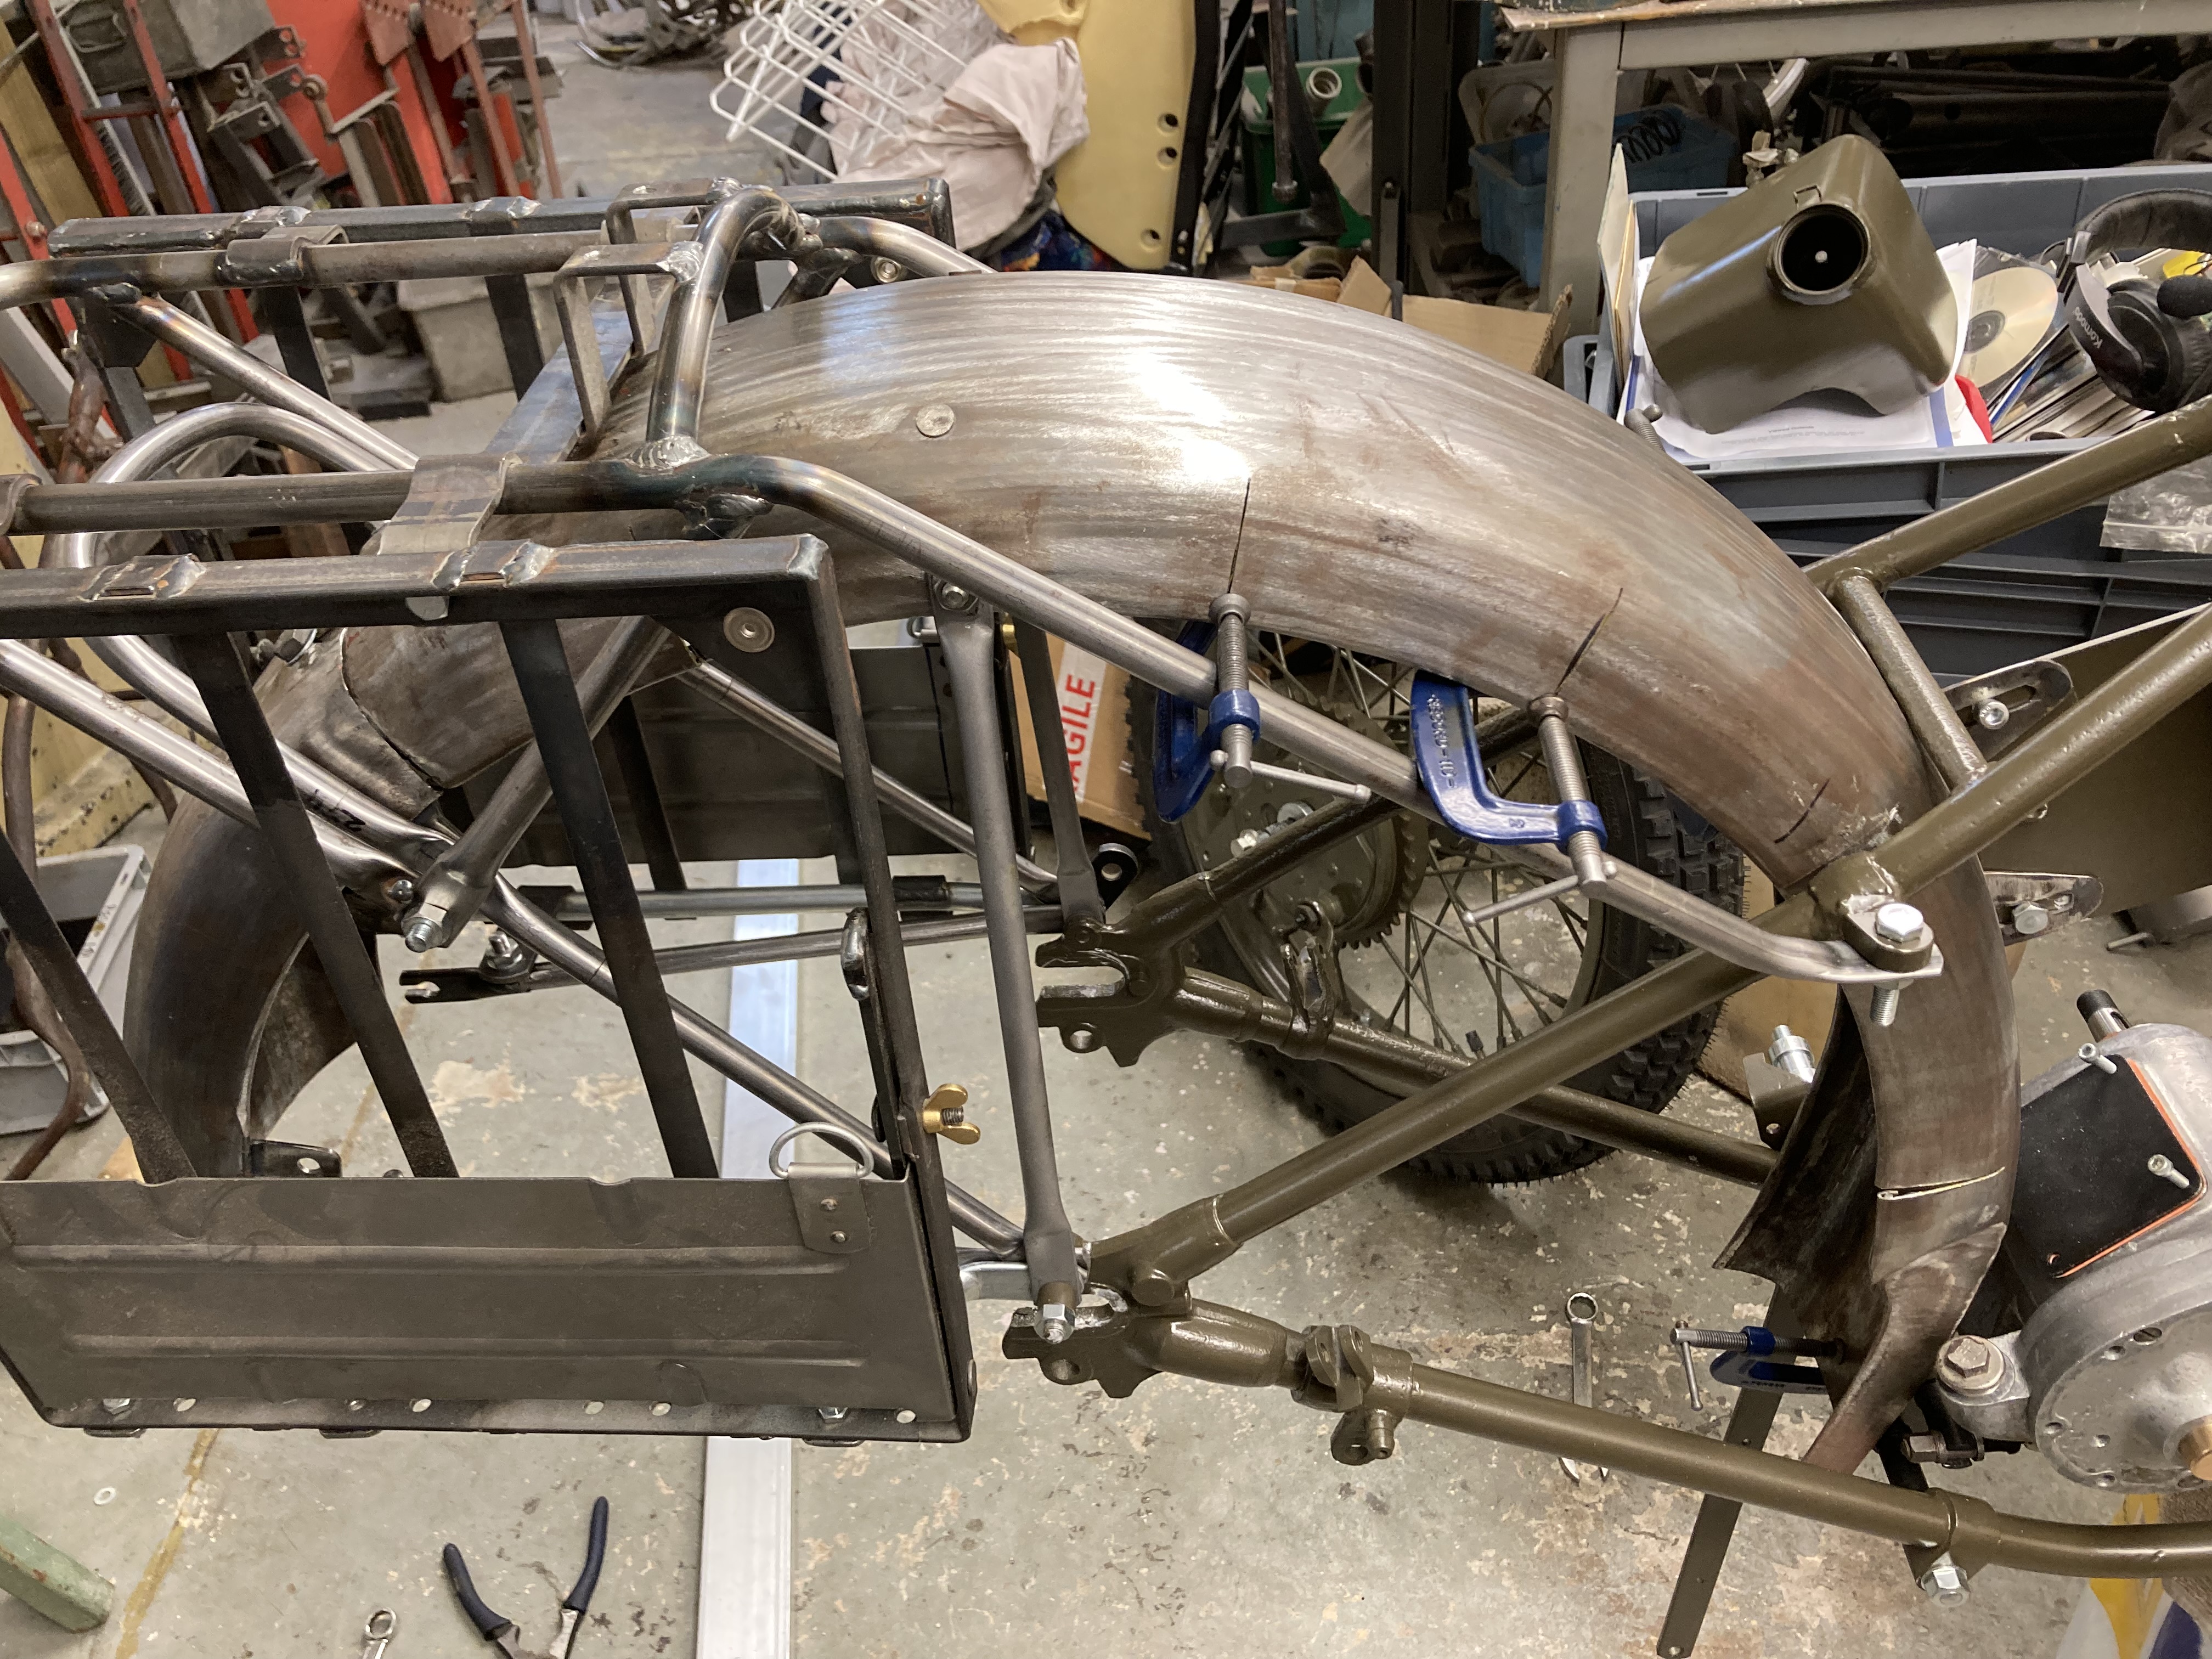
Yesterday I plucked up the courage to look at fitting the rear Indian origin Mudguard again.
It didn't last long as it all looked so wrong.
The idea was, once I had the rear wheel in place it would at as a guide.
Job abandoned before I did something I would regret!
This morning I announced I would not be working today, and maybe not again till further notice.
This puzzle will be solved!
I believe the key was getting Jan's pannier kit to fit.
A few gentle tweaks with a plastic hammer got things to align.
I had the problem that has been pointed out before that the back of the rack looked low.
Mounting the frame below the seat brackets seems to have cured it.
The mount fitting into the lifting stay is about a hole out.
I fitted original vertical stays that were a little longer than Jan's
The bracket that is supposed to fit the oil tank plate is about a hole out.
The tail piece just couldn't fit the horizontal stays.
When I placed the mudguard over the tire it looked like the radius was to much.
Now in the chainstay it is too much.
I will now mark the mudguard with a marking pen, before cutting into it with a hacksaw.
Half a dozen cuts should do it.
If another post doesn't follow this one shortly it all went wrong :sob:
Mark
email (option): pes.sales@btconnect.com
I'm loath to complicate matters any further but the rear carrier 'forward arms' should be on top of the frame saddle spring lugs....Ian
email (option): ian@wright52.plus.com
It's ok Ian, but for now it makes it work.
I could shorten the arms at a later date.
At the moment I'm just trying to get it on the road.
My surgery was more successful than I expected and it fitted quite well.
The only bracket that needed shifting was on the tail piece.
As usual you take a leap forward and have to crawl back!
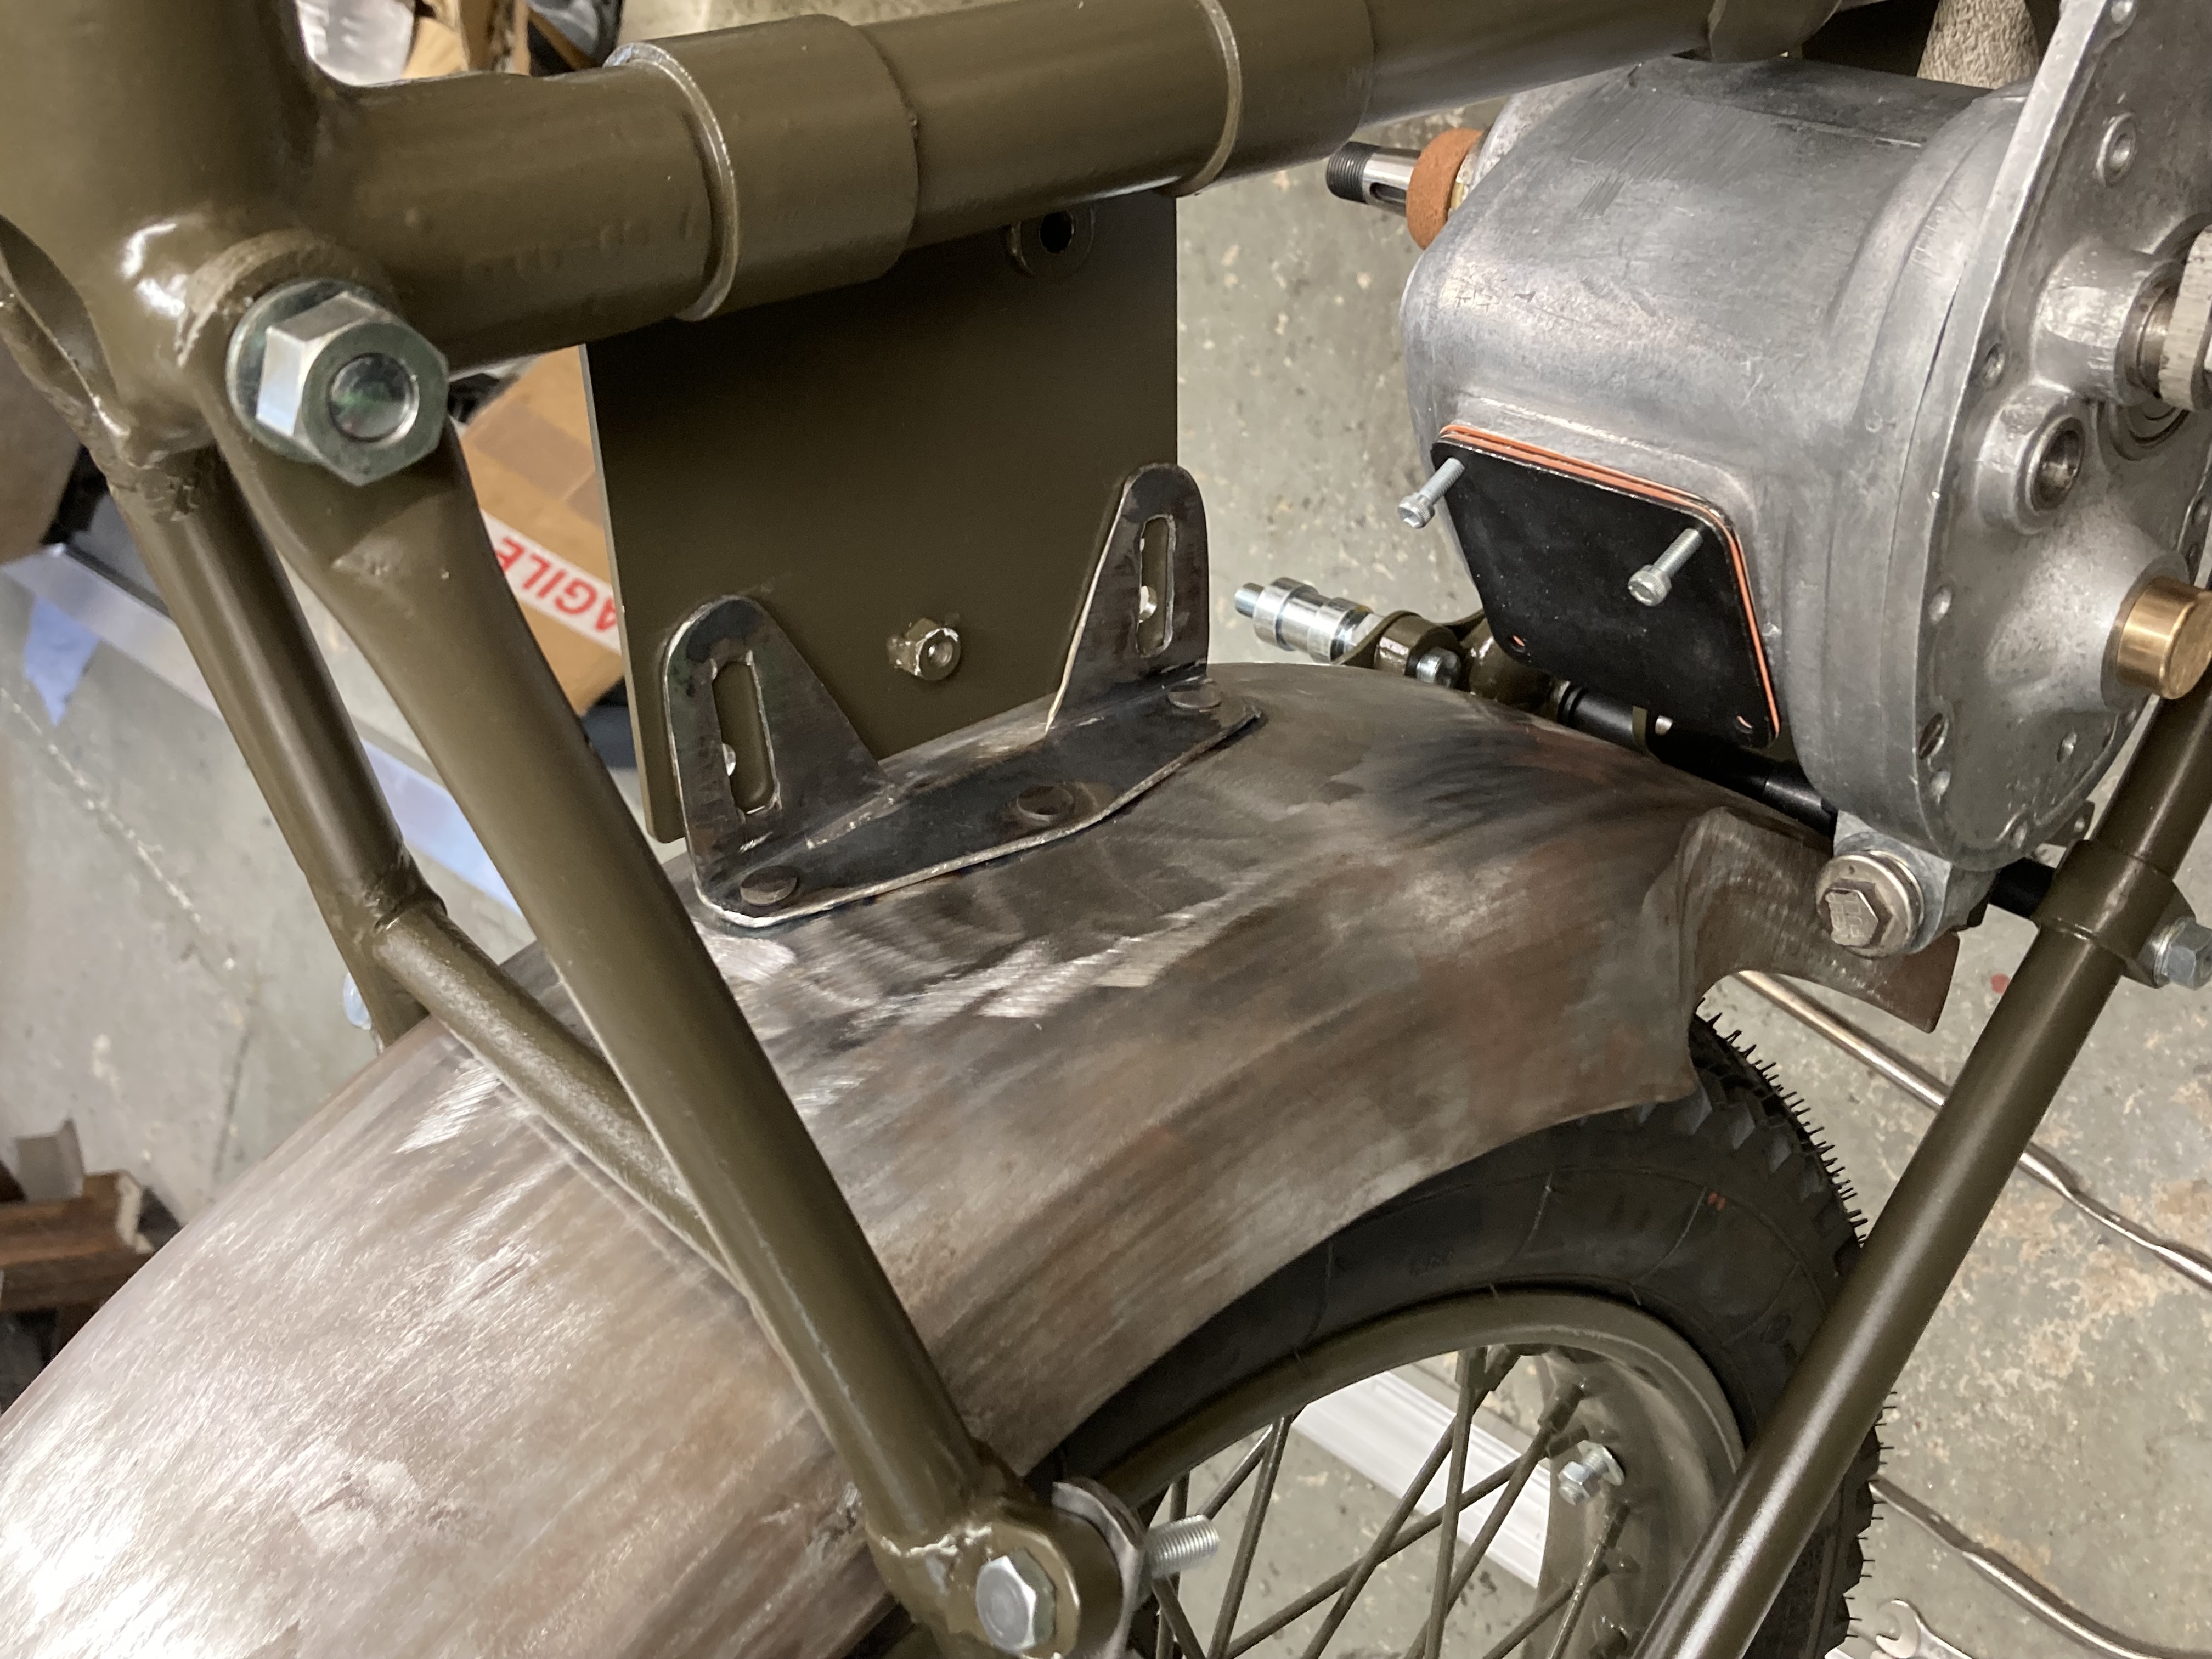
Getting this far has allowed me to trial fit other parts.
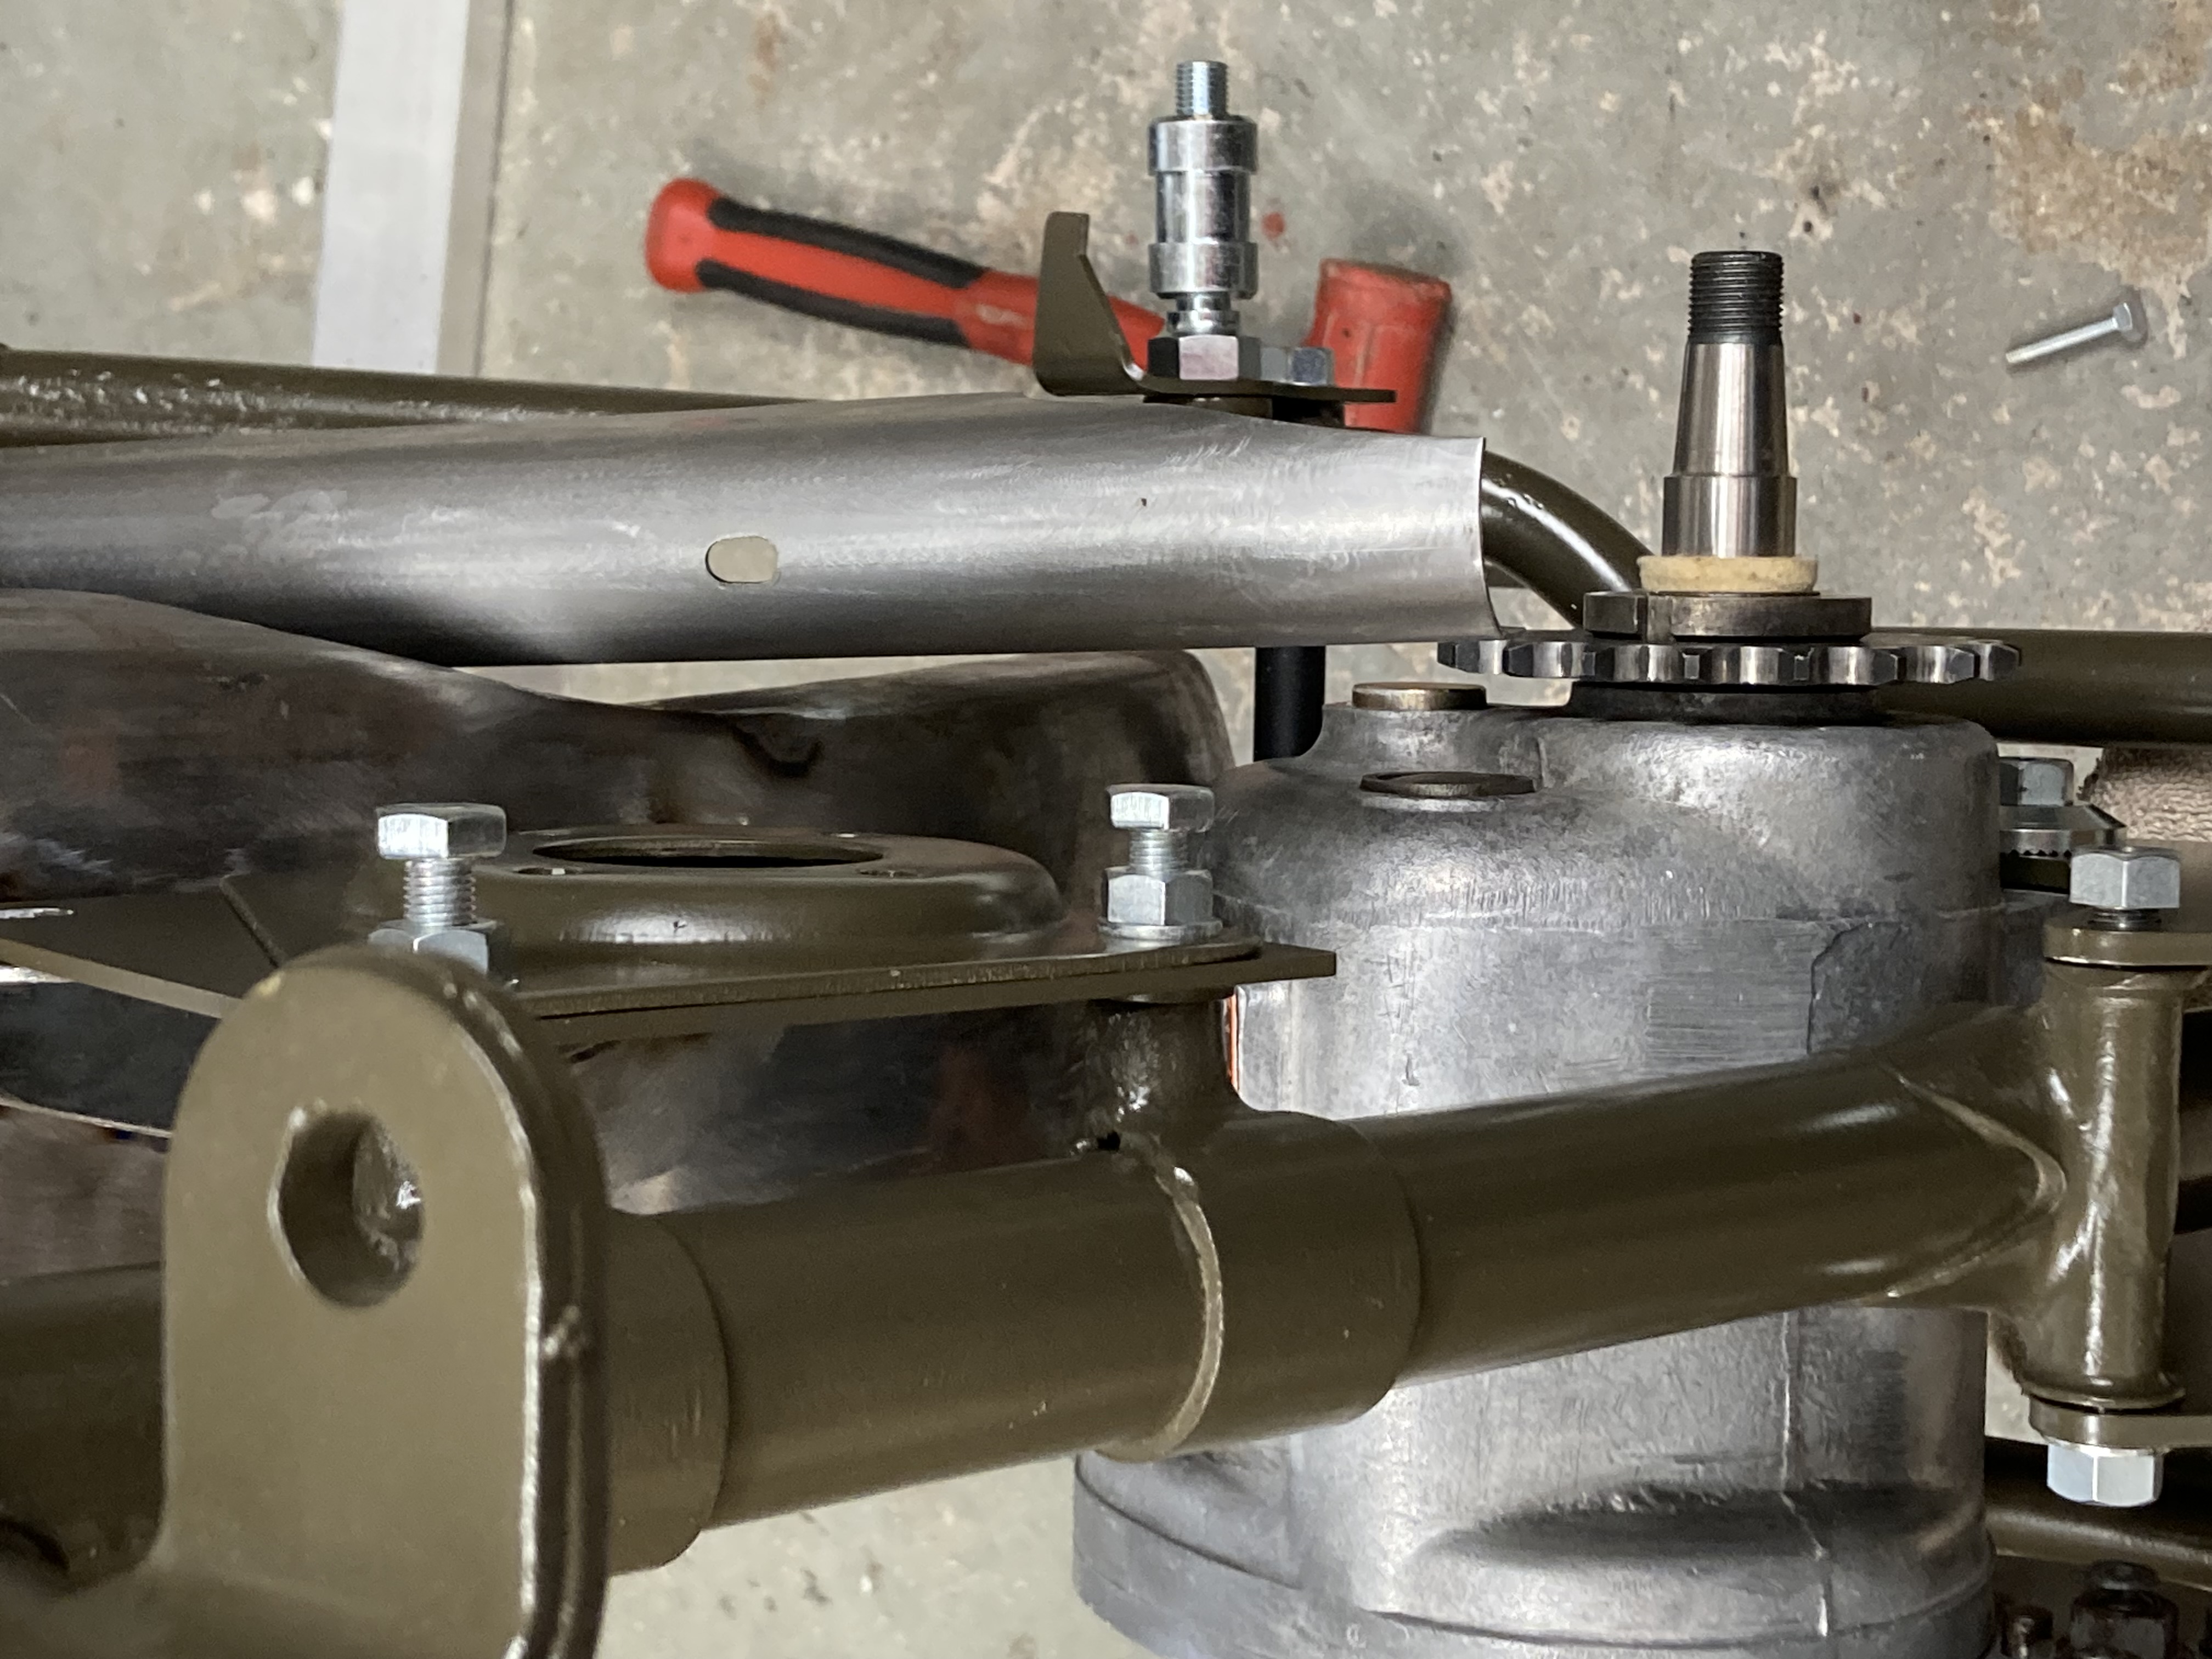
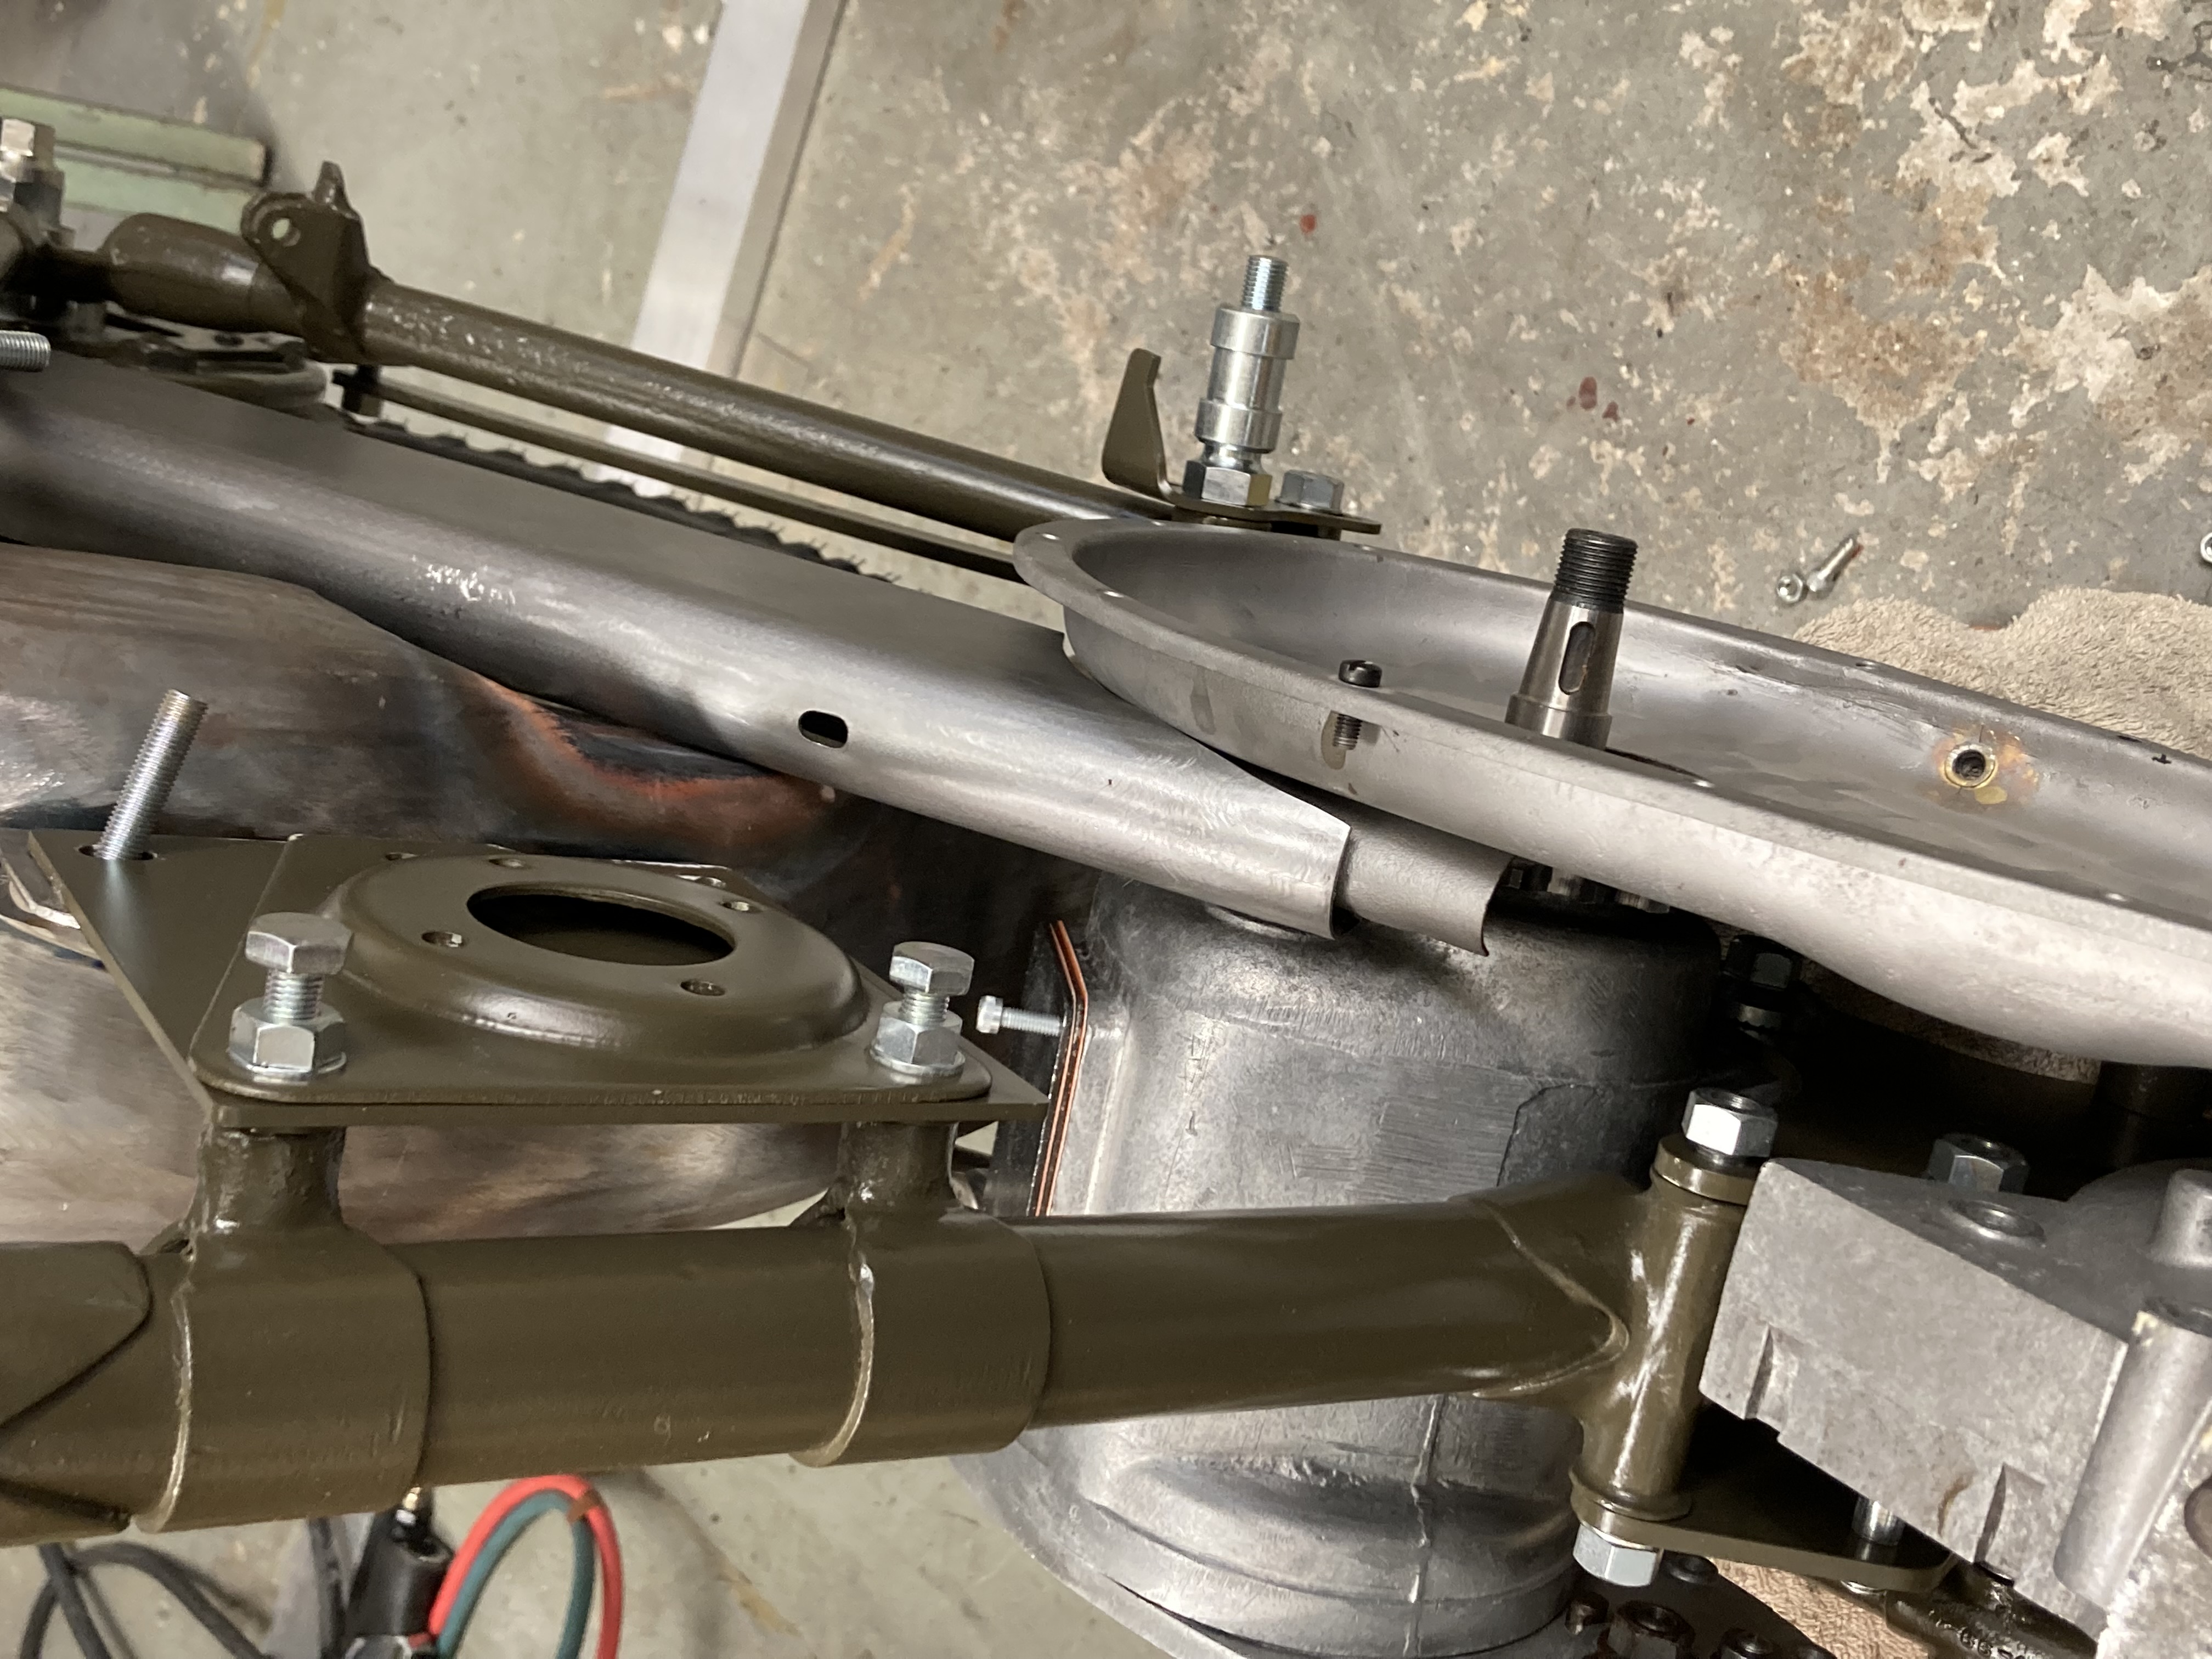
The upper chain guard bracket may need a little work to get it to clear the vertical stay, but that's nothing to what it has shown.
More rear Mudguard surgery! I think I will need to cut 6.35mm out of it to allow the chain cover to fit.
It gets worse! It's clear now that I have the wrong inner and outer primary chain covers.
If it's only the chain guard mounting that's wrong I could move it.
I think I will need the crankcases in place to check for other issues.
Mark
email (option): pes.sales@btconnect.com
Yes, deep joy putting together the rear end of an M20 even when you have all the original parts, never mind an Indian mudguard....Each part has to fit correctly as everything else won't fit if there's any discrepancies ...
I'm doing the same job on mine at the moment as it happens but thankfully it's not quite as much of a drama as it's all been together before and I've rebuilt the bike twice already in the 40 or so years I've owned it!...
Here's a picture of it before I rebuilt it....That's my niece sat on the tank, she's got two kids of her own now...
All over NATO green, made up C Number and tank markings, still with it's post war MU42 headlamp etc....Things were very different and a lot simpler back then when very few people actually wanted ex. WD machines....
I was just about to set off for home from my sisters in Gloucestershire so I had a roughly 150 mile ride to do on a cold January day....Ian

email (option): ian@wright52.plus.com
That's a picture to cherish Ian, it's a shame mirrors tell another story.
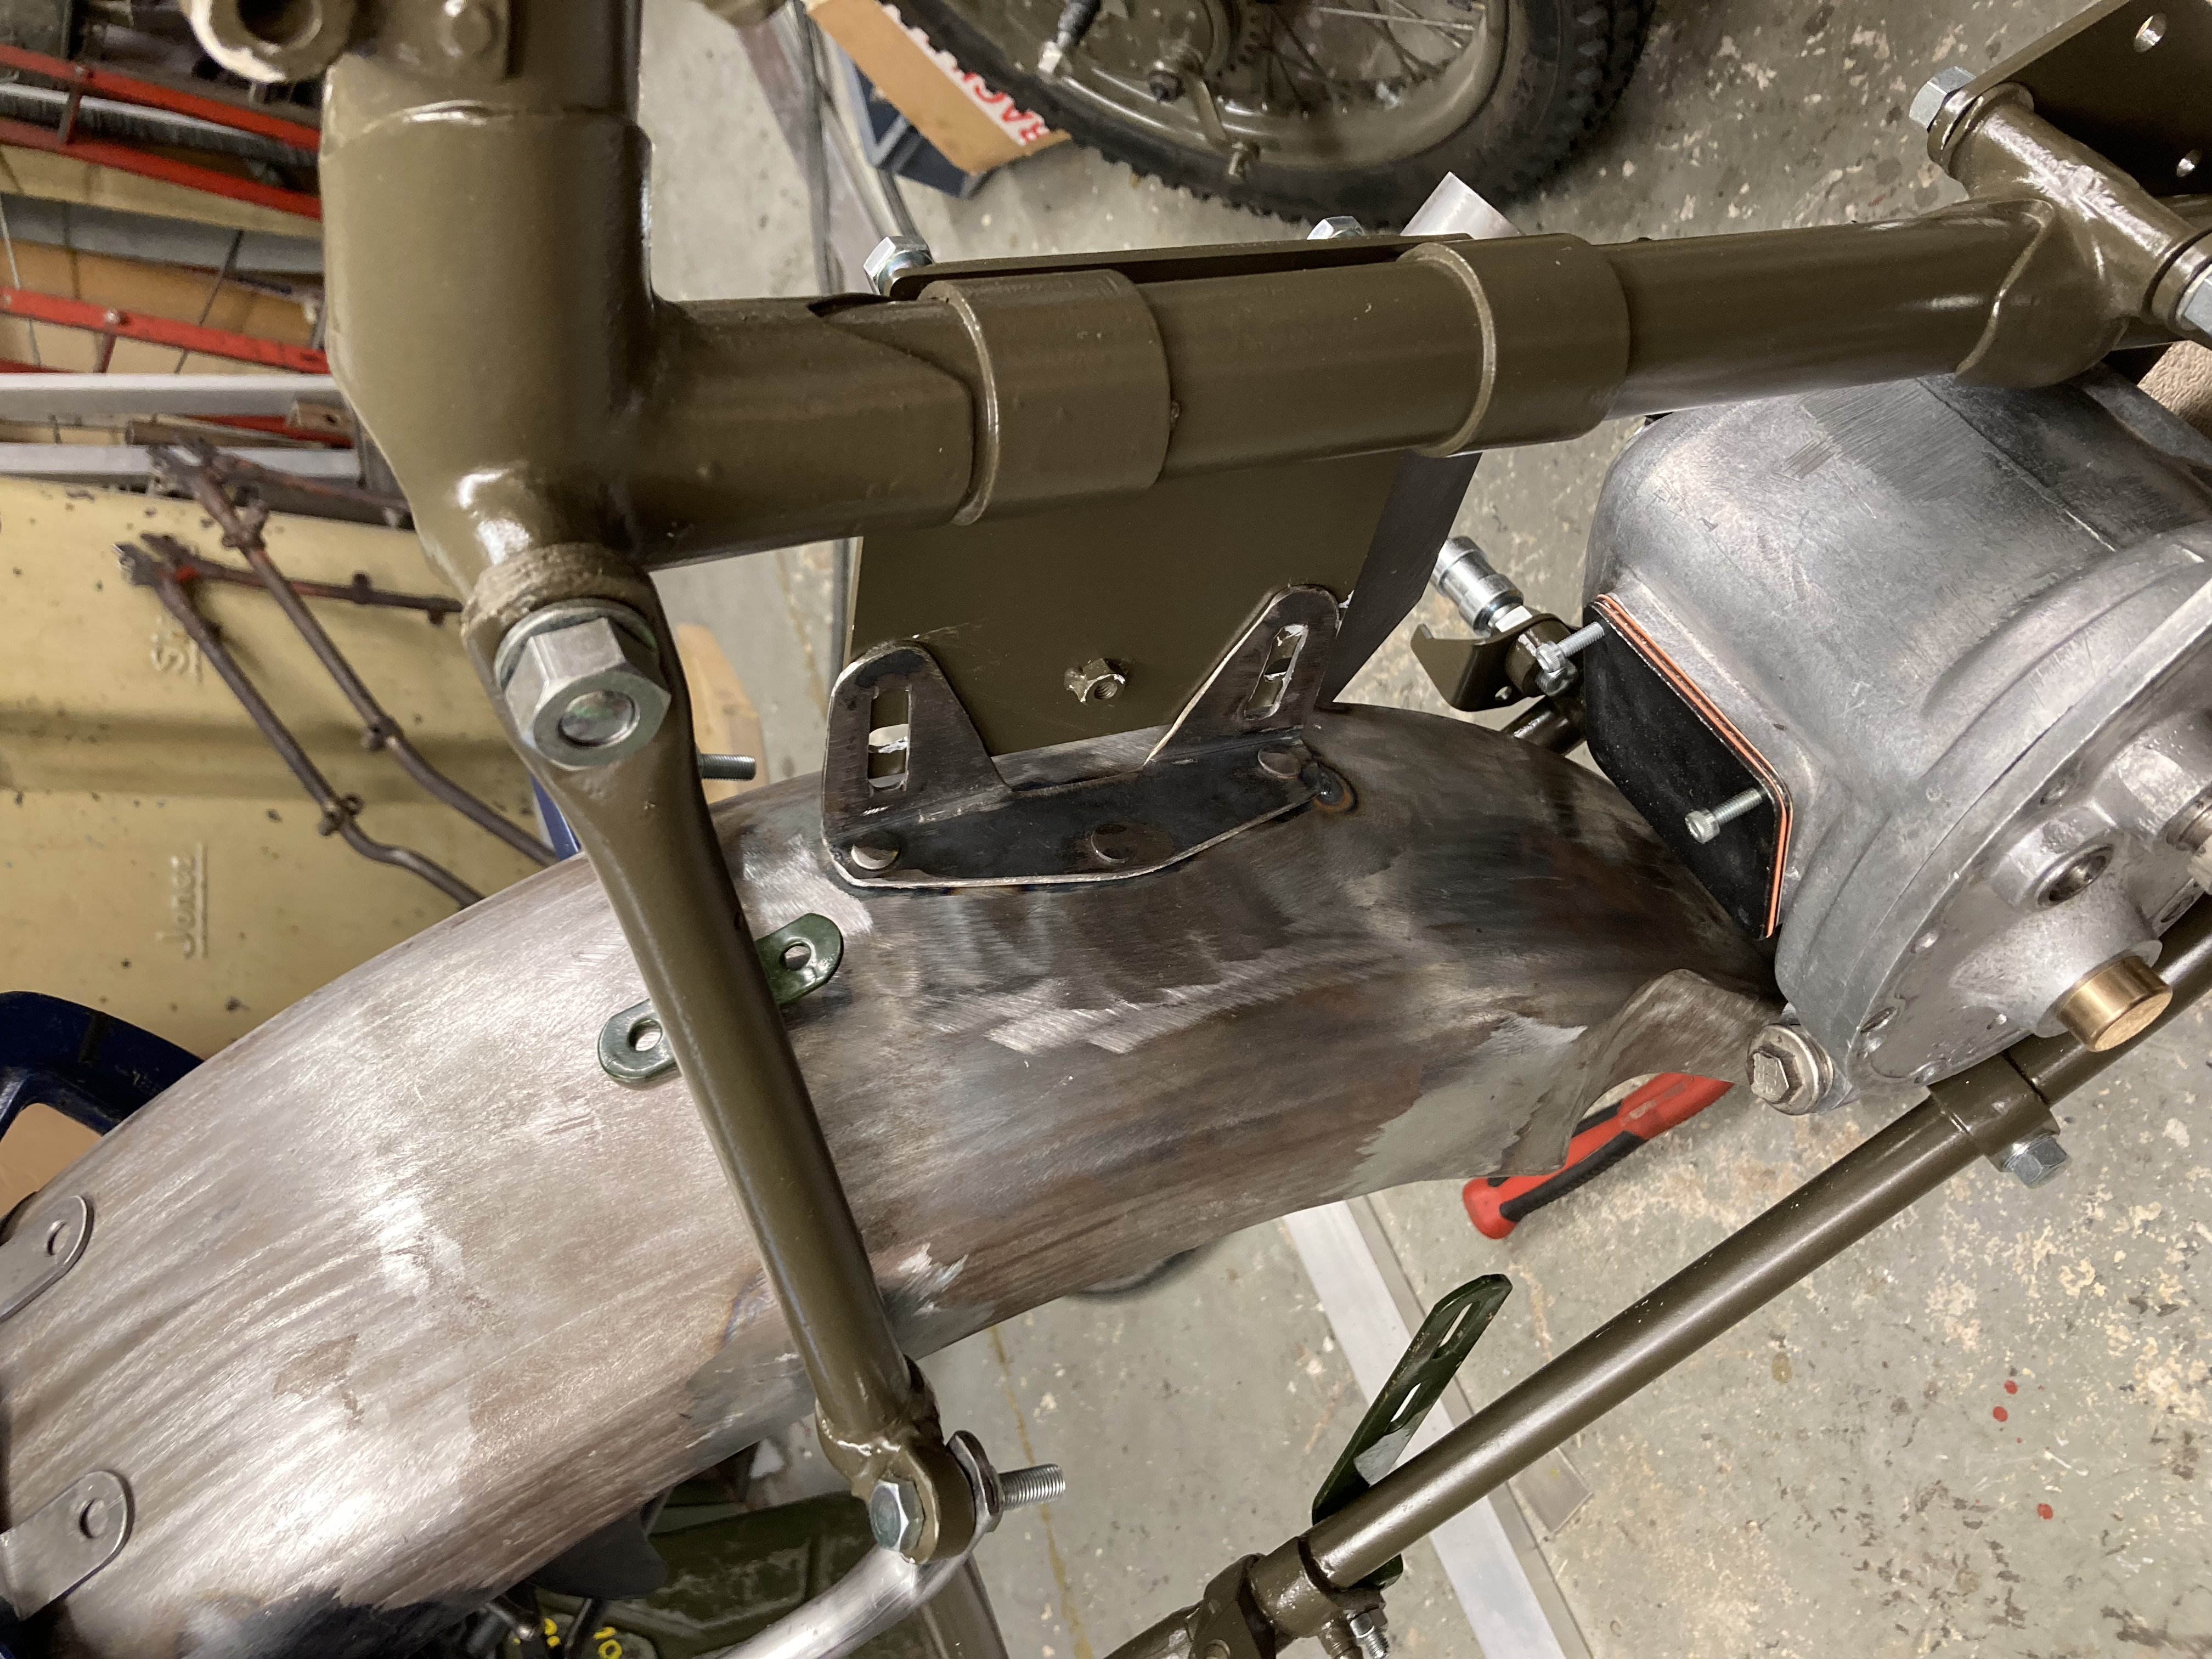
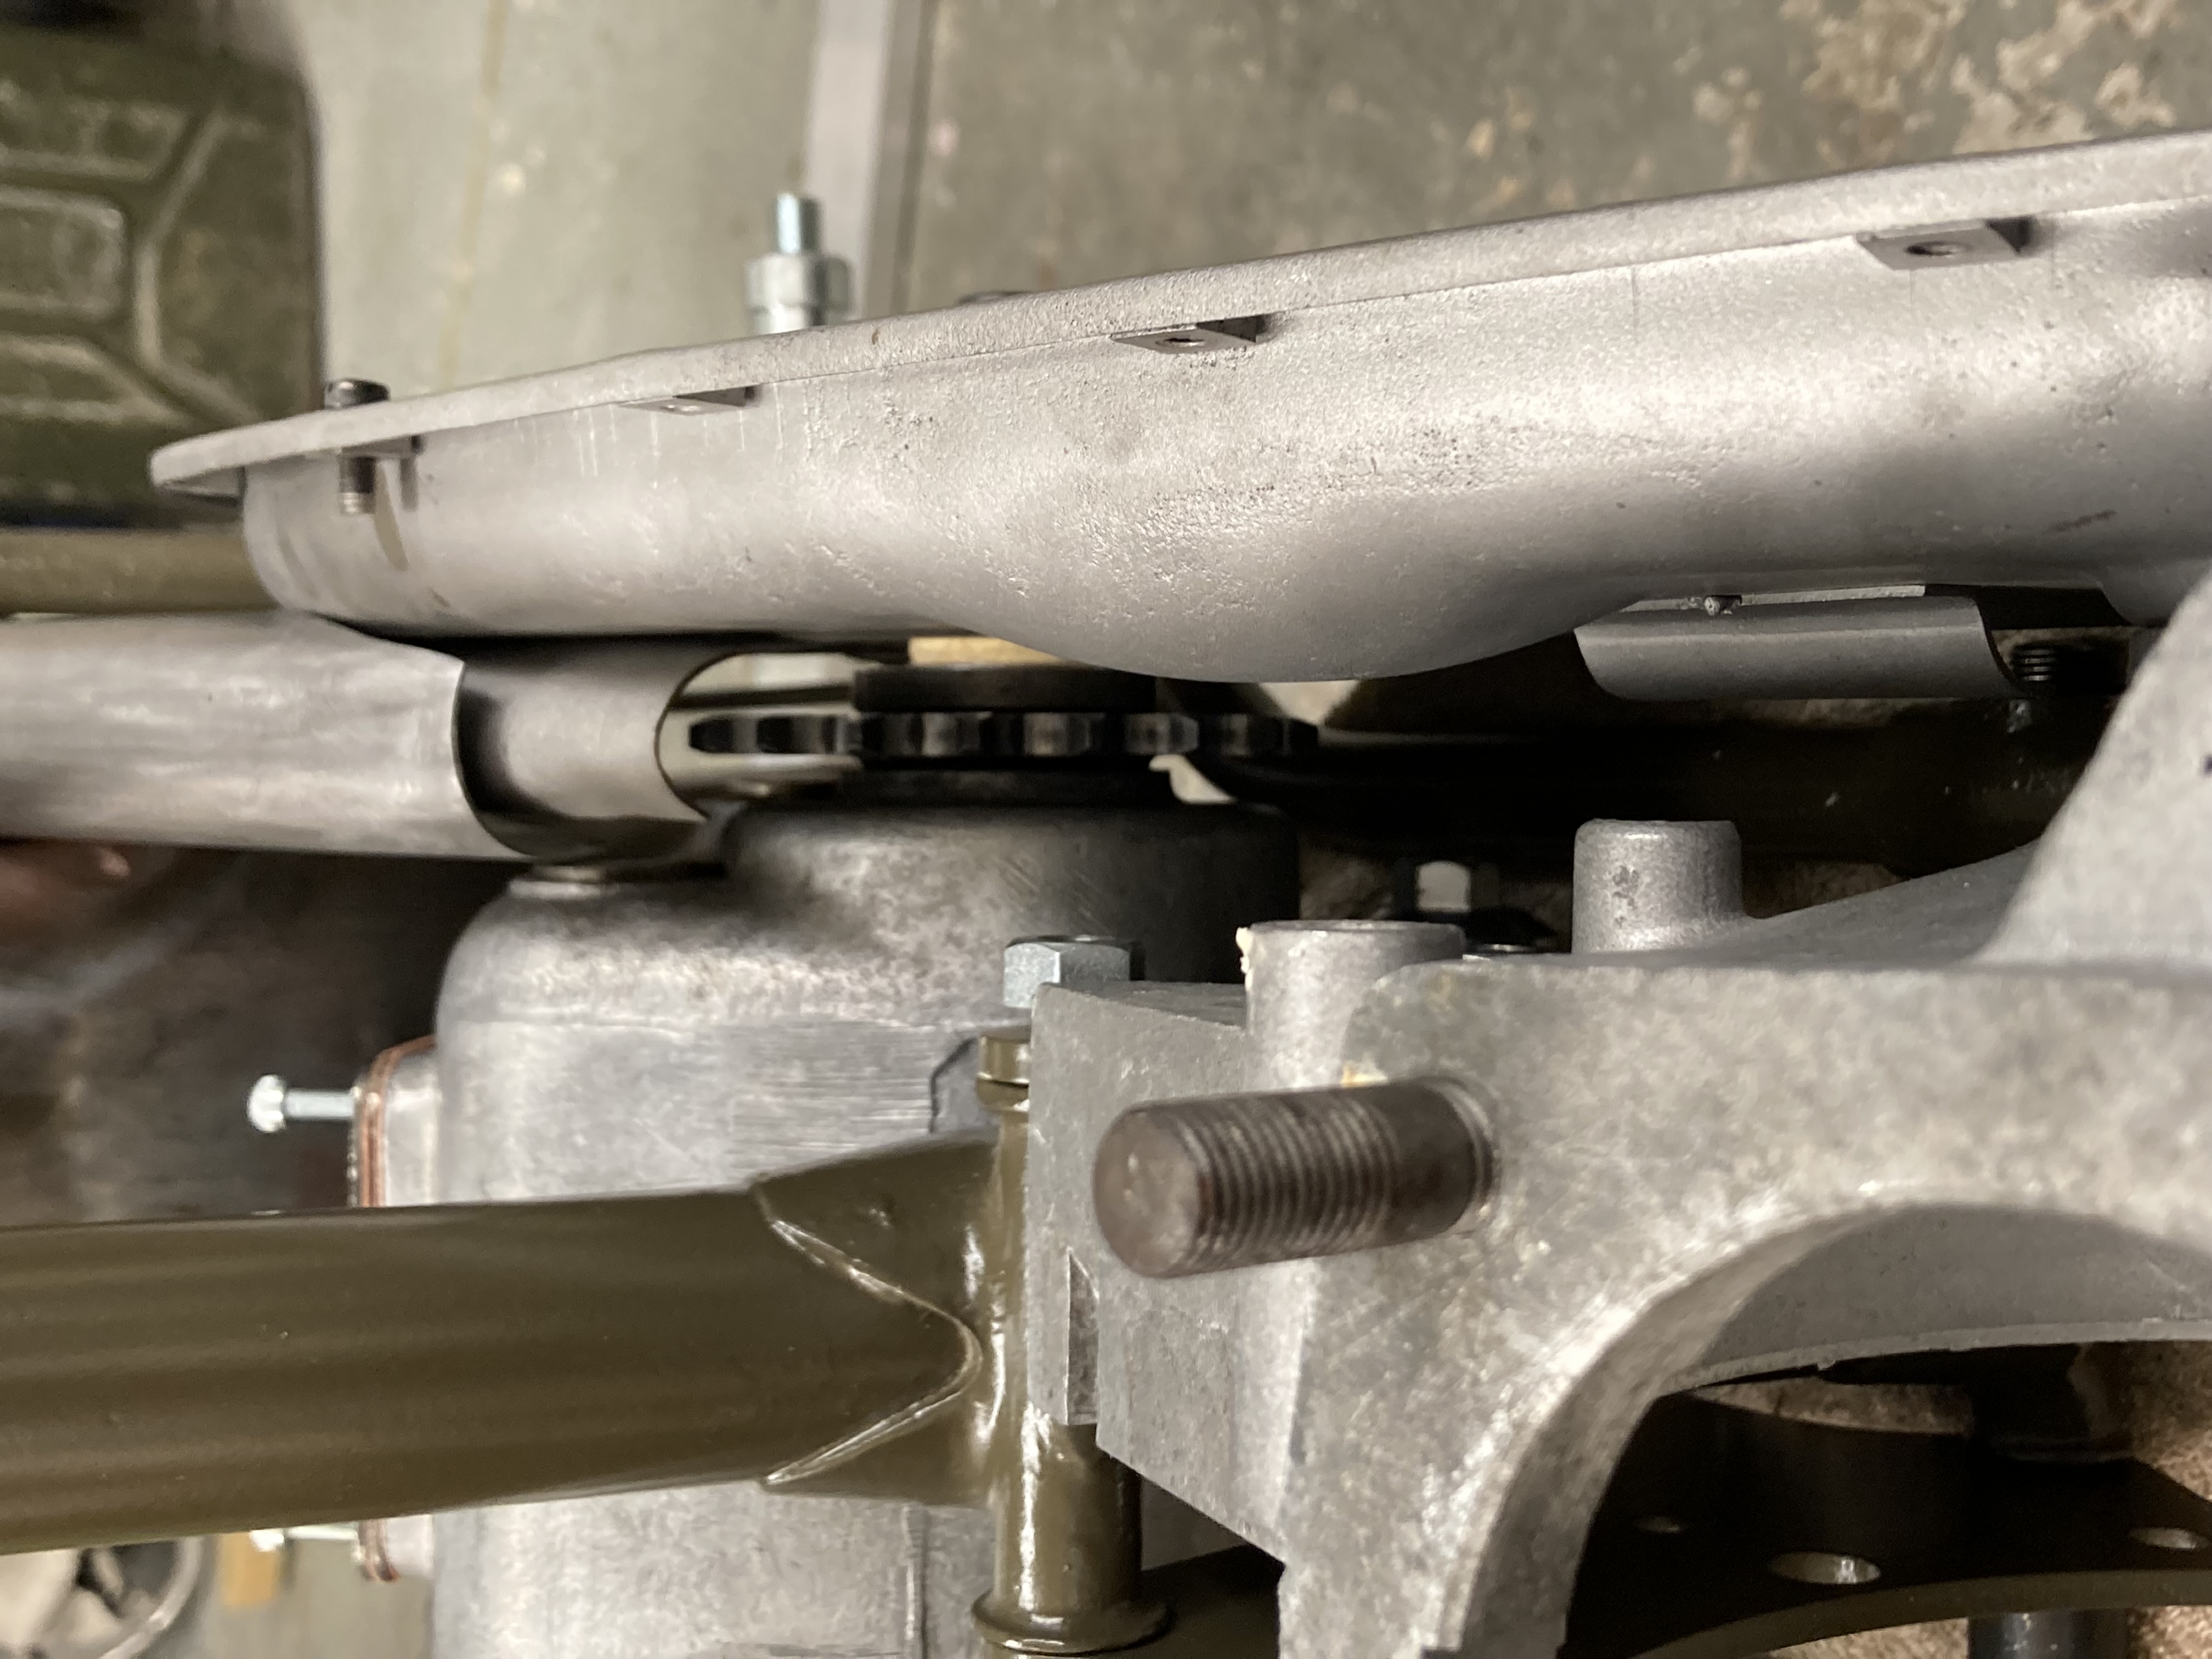
Progress, I haven't altered the B series inner chaincase yet, but I'm sure it will work.
I just need to make sure there are no more holes to drill in the Mudguard.
The horizontal stay fouls the brake arm, but hopefully when the wheel is adjusted back it will clear.
It might be getting closer?
Mark
email (option): pes.sales@btconnect.com
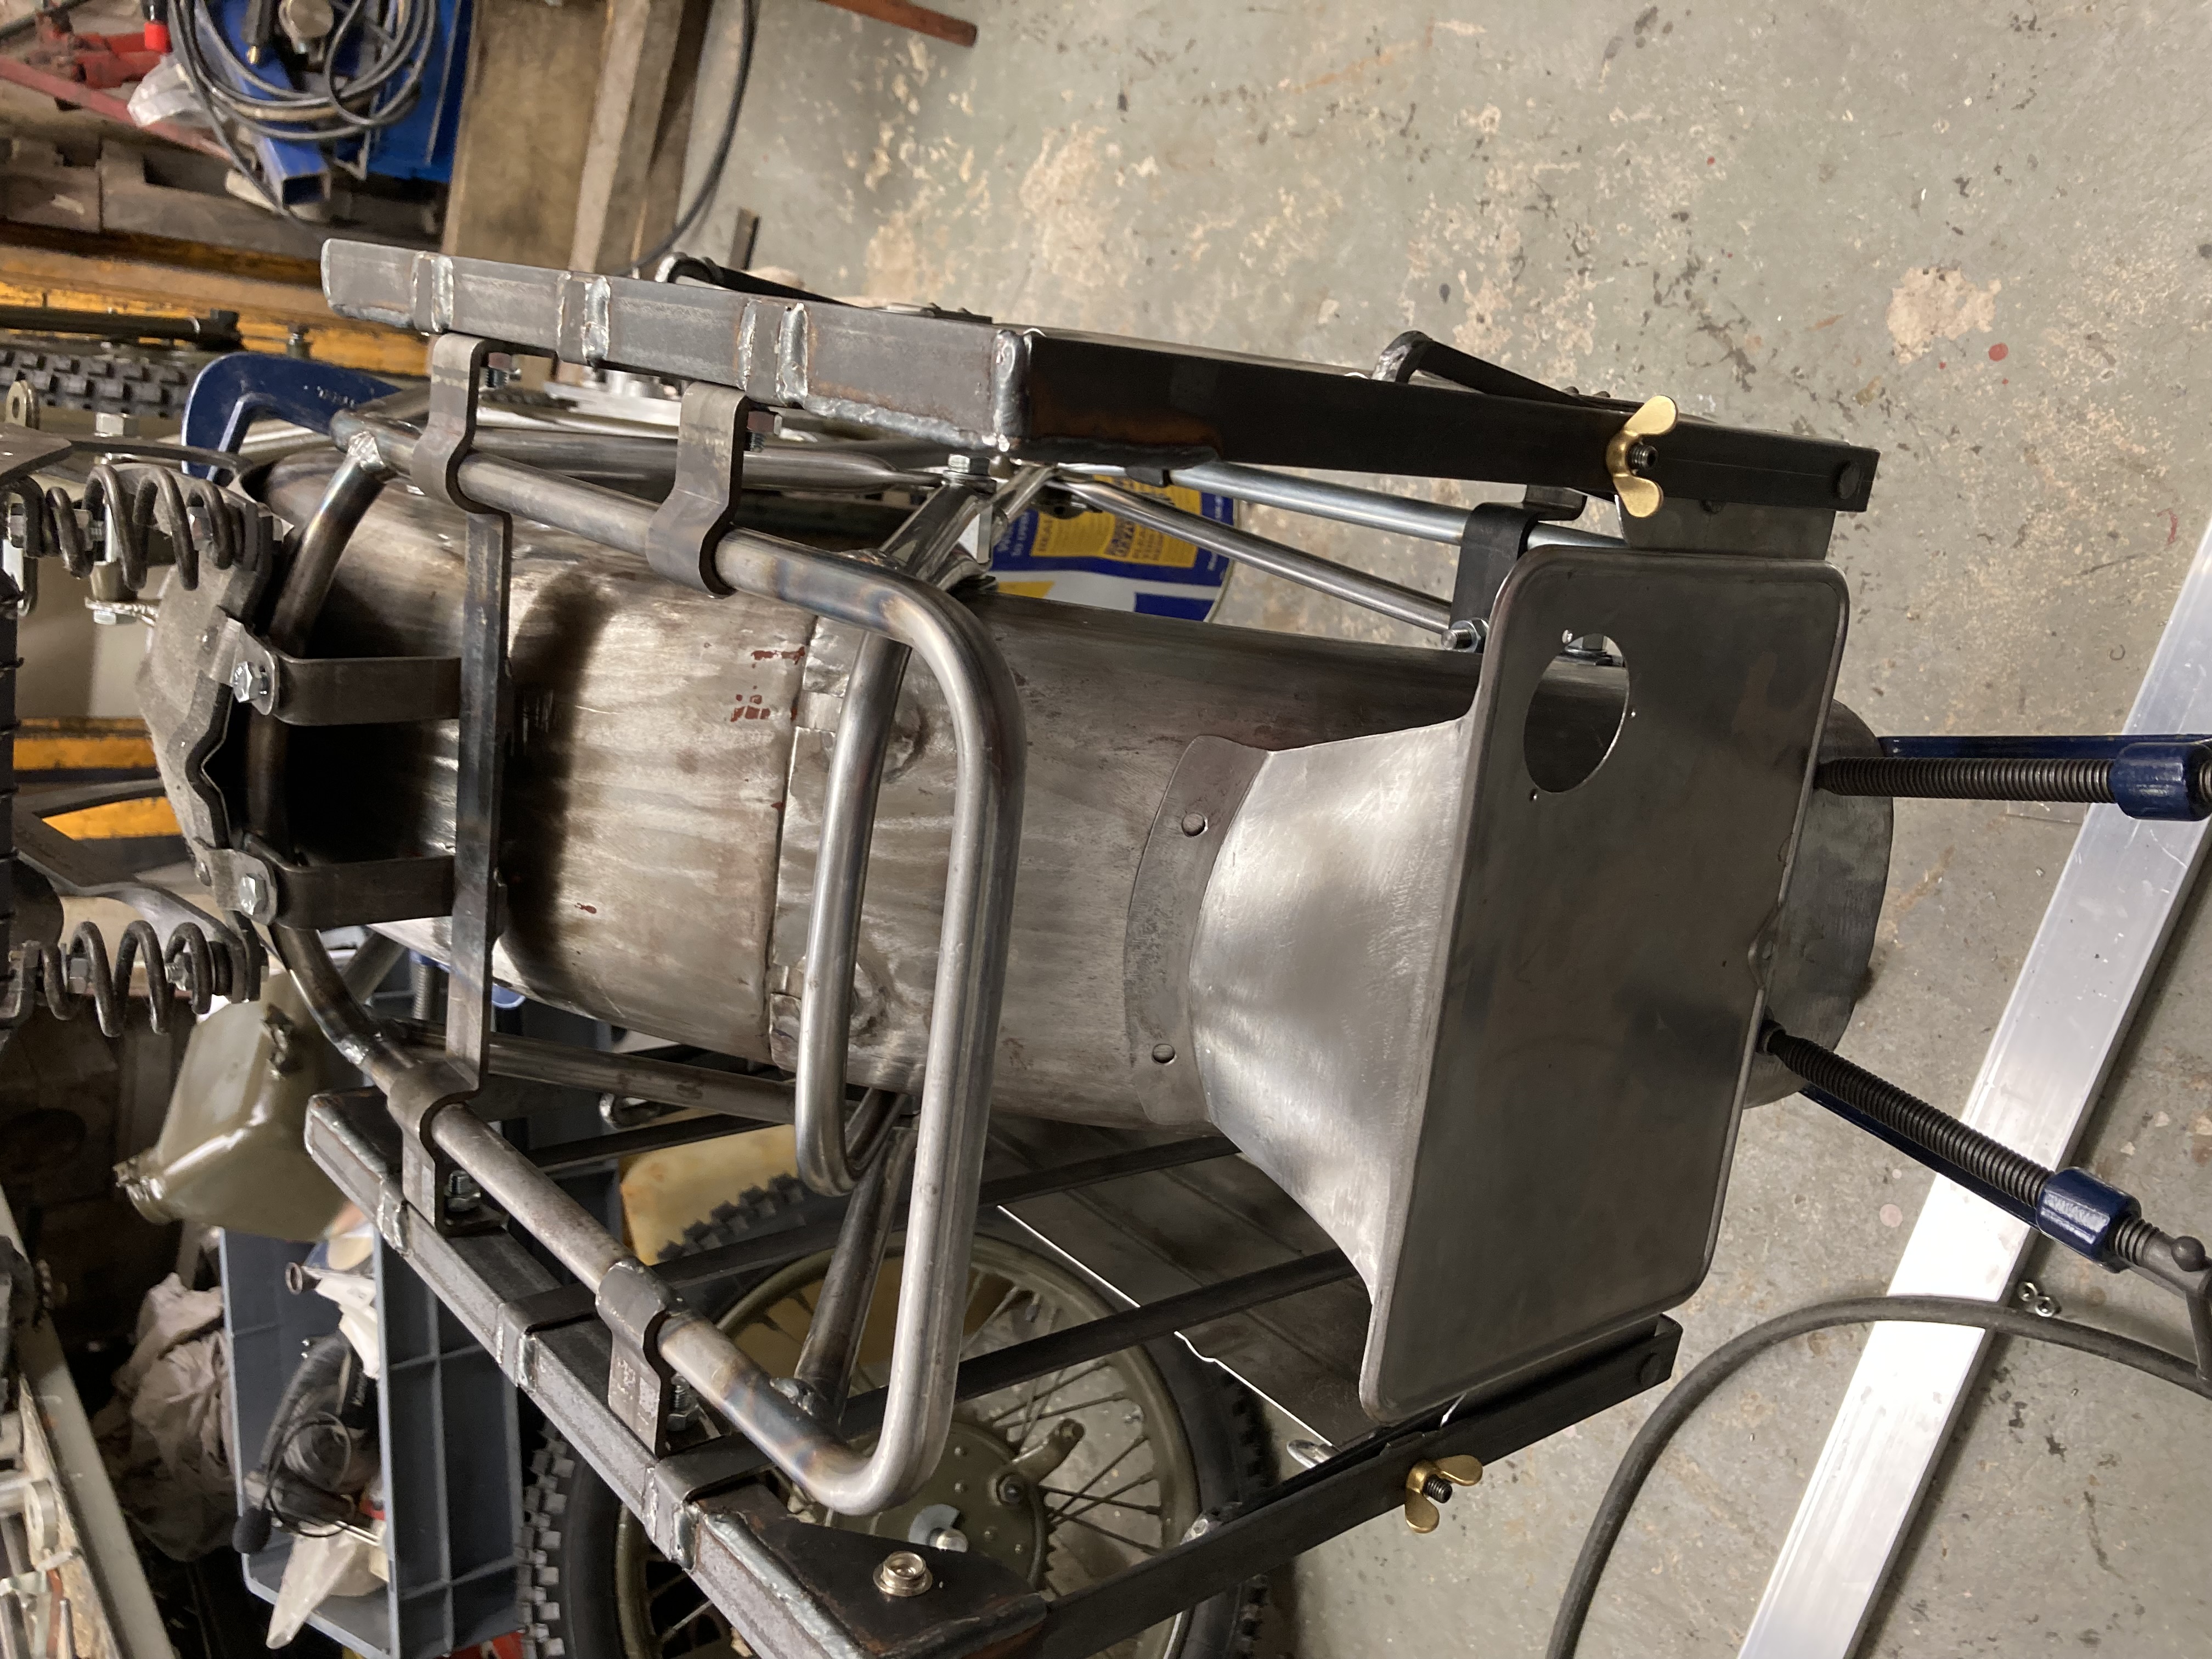
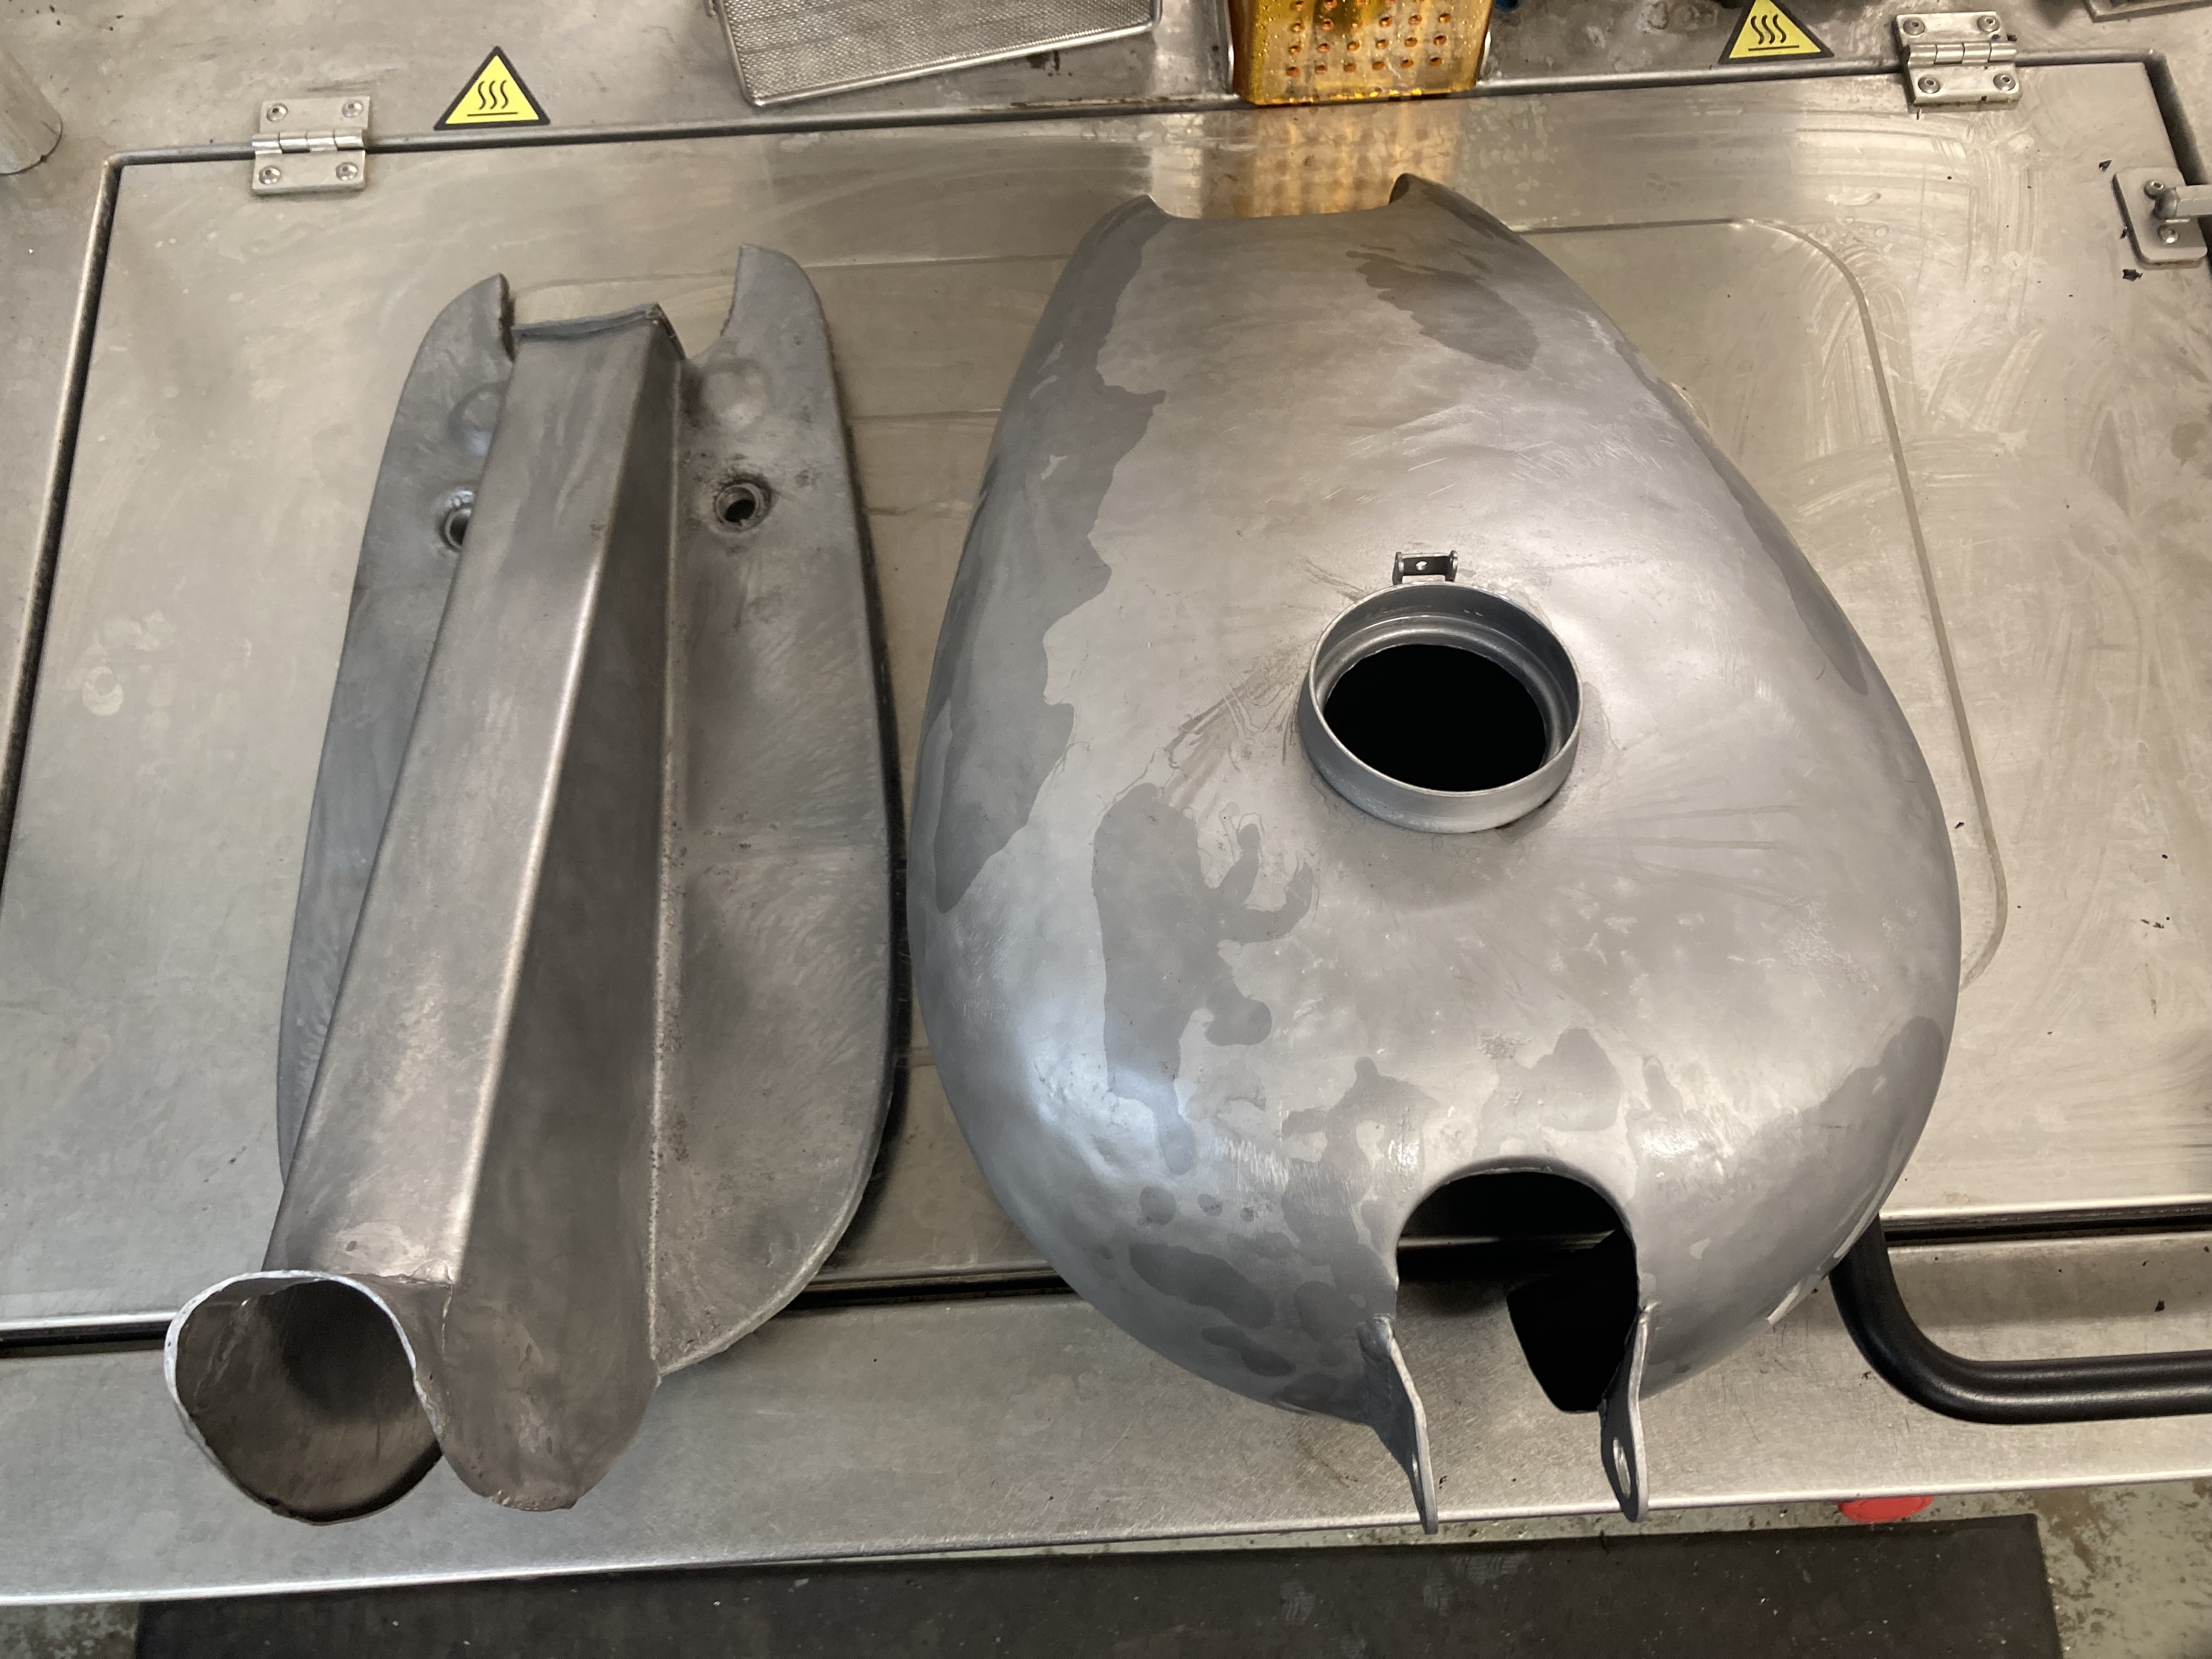
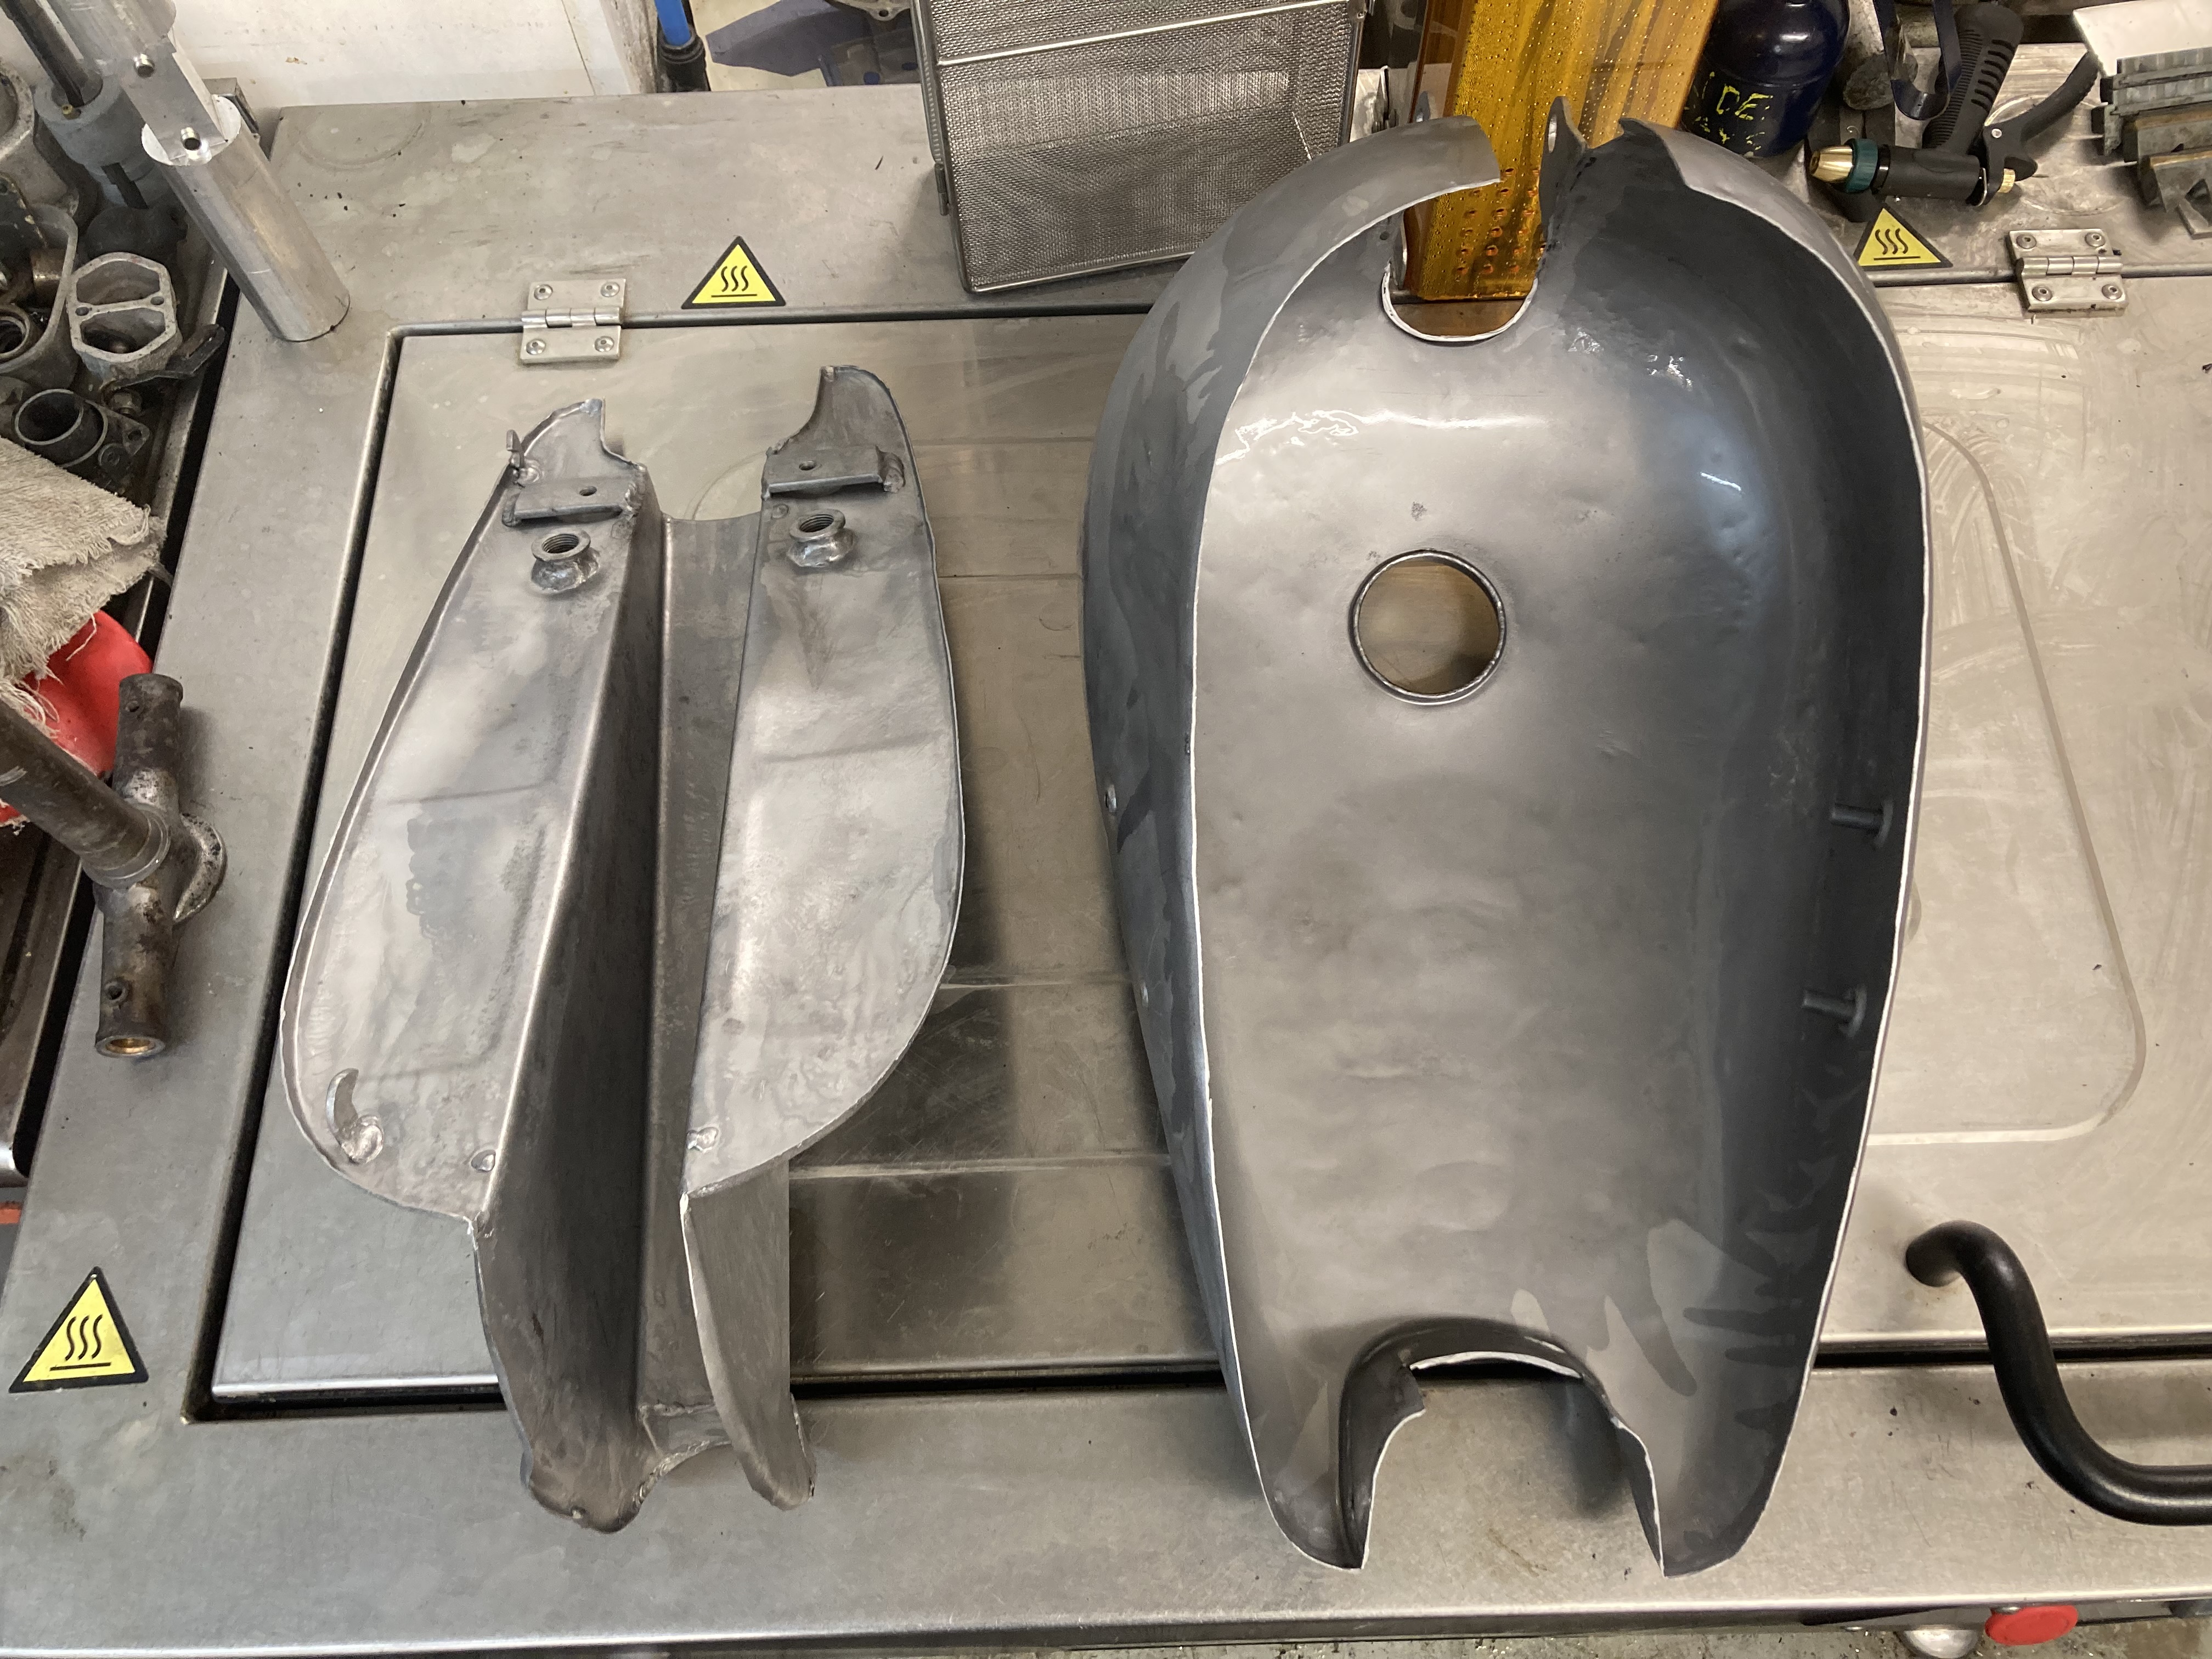
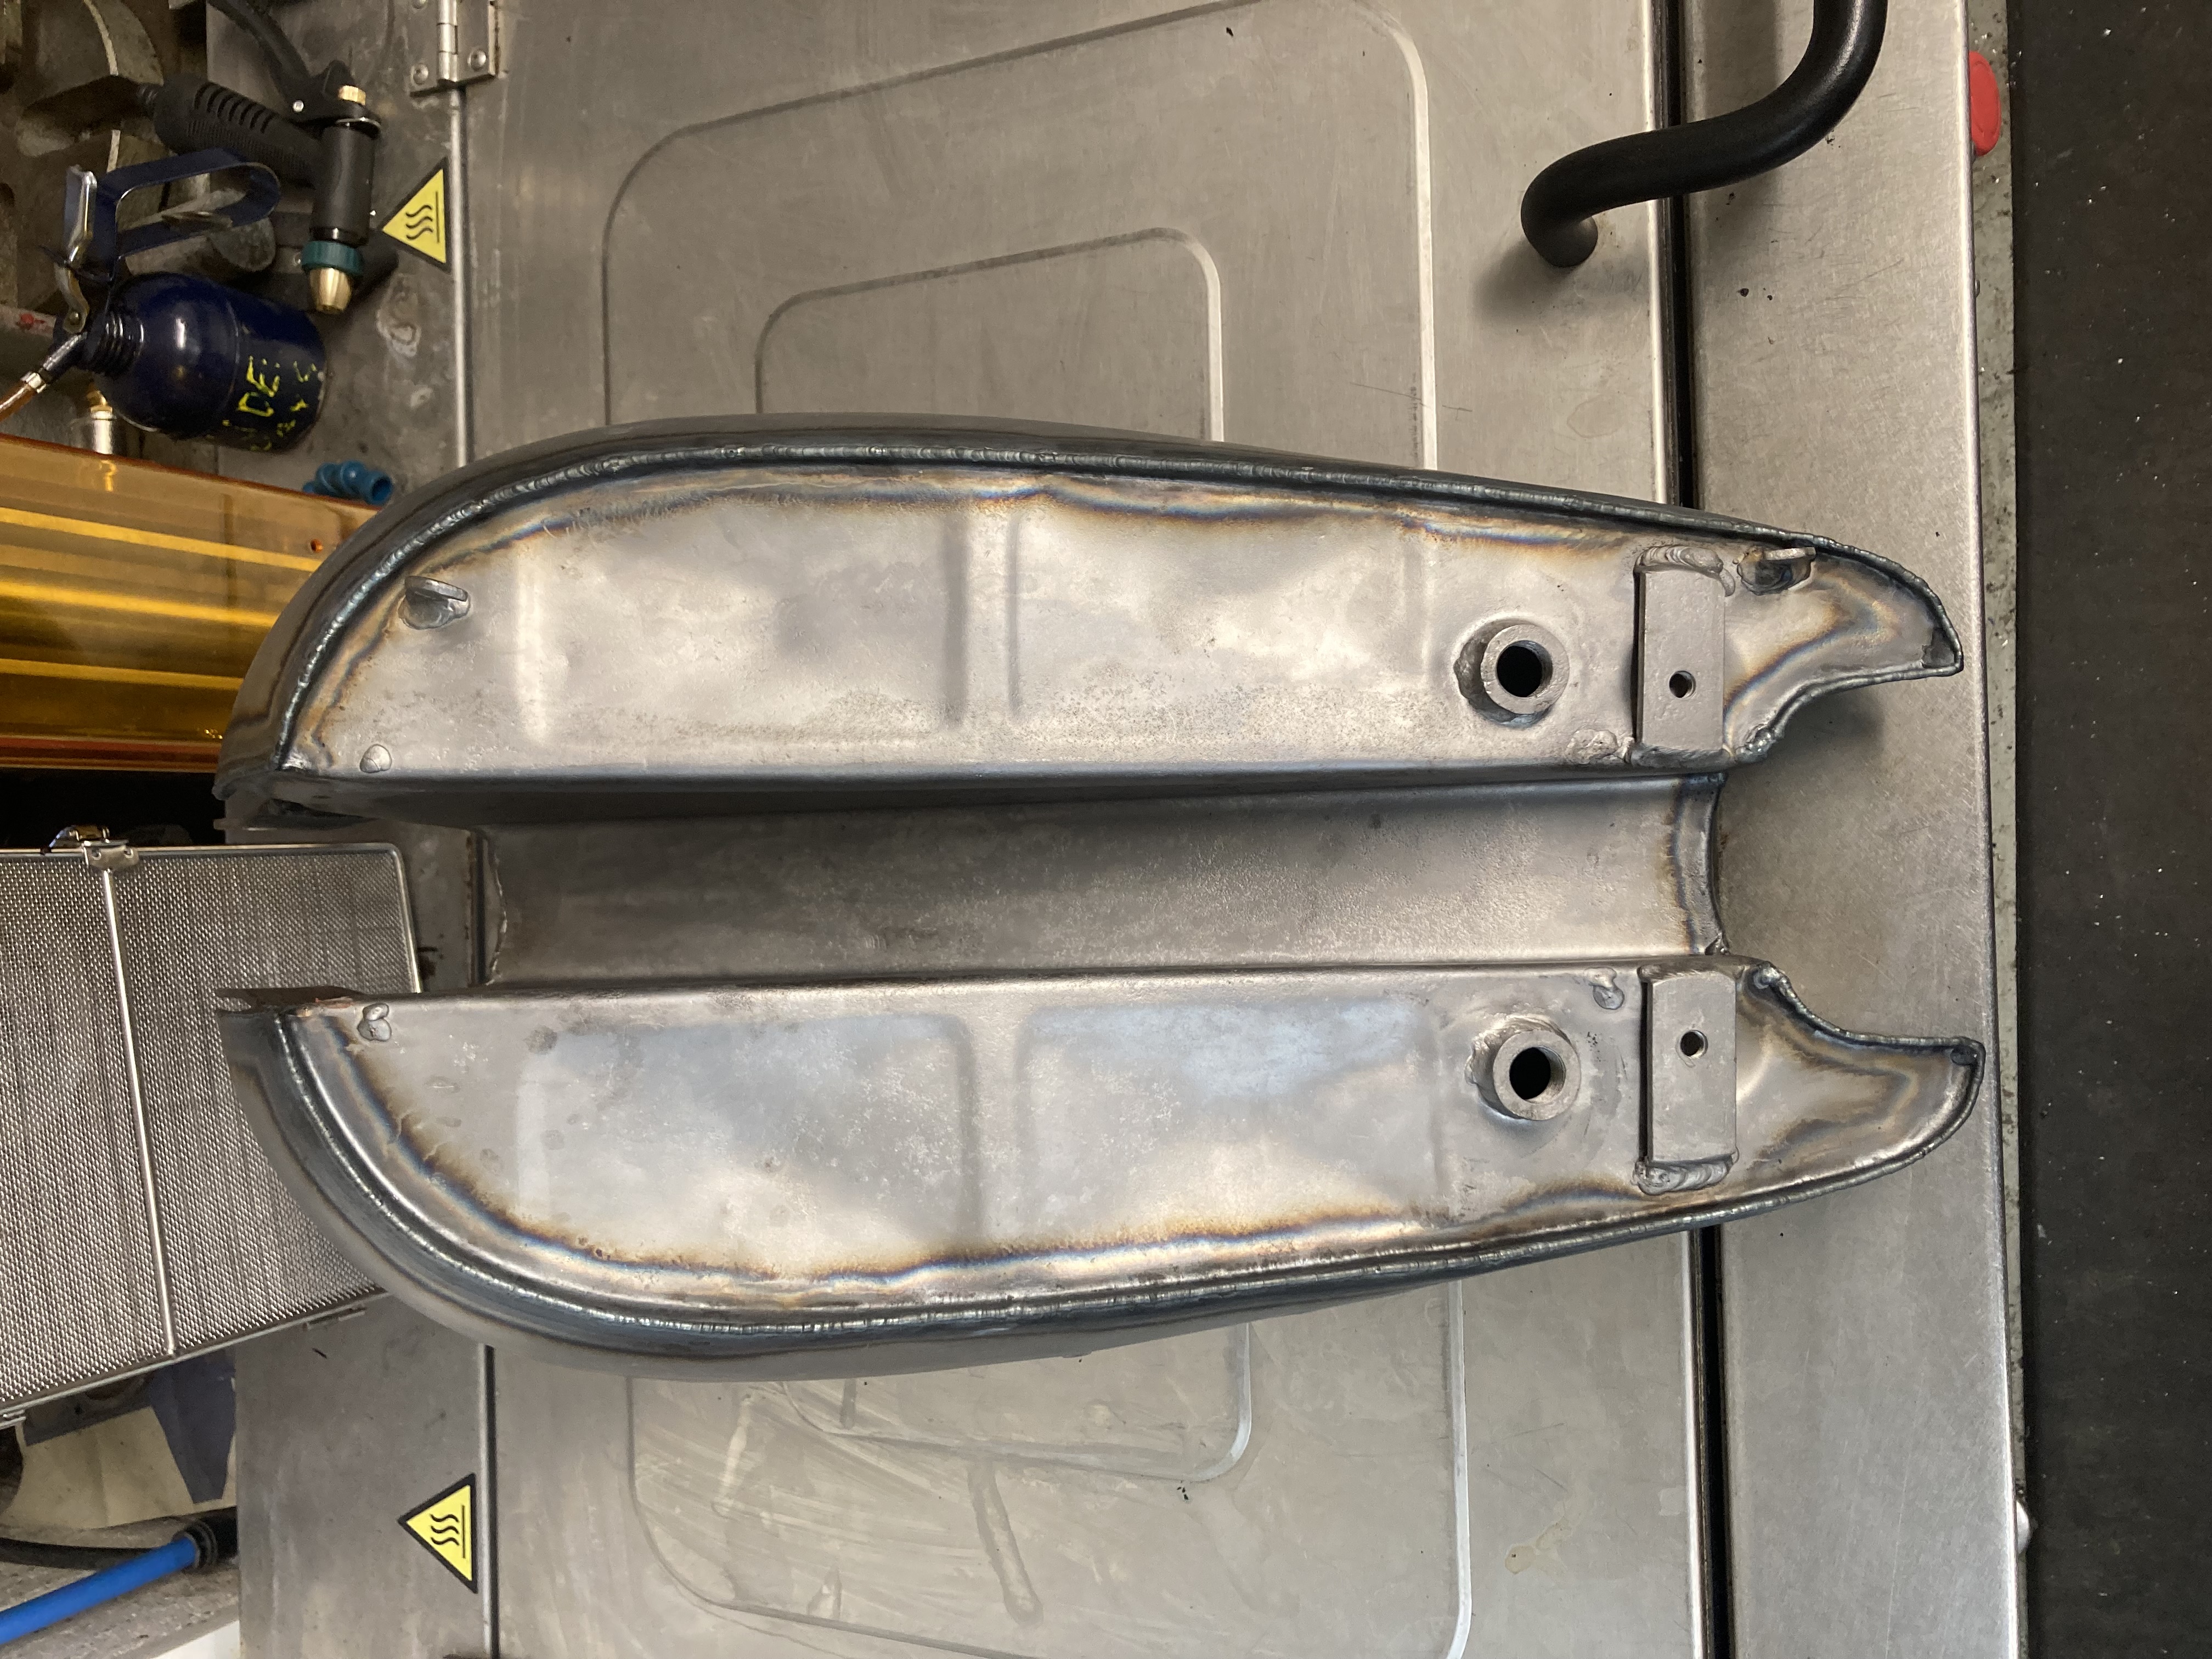
An old and beaten fuel tank cut open and given another beating.
Weld it up and paint it, and it should have an eighty year old period look.
Though I must admit that if I had an anvil and some dollies I might have done a better job.
Mark
email (option): pes.sales@btconnect.com
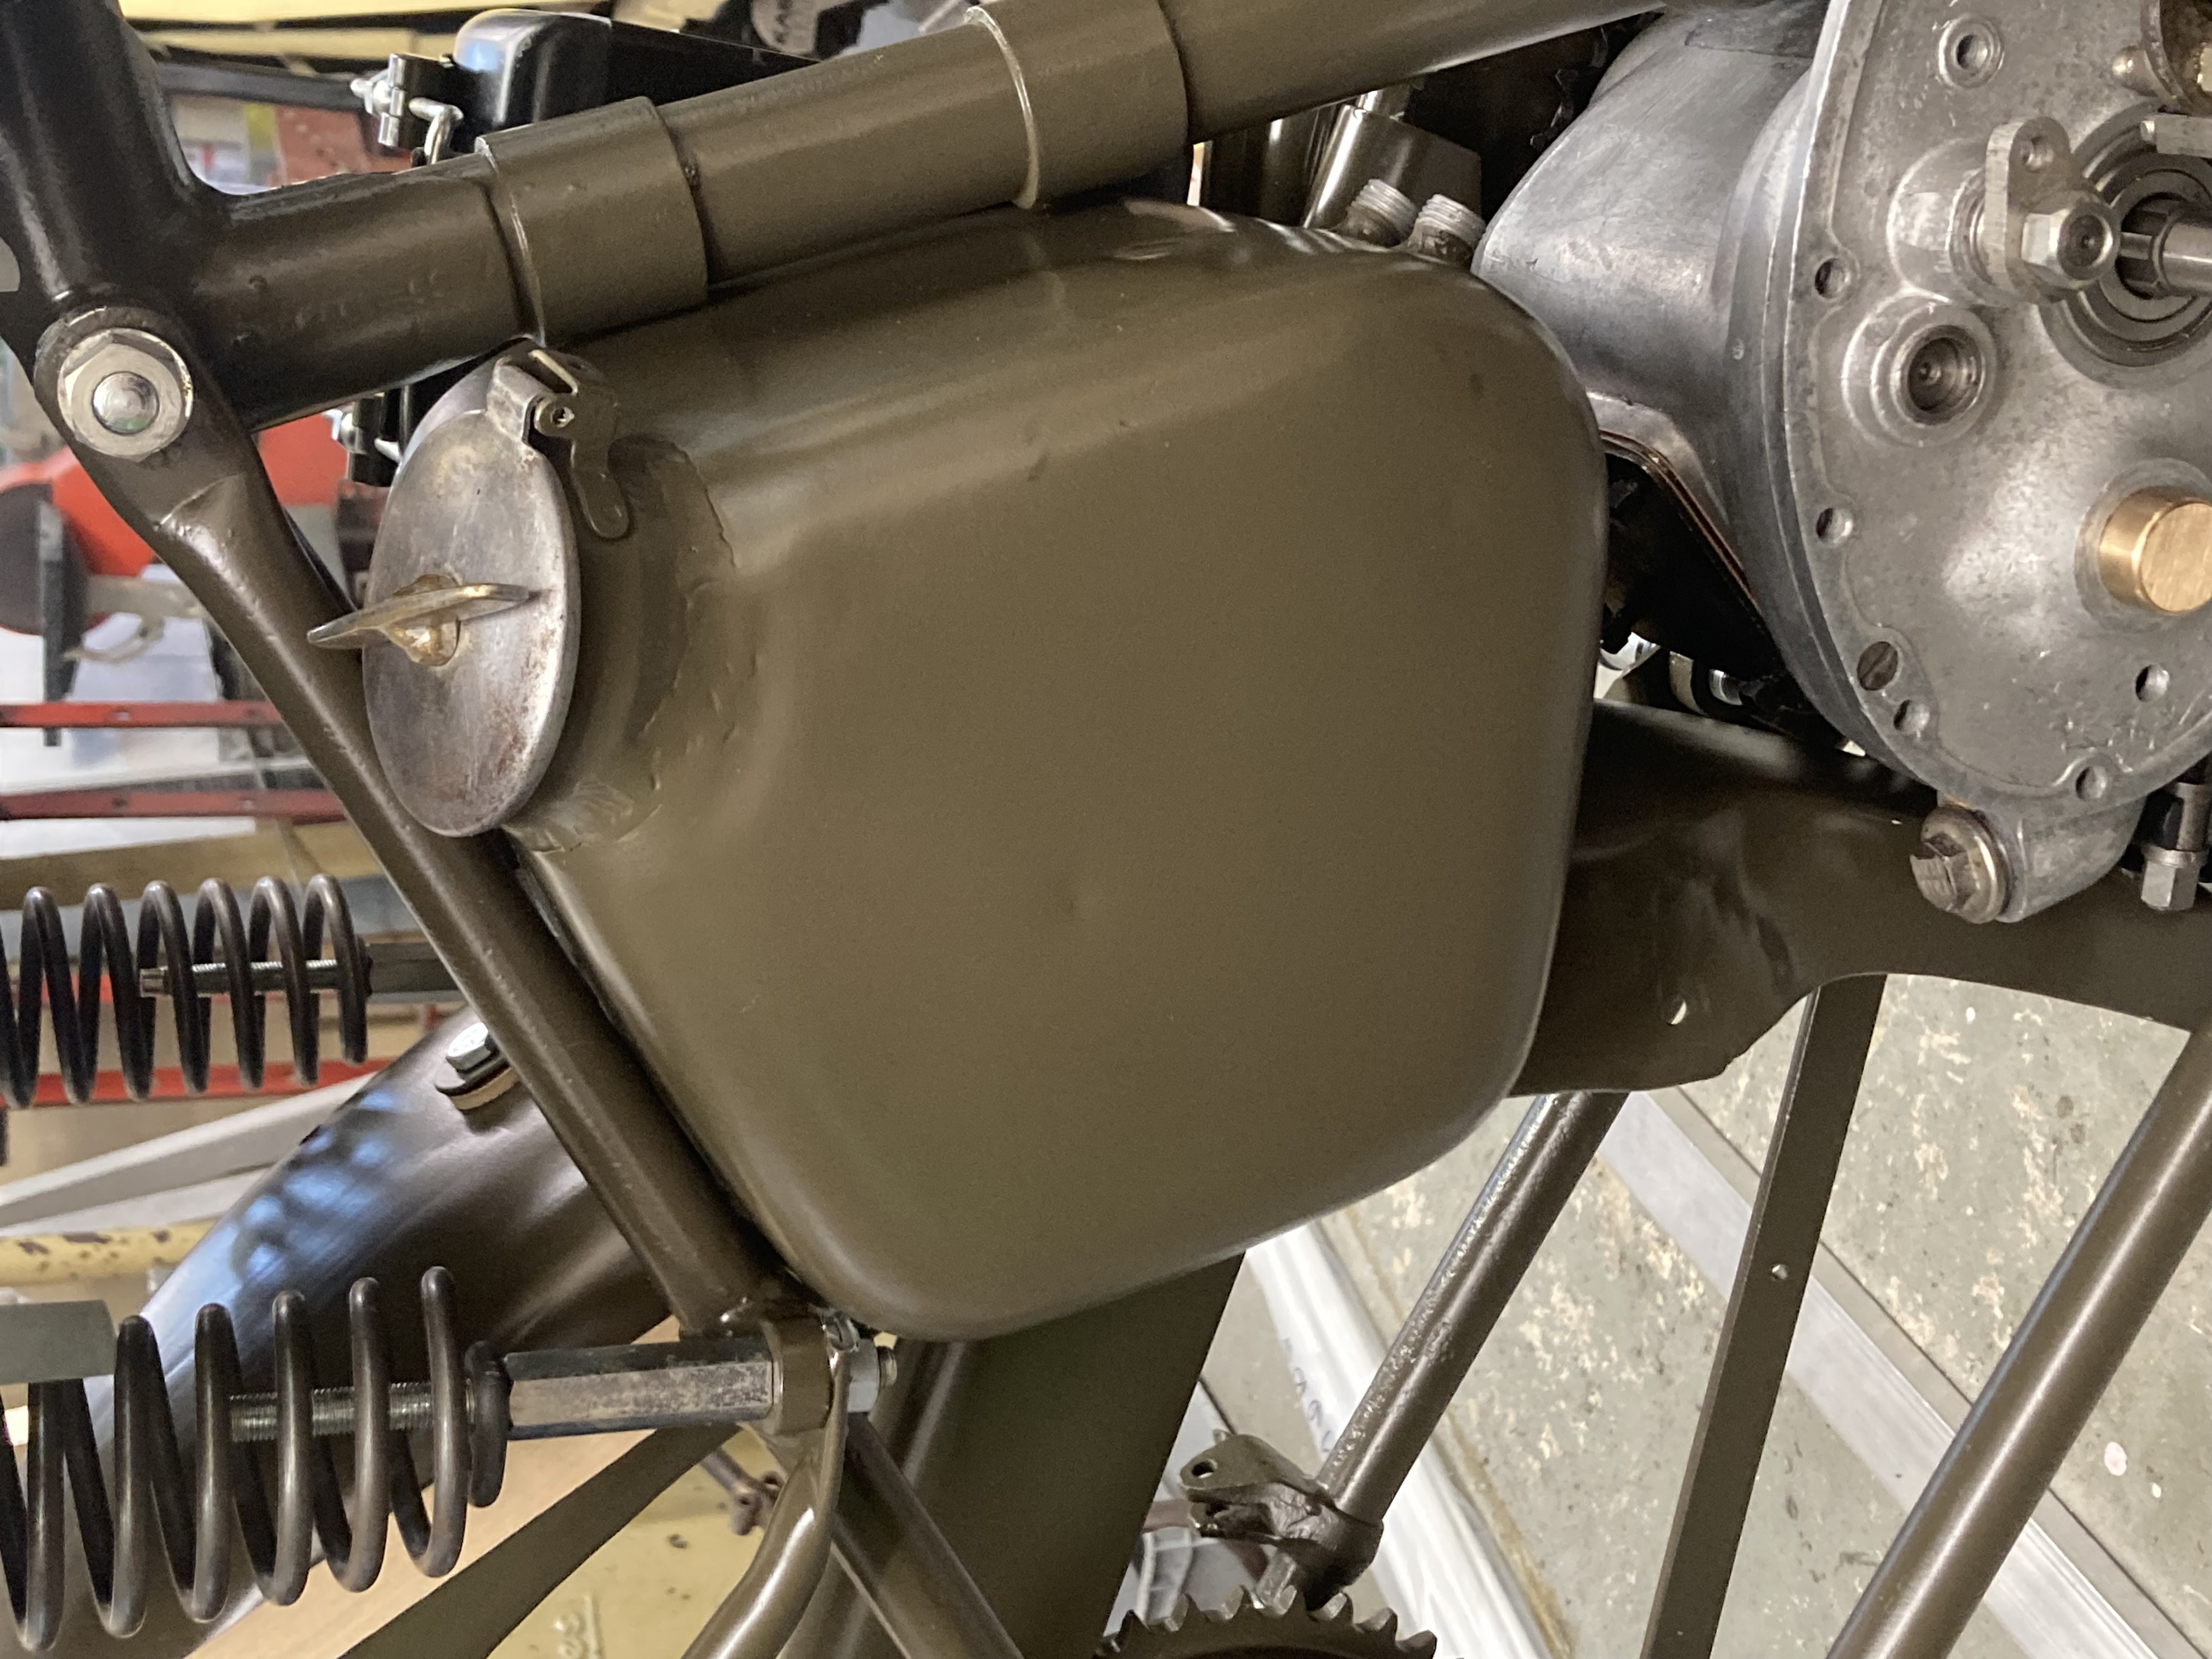
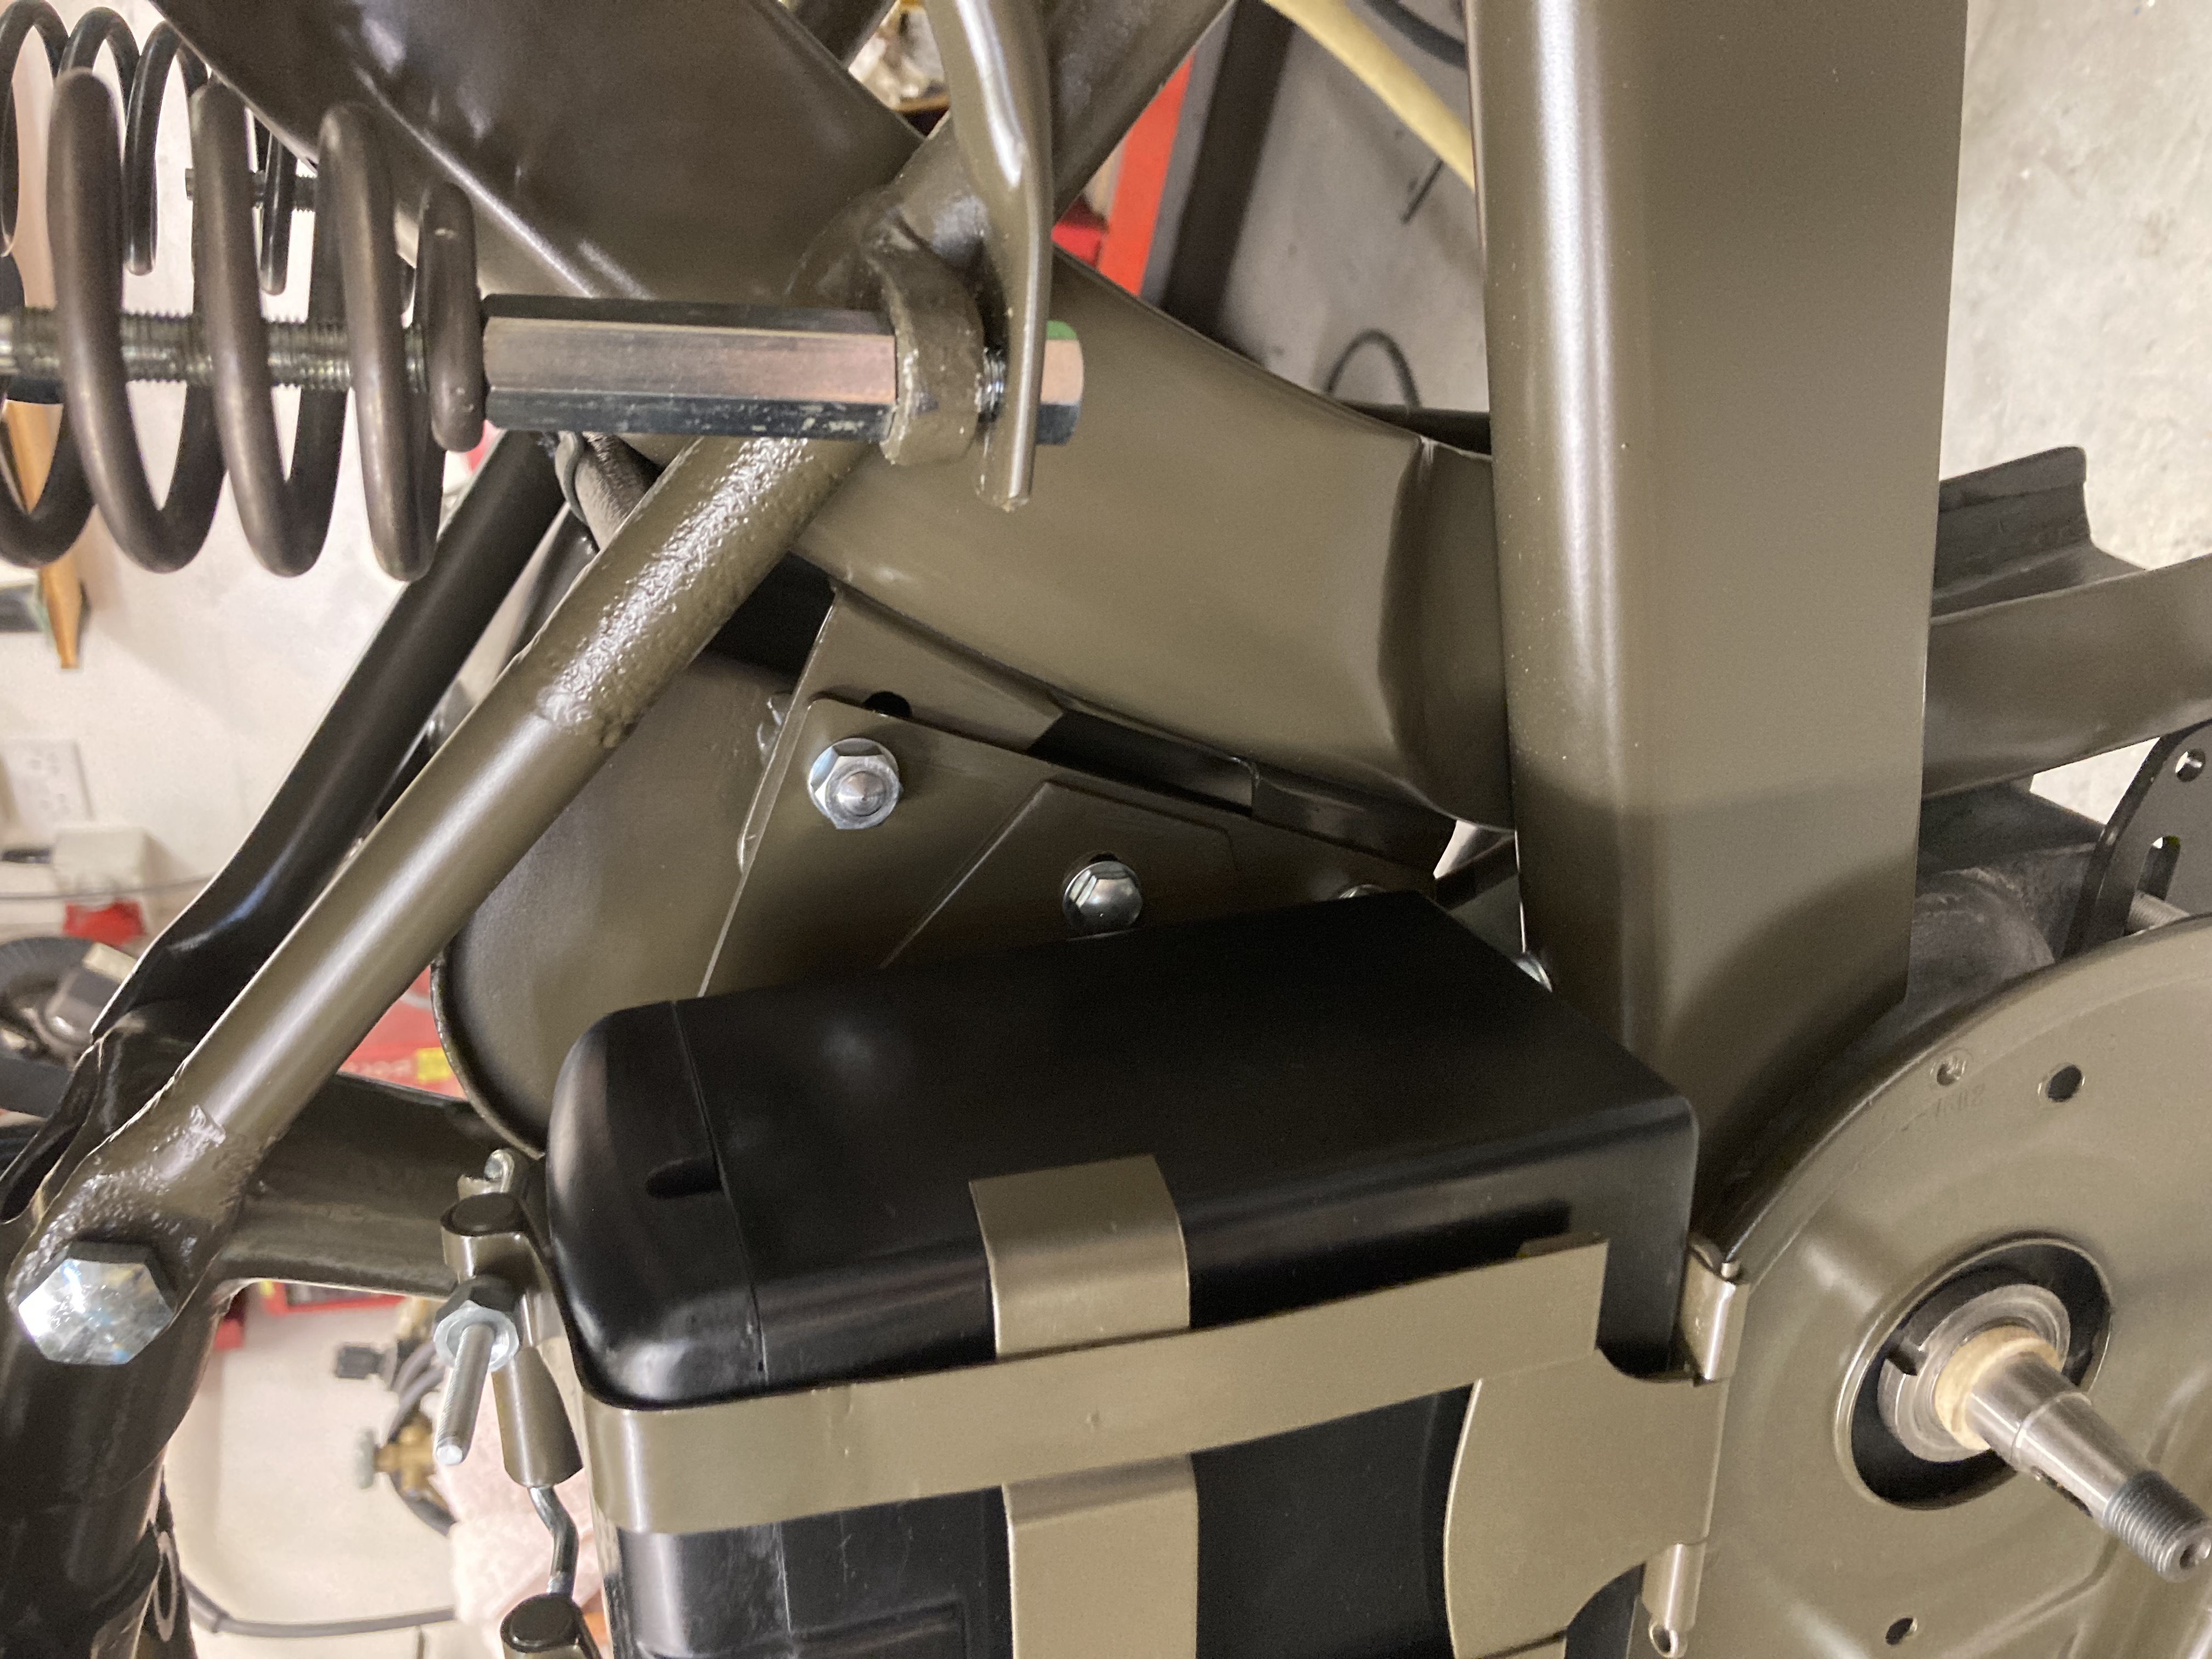
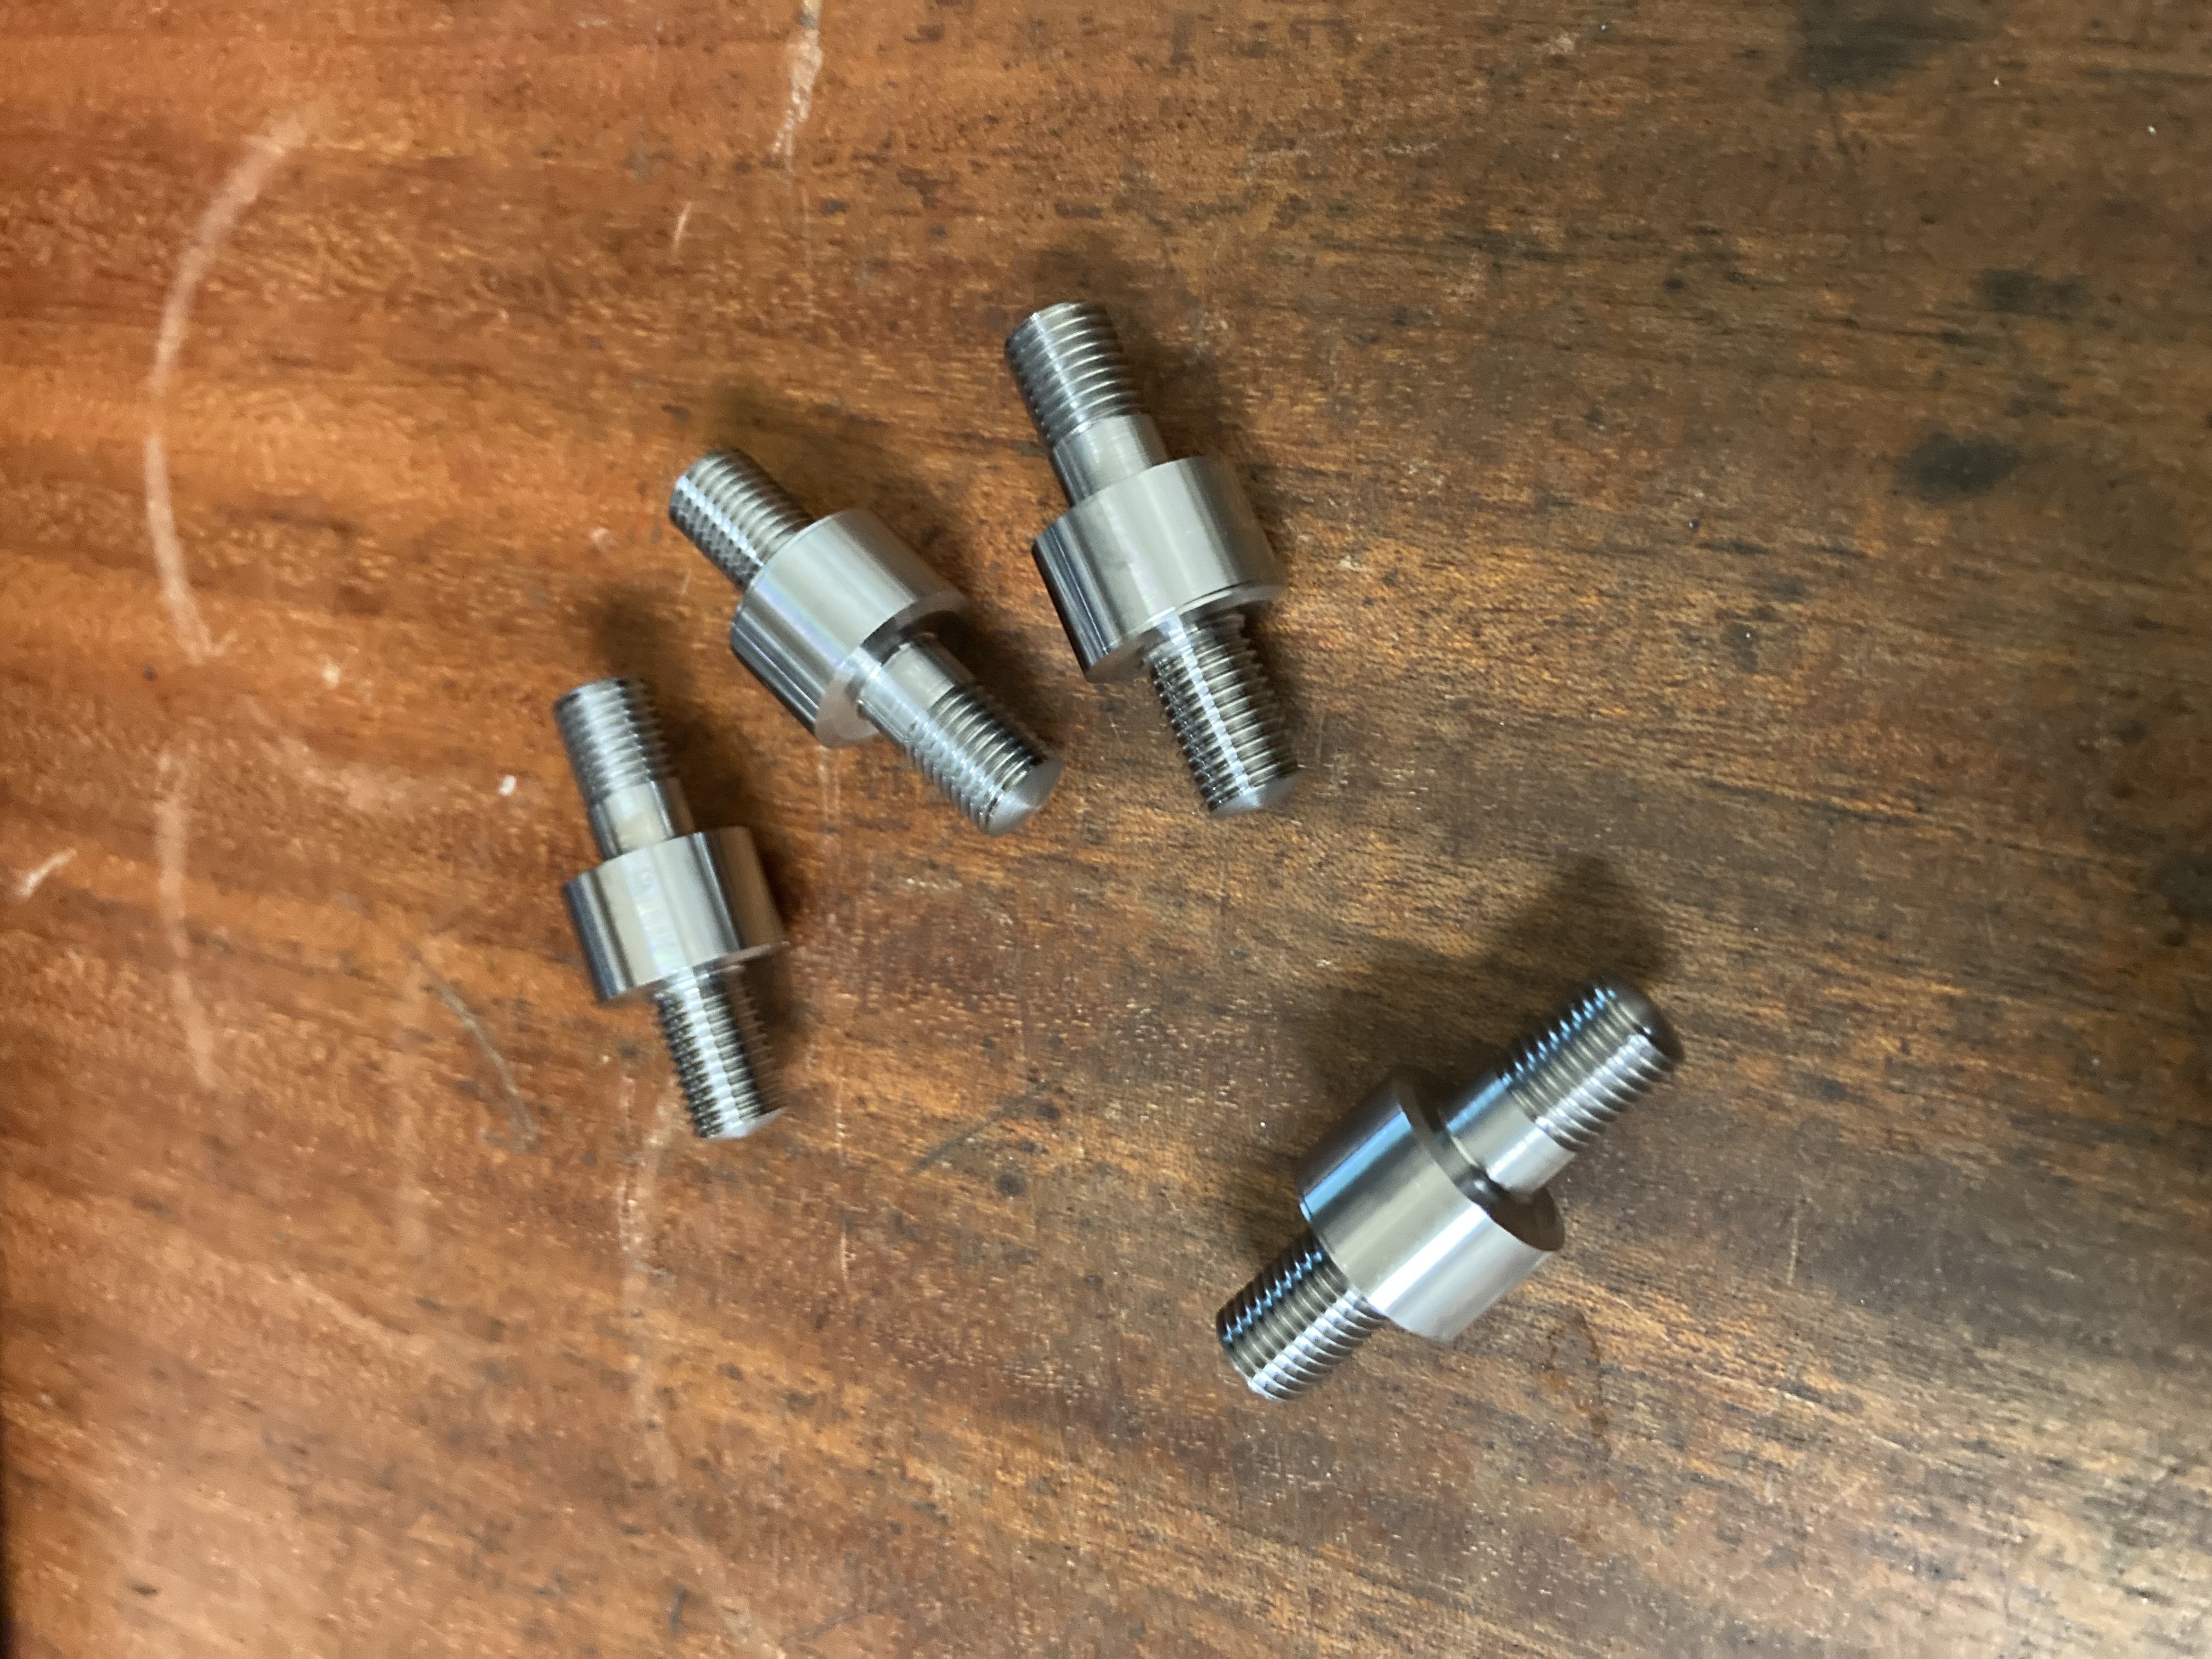
Oil tank fitted (Just) Ian was correct about the carrier mounting over rather than under the seat spring mounts. Clearance being the issue with the Oil tank. It won't take much to alter the carrier to fit the way I like it. Just a case of welding the holes up and re-drilling about a hole to the back. I had to file the slots in the Indian mudguard to allow the bolts/studs to go through.
After reading the late Rob Nortier's notes on oil tank fitting I decided to make his suggested combined studs and spacers. Only two are required as you can get the front spacer in without much trouble. Yes I know it's not original, but it's not stainless either! EN24T as it happens.
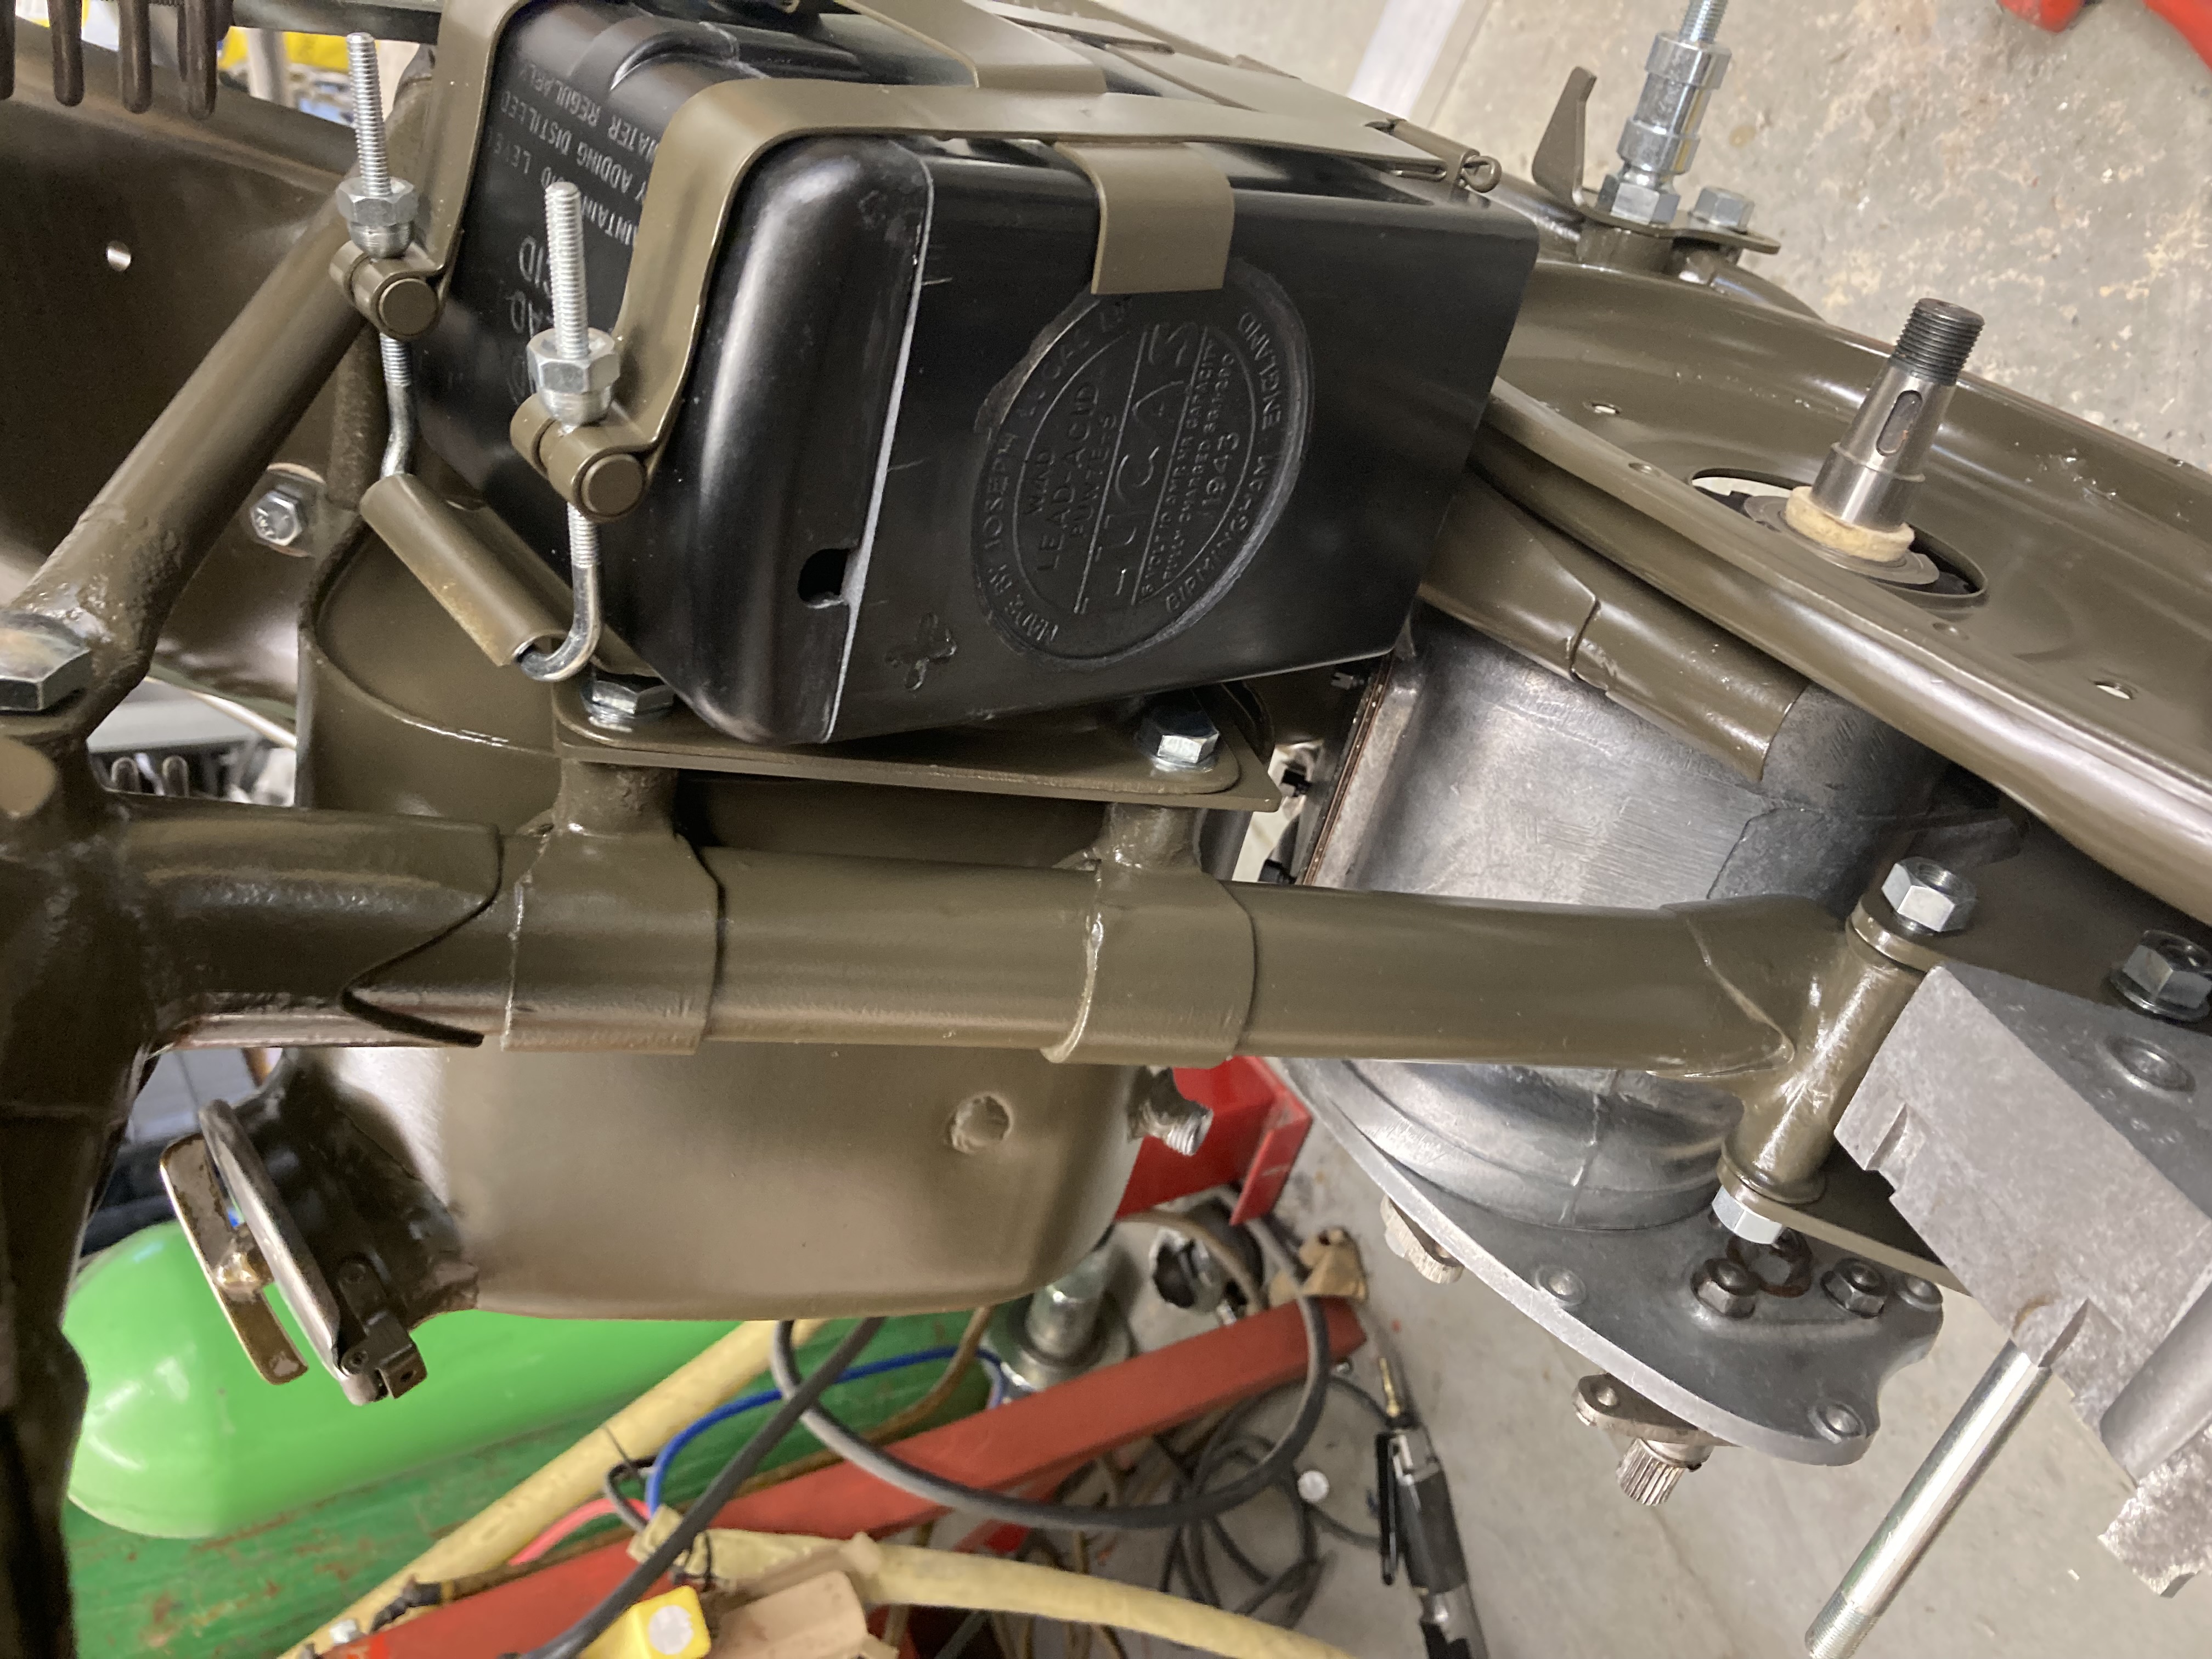
I also used an Indian Battery holder to hold one of Ron's cast plastic cases. It needed cutting down to fit the case. Still a little sloppy I'll line the holder with some sticky back edm foam rubber.
What a pain in the backside. The amount you have to do to adjust it's angle. These bikes were not designed to be serviced quickly.
I've shown a picture of the studs/spacers before the hexagon is machined on them. If there is any interest I'll put them on the PES website.
Mark
email (option): pes.sales@btconnect.com
I'm spoiling your day again...sorry...The battery carrier 'U' stud is fitted upside down....Very brave of you to cut up the petrol tank...Ian
email (option): ian@wright52.plus.com
Not a problem Ian, guidance is good. I don't think I've claimed I know what I'm doing.
I forgot about the tank, it's glued together now and doesn't leak.
Mark
email (option): pes.sales@btconnect.com
The Tease,
I'm sure those of you that have been here many times know that when it looks 90% there, you've only done 10% of the work.
I hope this is not the case this time, but it does seem to be getting harder now.
The rear wheel has been out far too many times.
Hopefully Monday it will look like a bike that might run.
Still waiting for some tooling from Switzerland so I expect I can blame the Swiss for my delays. (should have ordered the tooling earlier)
Mark
email (option): pes.sales@btconnect.com
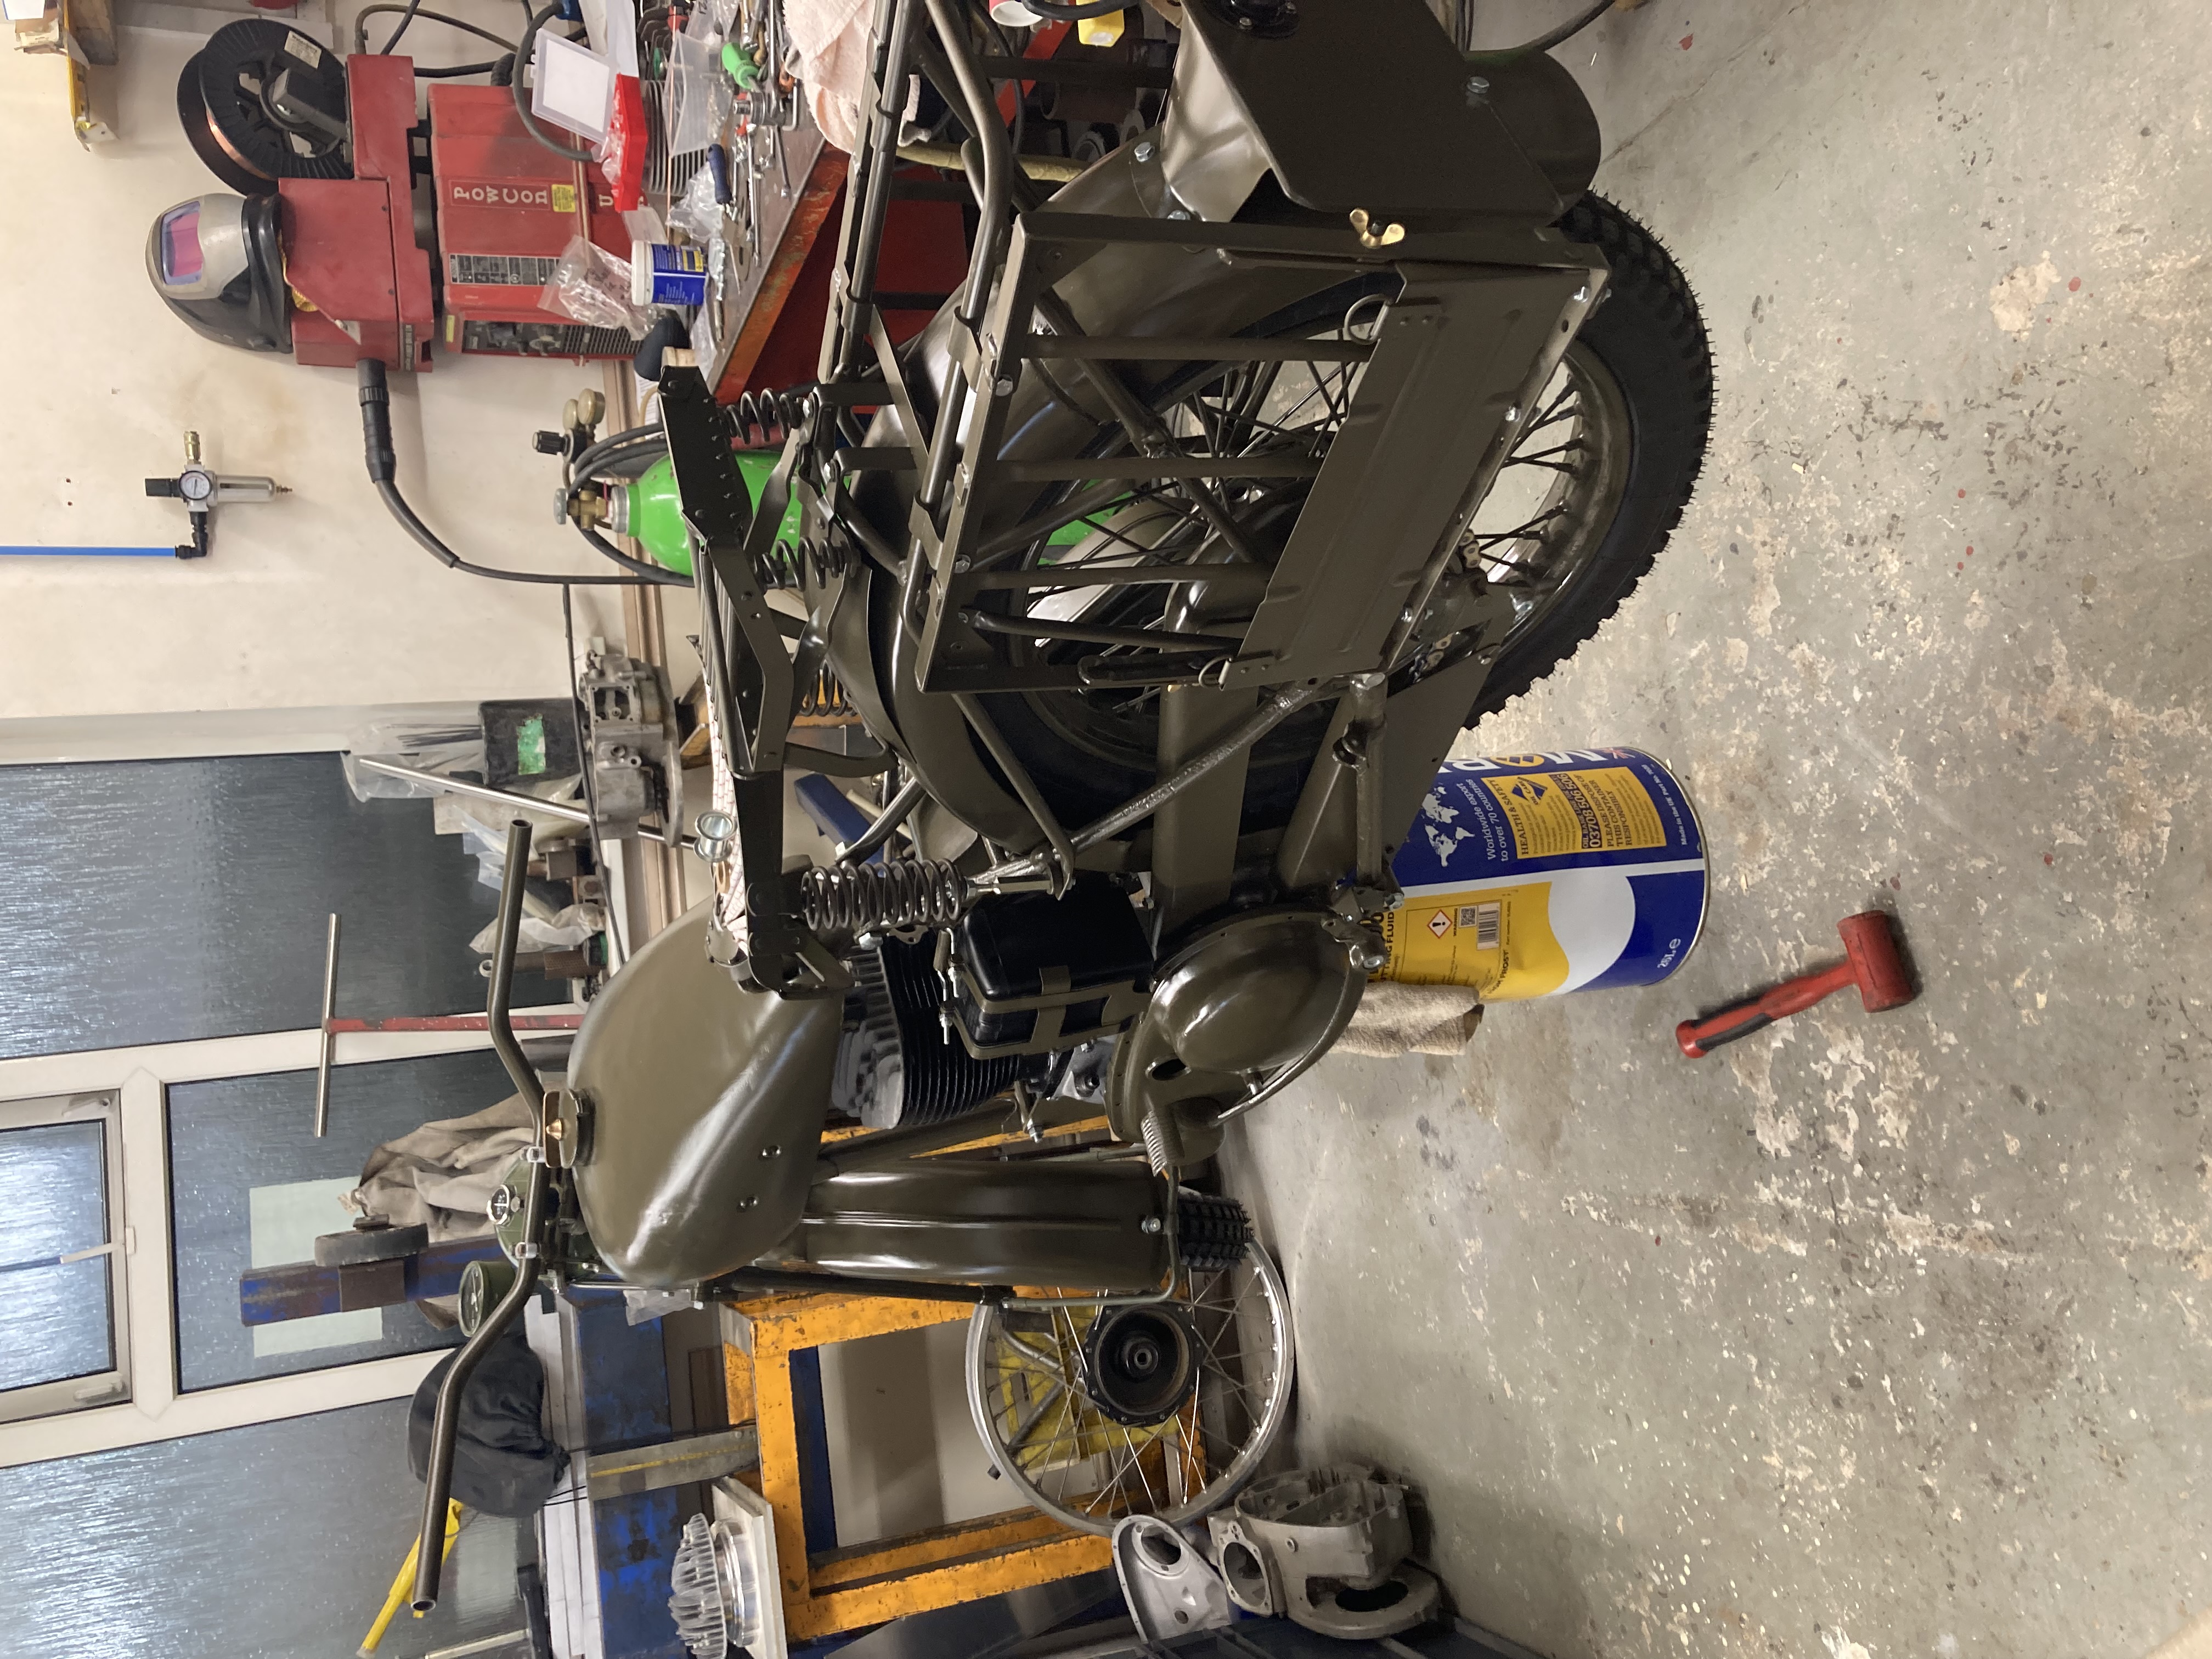
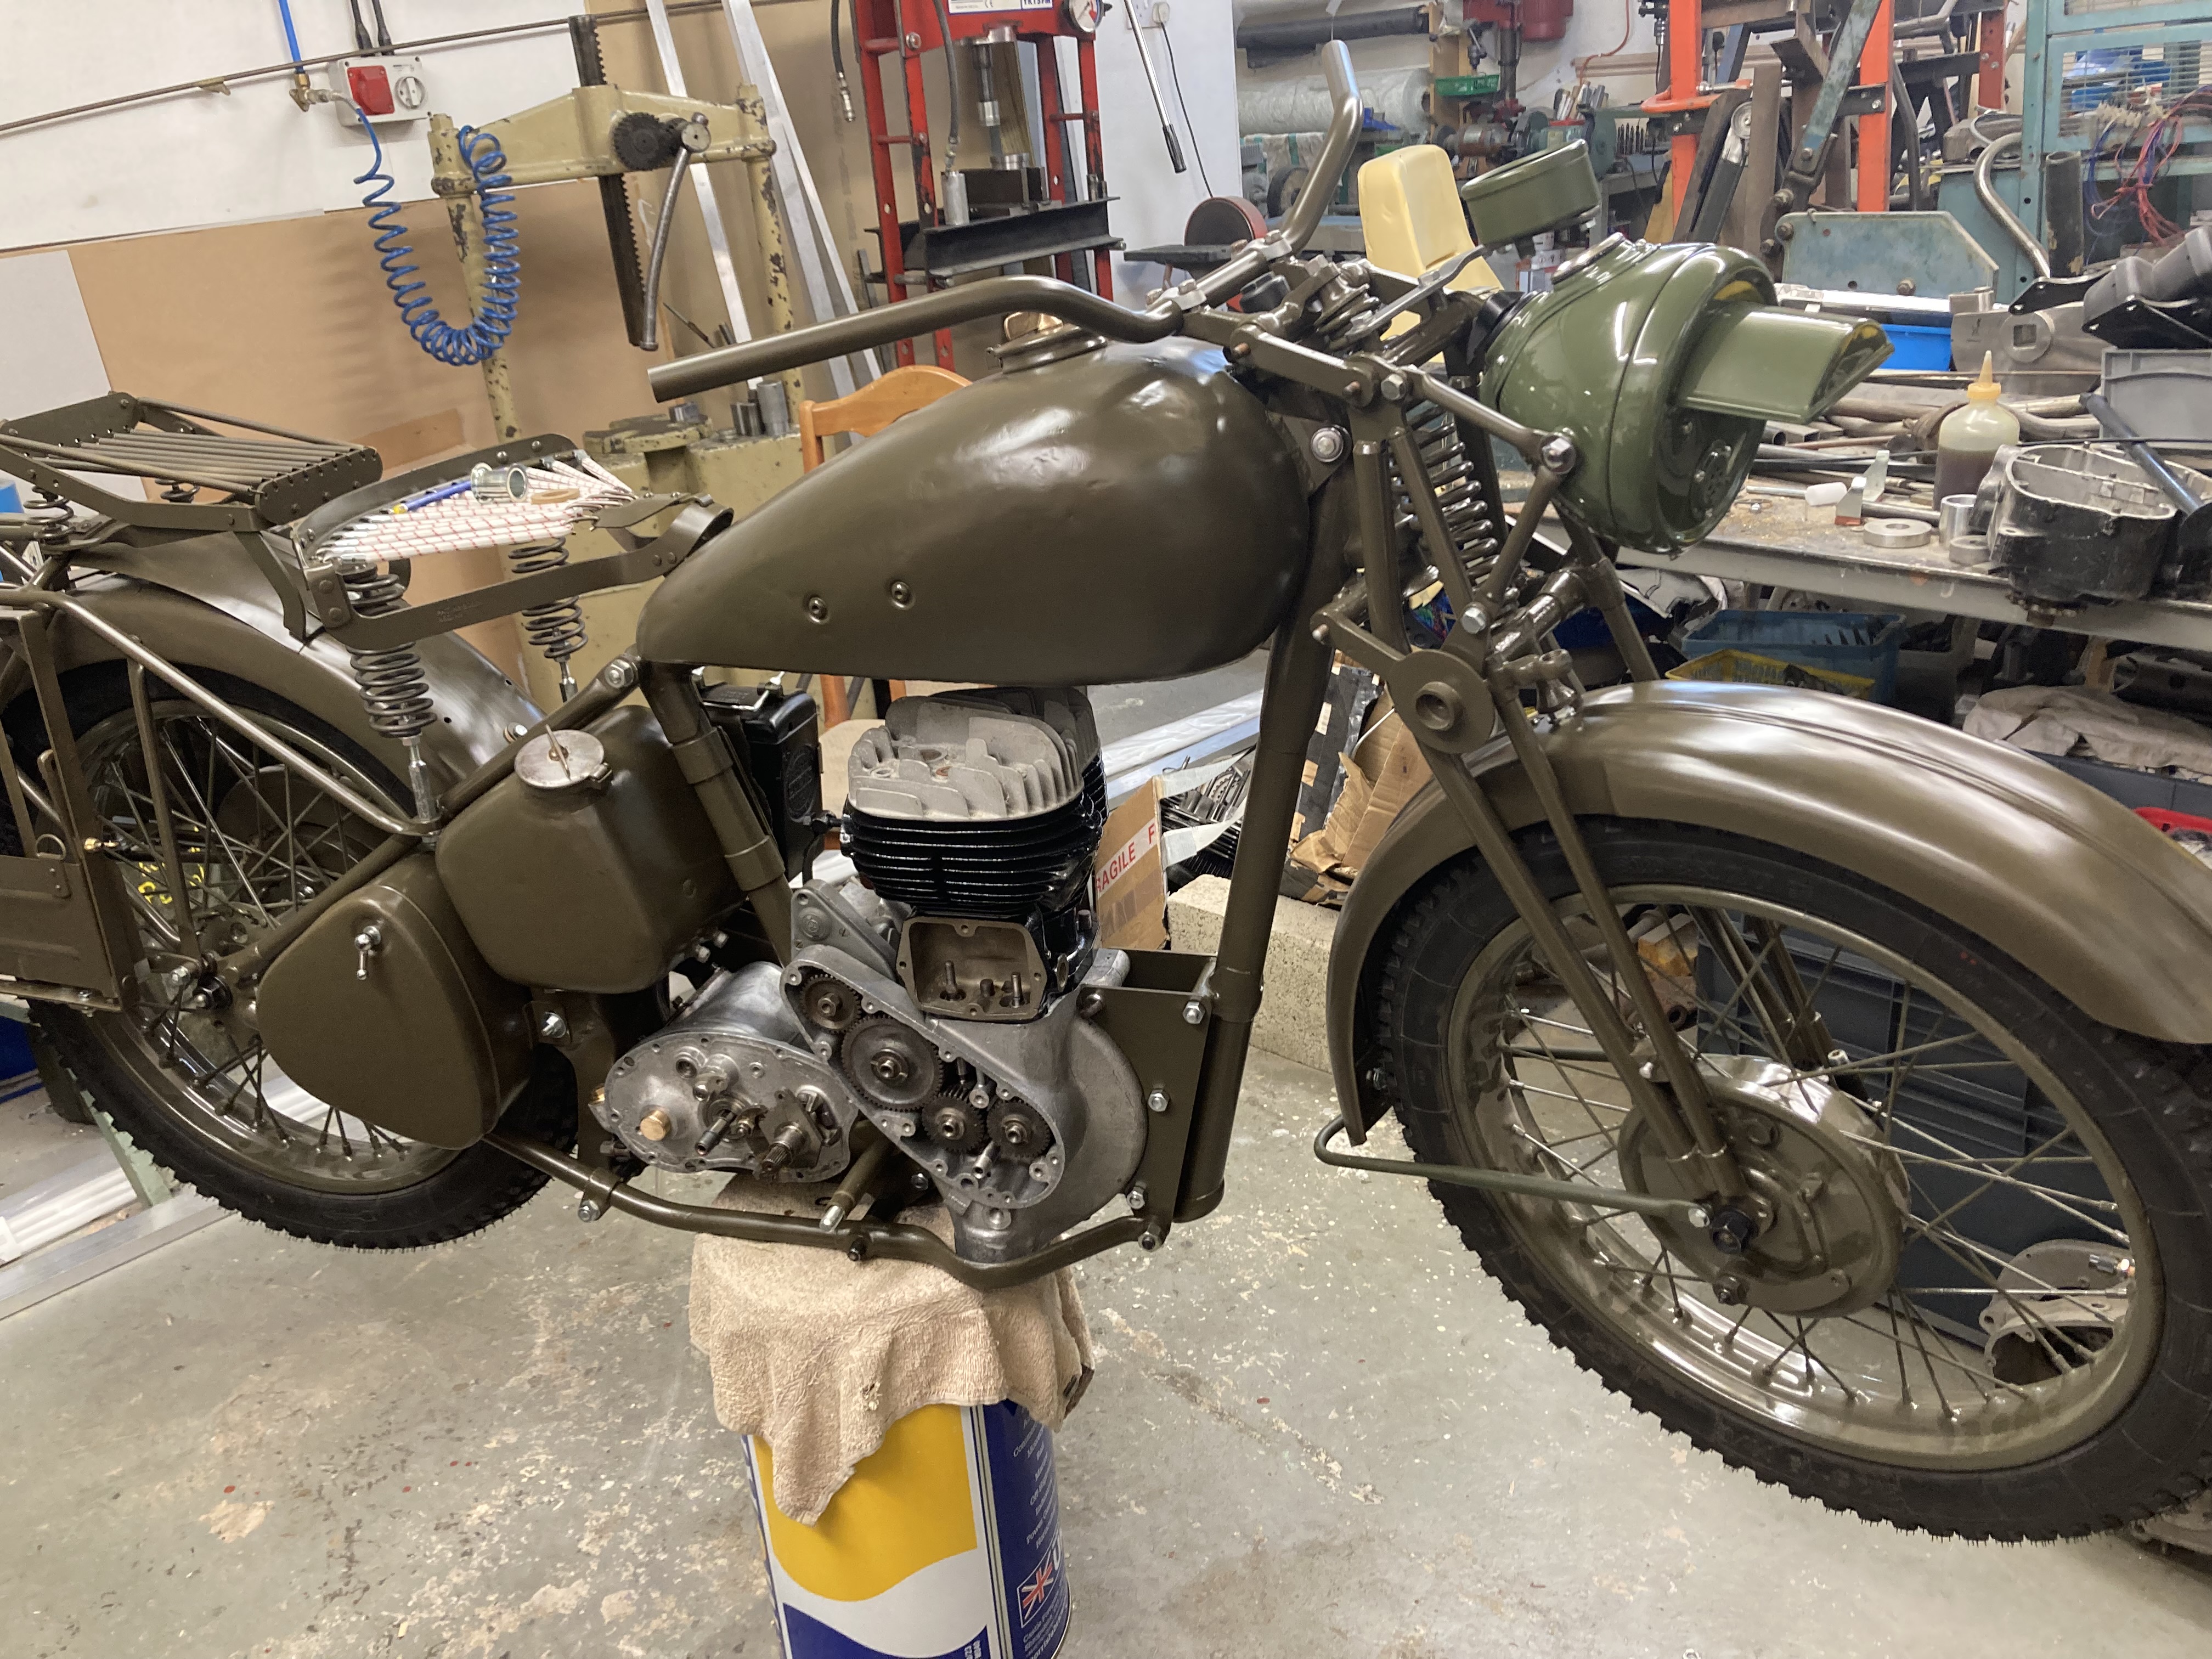
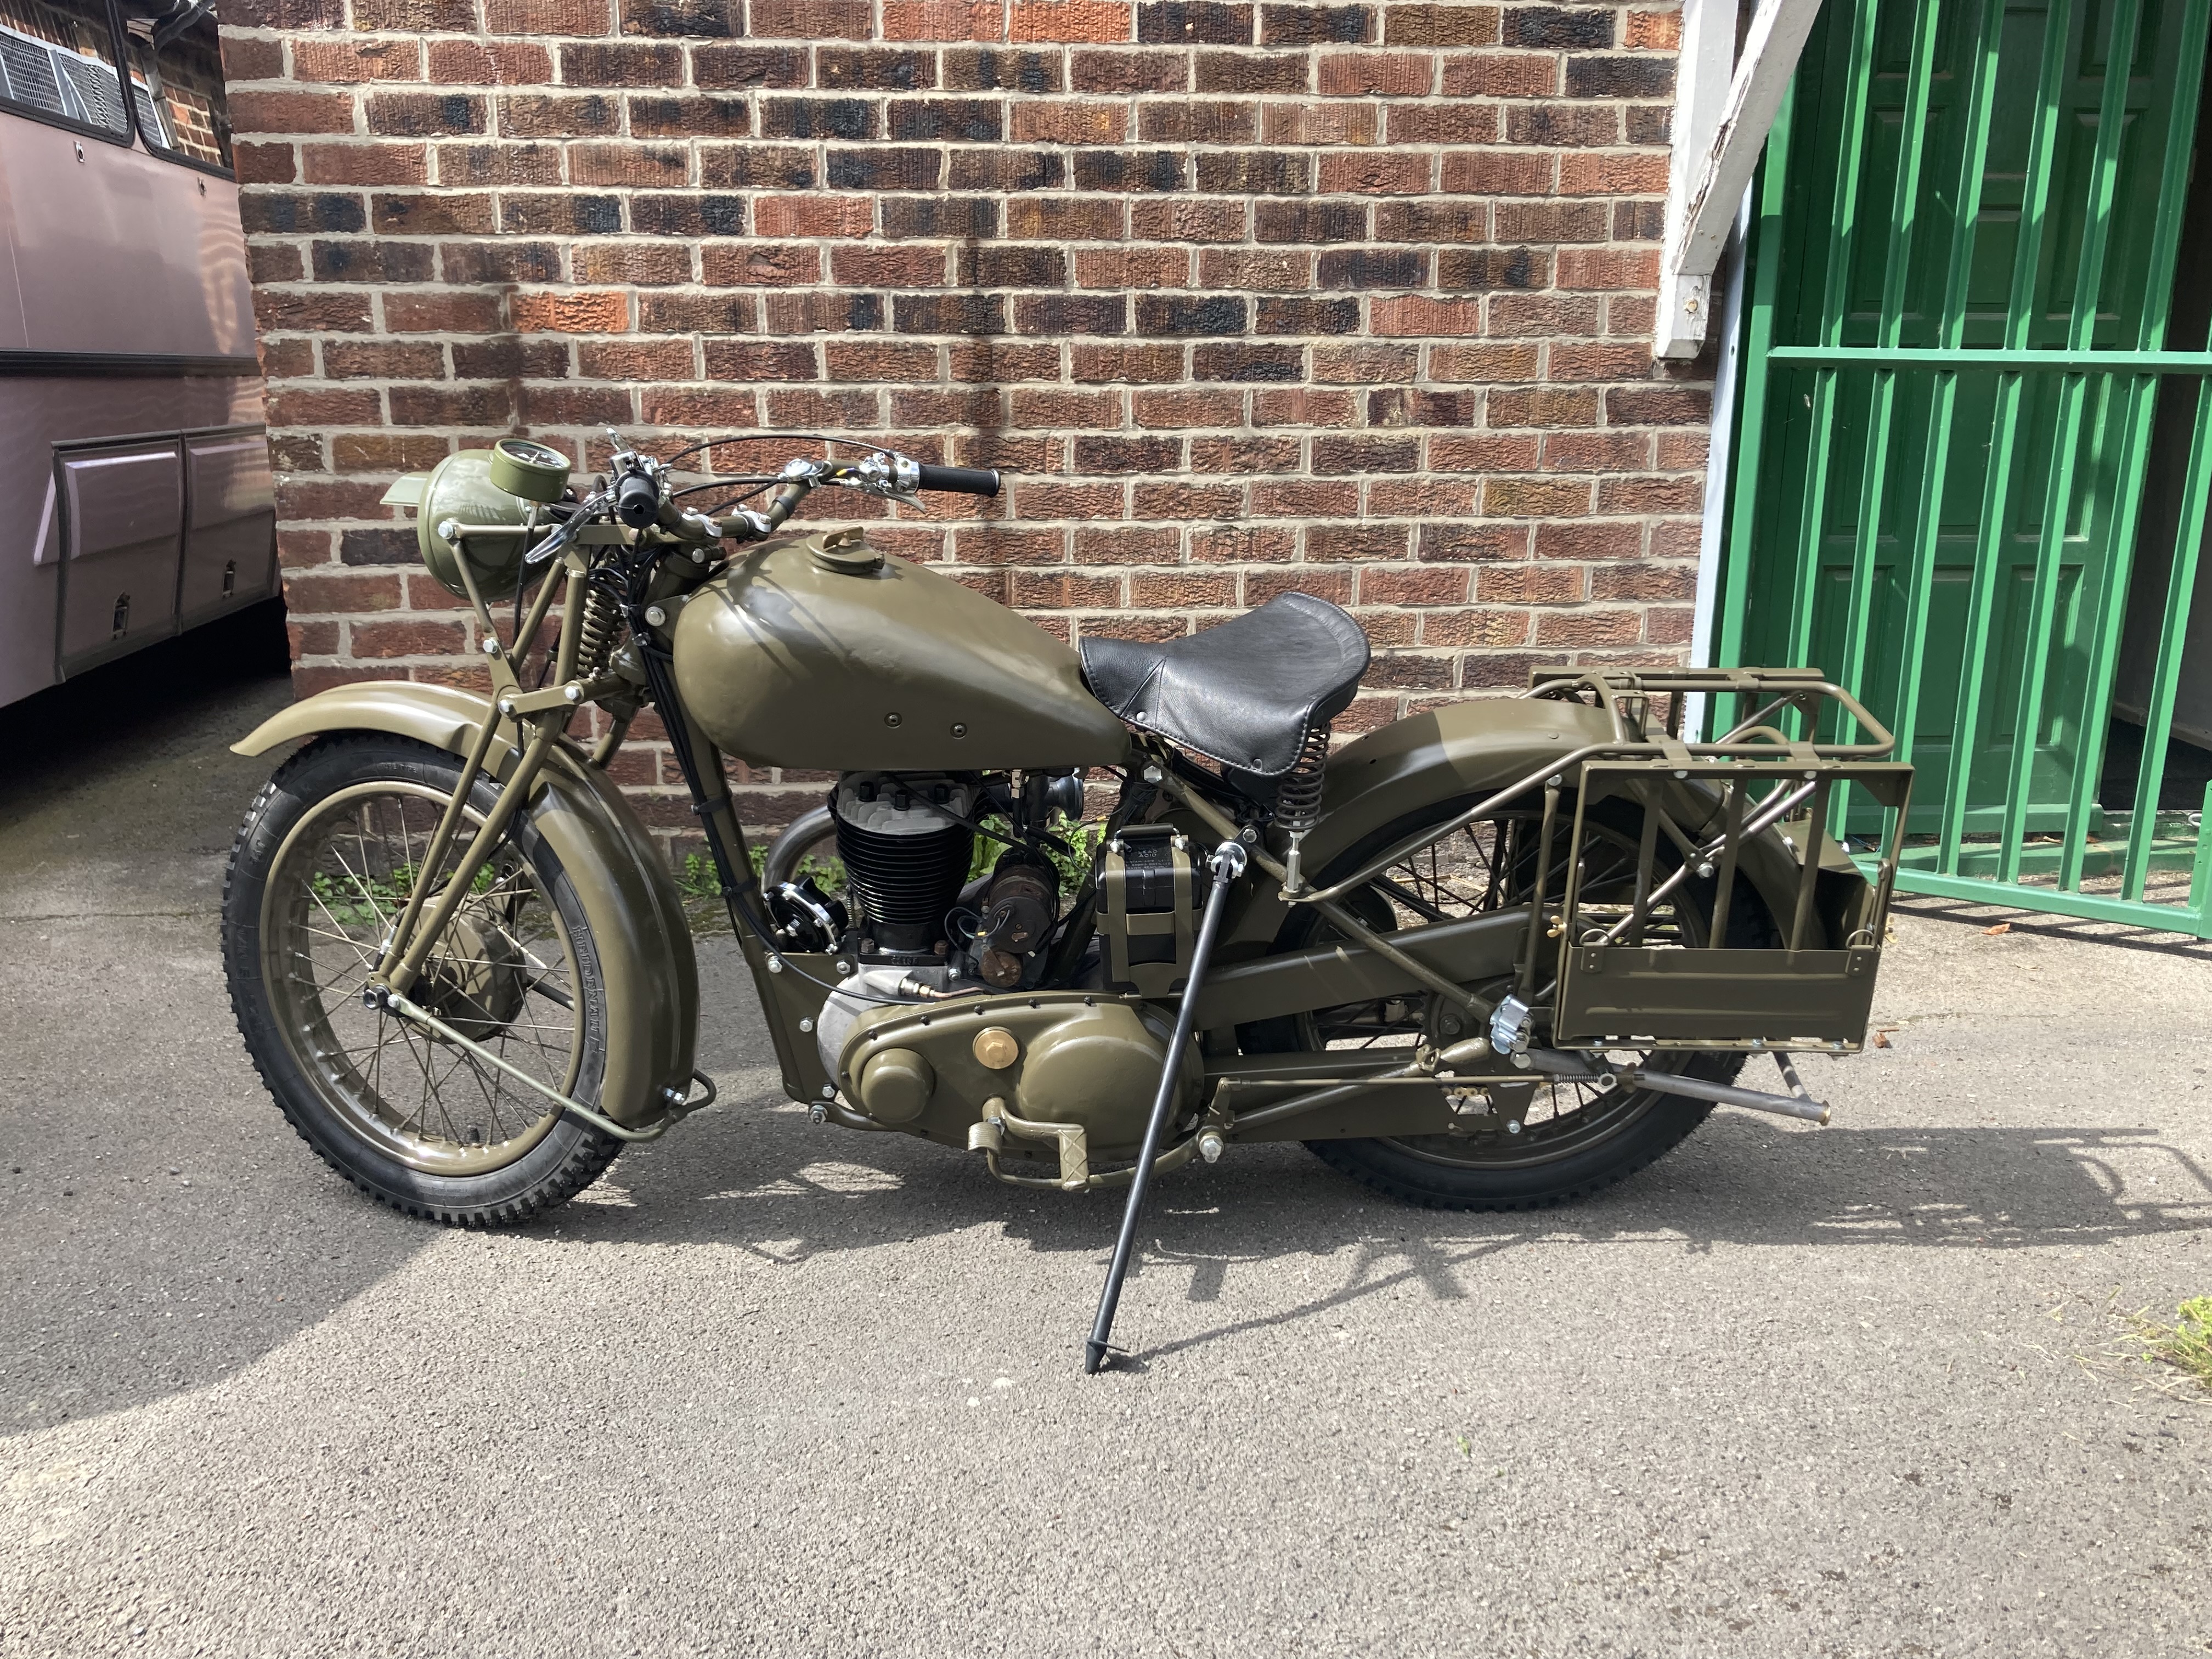
I still want to spend about three more days on it, but this is most of the parts fitted.
Some parts I also forgot to paint, or other bits want repainting.
Pillion foot pegs I will make, and it looks like one needs to be longer than the other?
I purchased to Hair and latex padding for the seats, but it compresses to next to nothing.
I'm sure I remember it being a firm fibrous material.
Some of the cable runs I'm not pleased with so I suspect I'll make new cables.
What's peoples thoughts over doing away with the choke mechanism and lever, I can't remember them being such a pain to set up.
This has been a long journey, and I'm disappointed it won't be riding in the Netherlands at the alternative BSA International.
Mark
email (option): pes.sales@btconnect.com
hi just asking , where did you get your tires from, regards peter
email (option): 2e0prp@gmail.com
I think we just did a google search until the best offer was found Peter.
Mark
email (option): pes.sales@btconnect.com
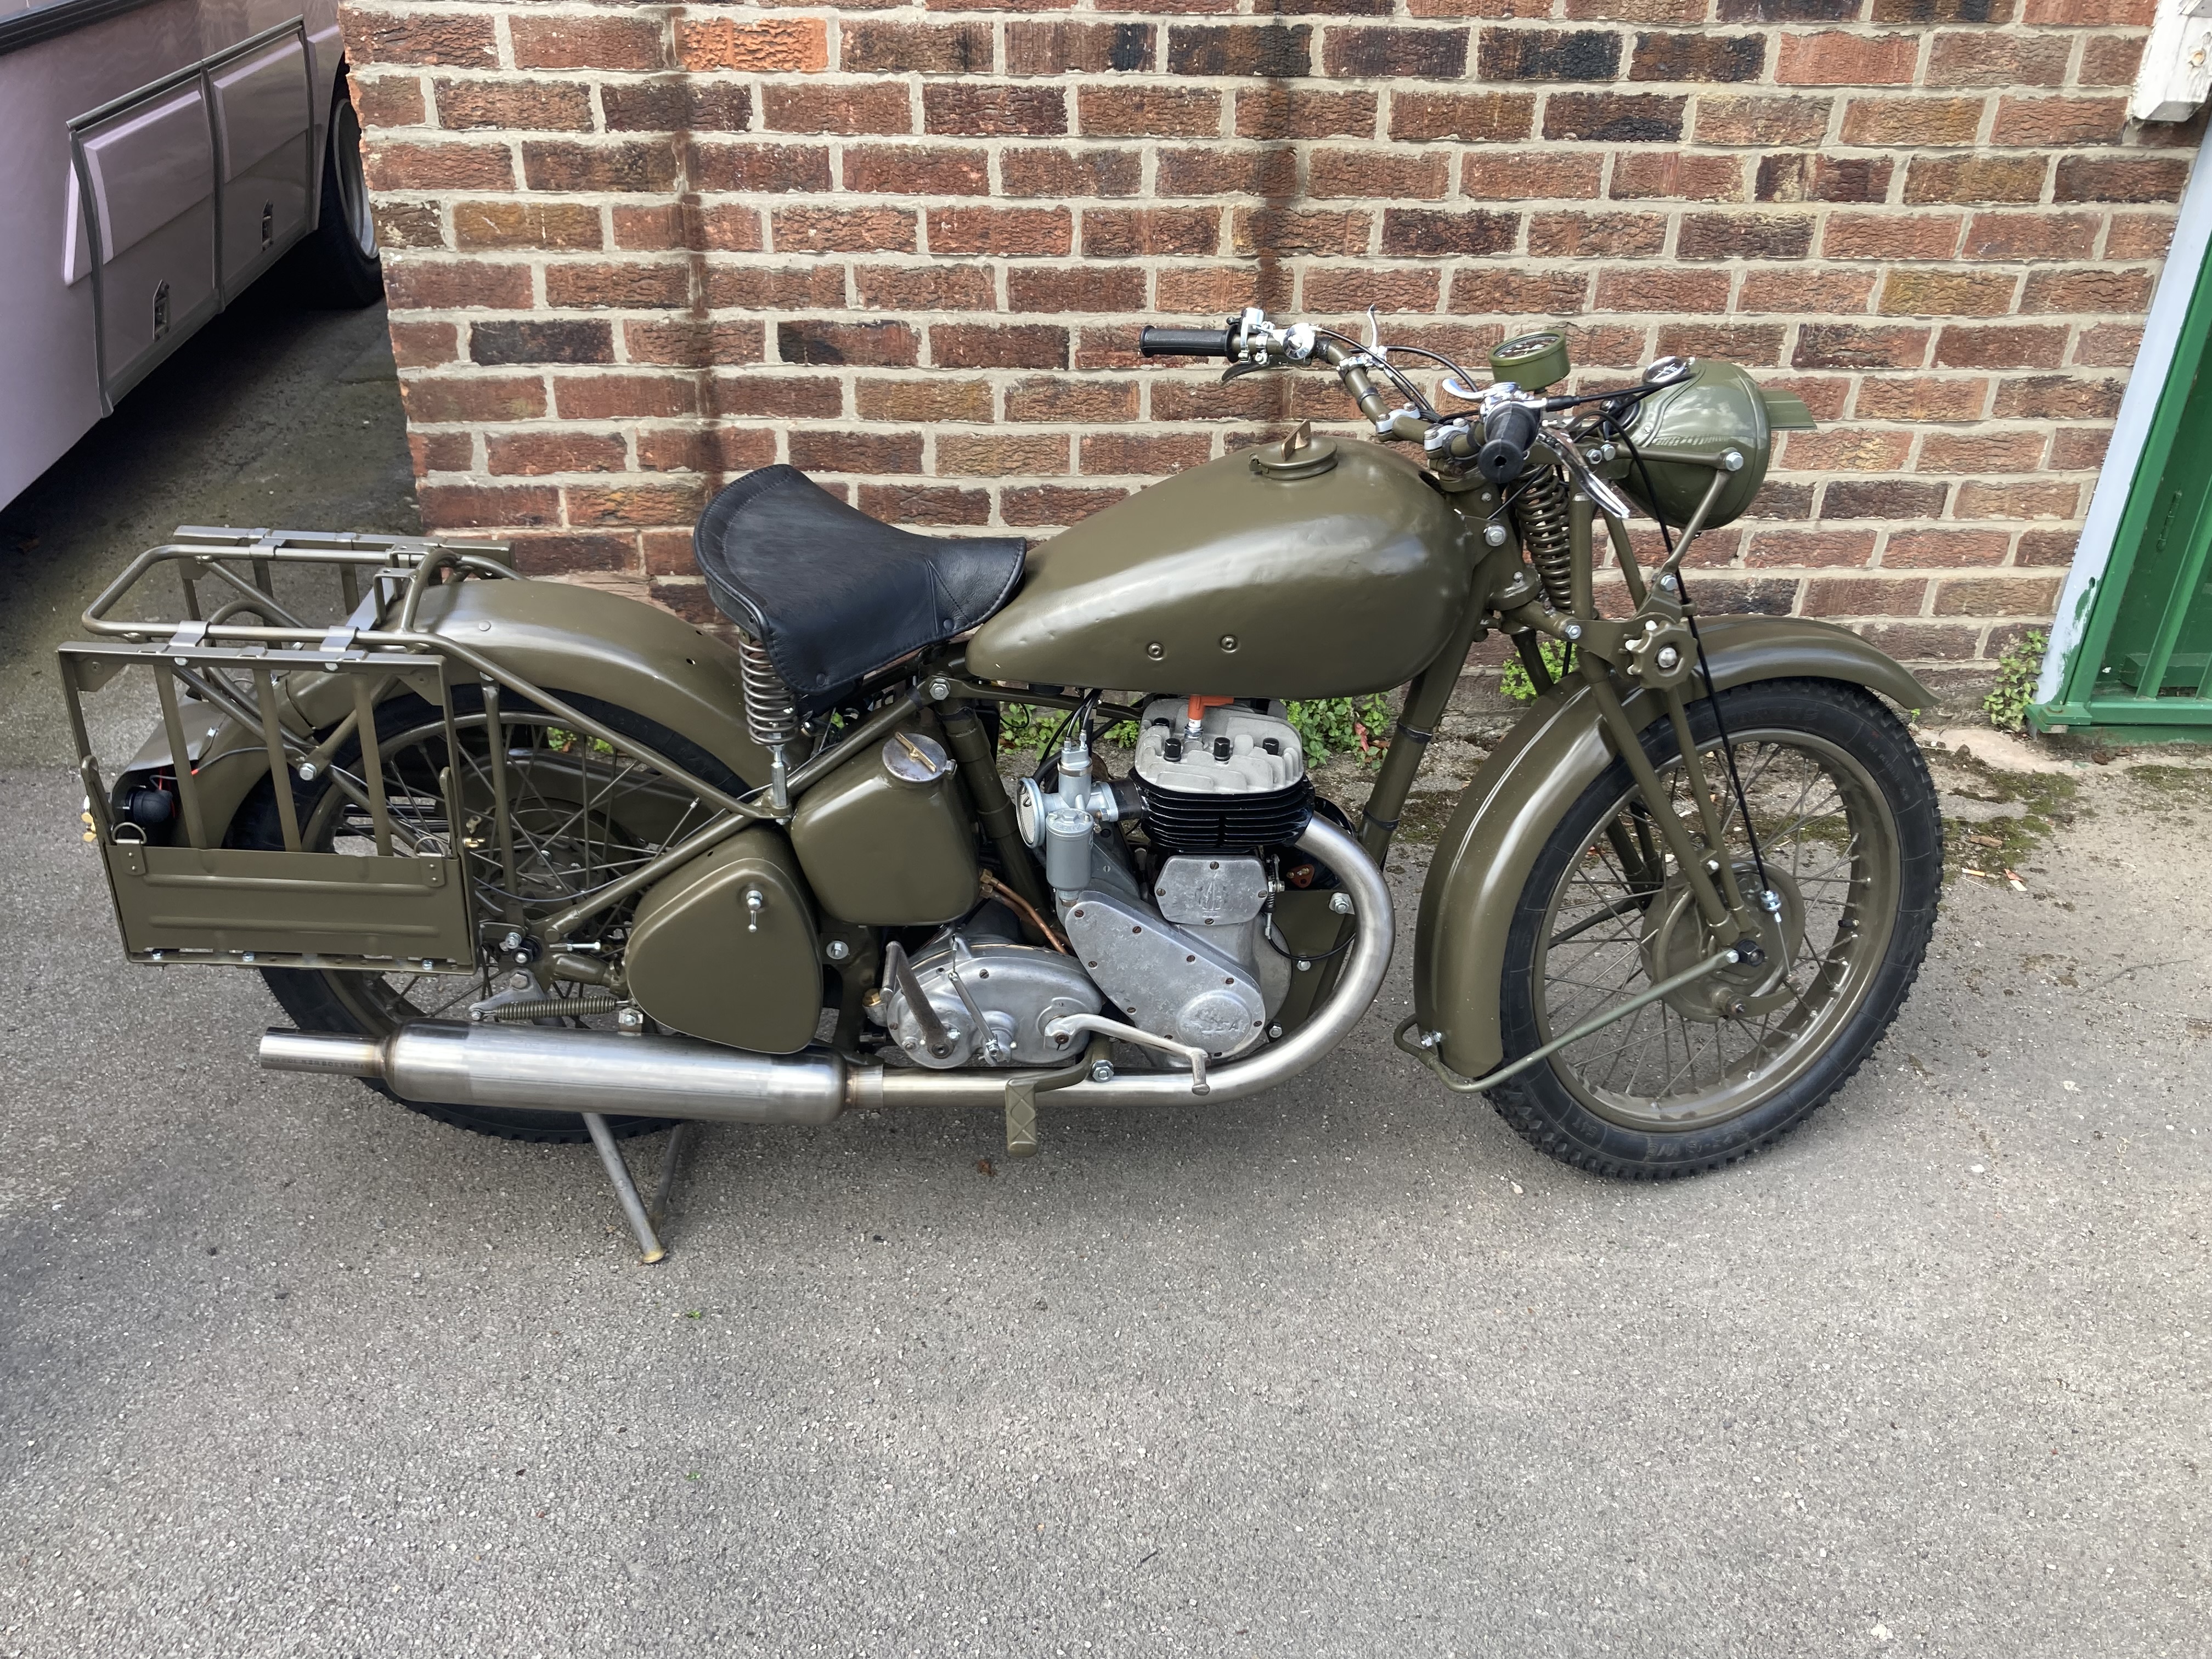
I know it hasn't been an easy job, but the bike looks gorgeous now Mark!
email (option): wd.register@gmail.com
Thanks Jan,
I'll put some notes together and make drawings of things I noticed.
You may find them useful, or they might just be this bike.
Mark
email (option): pes.sales@btconnect.com
I'll put some notes together and make drawings of things I noticed.
You may find them useful, or they might just be this bike.
Mark
I for one would certainly be interested in reading Your notes and pictures .
email (option): s.foster11@blueyonder.co.uk
Still playing around with this lump.
Observations so far.
It starts very easily with full advance.
I used one of those magneto timing lights, maybe it needs a little more advance.
On it's rear stand the gearbox seems to change well, so let's hope it's that way on the road.
It does leak and I think I forgot to put a small amount of silicon on the inner gasket. :disappointed:
I wasn't happy with the fit of the mag/dyno, so I think I will remove it and see if I can make some over sized pegs.
Whilst removing the mag/dyno I will put some new cams in as the valve train makes more noise than I would like.
Also there is a rhythmic ticking sound, I'd like that to go as well.
The throttle response is very slow, I'm sure pre war lawn mowers had quicker throttle response.
Mark
email (option): pes.sales@btconnect.com
['The throttle response is very slow, I'm sure pre war lawn mowers had quicker throttle response...']...They probably did :laughing:
Seriously though, being a little retarded will make the motor sluggish in response and it's very much more like that anyway compared to what you're used to I'd imagine...
If the crank was assembled within the .002" mainshaft concentricity specified it may well be wear on the gears that is making the noise, if not then the engine will be noisy and there is little you can do about it as the gear clearances will vary from snug to loose as the crankshaft rotates...Then when the cam follower goes over the top of the cam and the engine changes from comressing the valve spring to the spring pressure closing the valve the gears 'jump' forward and take up the clearance, generating the noise...If you turn the engine over slowly by hand with the timing cover removed using a spanner on the crankshaft nut you can both see and hear this taking effect just after maximum lift...
As a matter of interest I never run at the specified tappet clearances (and others do the same)...I found after experimentation and 'hot engine checks' that a slack .008" Ex. and a 'snug' .008" In. are quite adequate and function without any detrimental effect on either reliability or performance...I've run on these settings for decades, the bonus being quieter operation...Don't forget to check the valve lifter peg clearance on the exhaust side if you do alter them...
Also, the clearance between the peg and the underside of the ex. tappet head doesn't have to be 1/16" as detailed in the manual...Just set it so that there is no contact between the two parts when the engine is hot, the valve is fully closed and the tappet is rotated to test clearance...This makes it somewhat easier to set up...If you consider it, why would an .008" tappet clearance be adequate but a .062" clearance be needed under the tappet head?....Ian
email (option): ian@wright52.plus.com
I do my very best Ian to ensure all cranks I build are under 0.001" true.
I decided to replace the cams and I should have done this from the start.
It's not like they are expensive, and the rest of the valve train was new any way.
Tappet clearances closed up as you suggest.
I took the pegs out of the magneto and made some stepped ones for a snugger fit into the crankcase.
The magneto body was also lapped flat whilst the pegs were out.
I really should have done these things earlier, but I just wanted it going!
This morning was frustrating as I got confused as to whether the timing light should be going out or on.
Lots of unnecessary kicking! First kick once corrected. :worried:
Now that I have tightened the mesh I have timing whine, but still more backlash than I would like.
I'm tempted to cut a set of higher accuracy gears, but no I need to learn when to stop.
The new Amal isn't the treat I would have hoped for, it does seem to weep from many of it's joints.
It also feels rich at lower rpm, I suspect it will be the same at higher rpm on the road.
I'm temped to reduce all the jet sizes.
I also fitted an Amal gauze air filter, you would have thought these would have been made to allow access to the throttle stop screw!
Rather than time it with the head off, I made a depth bolt to make life easy.
I'm sure many others have done the same thing.
It's a shame each bolt has to be tweaked for each engine.
DVLA inspection next week, so hopefully it can be road tested this year.
Mark
email (option): pes.sales@btconnect.com
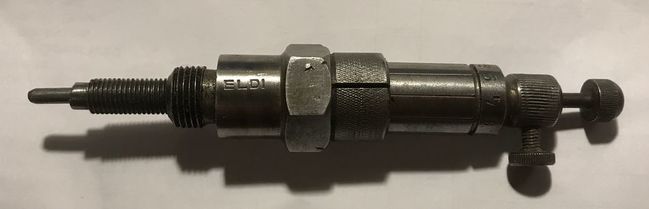
Here's a handy little device, made by one of our Dutch members. Ron

email (option): ronpier@talk21.com
It's a good idea Ron, but wants a little locking collar on it to make it easier to use.
The fixed bolt (that I think I was inspired by Trevor in Aus), is just perfect for paranoia about slipping timing.
Mark
email (option): pes.sales@btconnect.com
I have a tool with an adapter that screws into the blanking bolt and has a clock gauge fitted on the top...It's a bit complicated to describe verbally but it can be set to record both TDC and 7/16" before TDC....Rob Miller might remember me retiming his bike with it in a field!!....
Generally, I like to time mine with the head off and I use a depth micrometer and the electronic gizmo that tells you when the points are just opening....
Always double check the setting after doing up the mag nut as it frequently moves during that process...I also lap the gear to the armature with some very fine grinding paste before fitting the mag to ensure the best possible 'taper lock'....
Note if you do try to use a bolt down the blanking bolt hole to stop the crank moving it won't...The crank moves backwards when the mag nut is tightened...Ian
email (option): ian@wright52.plus.com
I do remember Ian, I don't think I have ever achieved accurate timing myself, I'm not an engineer, and I have an original WW2 document refusing a unit who were trying to obtain a mag pinnion puller, they were told no, use a REME workshop.
Rob
The simple and nice thing about that tool I have is, I set it in my head and marked the plunger at TDC and 7/16" BTDC. It can now be used on any M20/21 as you just adjust the height with the outer hollow bolt:+1: Ron
email (option): ronpier@talk21.com
"Note if you do try to use a bolt down the blanking bolt hole to stop the crank moving it won't...The crank moves backwards when the mag nut is tightened...Ian"
A spanner on the crank cured that, but yes it took a few goes due to creep on the taper.
Mark
email (option): pes.sales@btconnect.com
I'm using this one for my bikes, every full turn is one millimeter down, and the zero collar can be turned, so it's in the right spot to read it. Not sure where it came from, but was something commercial from the 50's.
Something similar can be made for BSA's ofcourse.
Nortons have a bigger timing hole, and I can use it with an adapter (18 to 14mm.)
Works for me, even with a slanted plug hole like a Matchless.
Cheers,
Lex
email (option): welbike@welbi**.net
['Works for me, even with a slanted plug hole like a Matchless...']
Often wondered about that...Linear (vertical) movement converted to an angular movement won't be the same...I couldn't calculate the difference (and it would be dependant on the plug angle) but it would be interesting to put a degree disc and clock gauge on it to work it out as there will be an error...It's an interesting tool, I've never seen one from the period, only the cheapo modern version...Ian
email (option): ian@wright52.plus.com
Ah, Ian, you know how I think about this, different petrol, etc. etc. the old values from the manuals are just a rough guide, I usually time it a bit too advanced, and then set the lever on the bars to where it sounds and feels best.
The Matchless piston is also domed, so don't think it makes much difference, but it can be calculated, if I was so inclined, I could probably do it, but after 10k (hard ridden) miles without troubles, since a rebuild 7-8 years ago, I believe it's OK.
Cheers,
Lex
PS, the Eldi brand of timer is Dutch, and they still sell them!! 90 euro's though.
email (option): welbike@welbi**.net
In common with a lot oc things like compresion tests you find out what works with your tools and then use those values .
Piston drop is such a coarse way to set ignition timing inthe first place because each mm of drop is a different number of degrees
I gave up using piston drop decades ago .
What is your method Trev? Ron
email (option): ronpier@talk21.com
The method used to set the ignition is down to the individual at the end of the day....
Setting accurately by the the original method, namely setting the piston at 7/16" BTDC in the case of an M20, will at least replicate the original method used by the manufacturer and will result in the engine running as intended. This assumes no change to the fuel of course and everything else being set within the original parameters (carb settings, engine condition etc.) .....
The question of whether the original settings/plug grade are right or should be altered to suit changes to fuel burn characteristics is an interesting one and it may well be that a change would be desirable...Fuels have certainly changed...
So, assuming a change is to be made, let's say to 3/8" BTDC how will the results of that change to the power/torque curves be measured?...
I'm afraid 'tuning by the seat of the pants' is a woefully inadequate method to determine any changes unless they are substantial....Perceptions of how well the bike is running are largely subjective as the brain is not an accurate engine measuring instrument. For a crude example, take away the baffles in the exhaust and many people will report an increase in performance, when in most cases the opposite would be true...Louder doesn't mean faster...
The only accurate way to determine relatvely small changes to engine performance is to put the bike on a dyno and do comparative tests using different settings/rev points etc.. The results will be printed out for examination and comparison...If changes aren't accurately measured how can the benefits/disadvantages be proven?.. and if they are not you are just 'shooting in the dark'....Ian
email (option): ian@wright52.plus.com
I do like a well typed post Ian.
Though I guess in reality with modern fuels most engines of the period would stand a little more advance.
But back on topic I think the calibrated bolt method is perfect for "in field" check.
Though on the bench an angular check would be better.
Mark
email (option): pes.sales@btconnect.com
For static timing a disc printed specifically for each bike & a clamp on pointer
Disc has a magnet glued to it so your cush nut needs to be flat
use piston stop to locate tdc then rotate crank using a long spannar on the crank shaft nut on the other side.
Manual ignitions on side valves are not as fussy as auto advancs on OHV.s
Had my DVLA inspection this afternoon, a dozen photos taken and that was about it.
Now to wait and see what happens.
Mark
email (option): pes.sales@btconnect.com
🤞
email (option): wd.register@gmail.com
It's been a while, with a few fairy tales to keep me nervous.
Finally I have a V5C with a six figure registration number.
So white numbers on a black background I guess.
Just too busy at work at the moment and a building that needs a roof on before winters sets in.
Mark
email (option): pes.sales@btconnect.com
I got my correct stencil from https://classictransfers.co.uk/ They also have the correct water slide tank transfers(cream)
"Axholme signs" Also have the number plate stencils which is where my RN tanks stencils came from. Ron


email (option): ronpier@talk21.com
Back to the saddle
My M20 lives outside , usually under a cover but some times the rain gets to it and soaks into the seat cover.
On mine there was a piece of pressed felt between the cover & the springs that was forever becoming saturated and rusting the springs.
Sollution was some pallet wrapping so no more rust
The springs are by now ( 30 years of riding ) now quite sad, I really should replace them but to help things along I cut a piece of HDPE from the sides of a 25L chemical drum to fit on top of the springs which has made a big difference to the "Lack" of comfort when I have been caught out or have just been to lazy to lift the bum off the seat when going over potholes .
Just a thought
A couple of others with spring saddles have now done the same & all agree it works better and prevents the springs compressing groves in the padding .
All my pictures have been removed, how can I bring them back?
They will open if you open them in a new tab.
Mark
email (option): pes.sales@btconnect.com
I can see all your pictures Mark!
email (option): wd.register@gmail.com
The pictures all opened for me, but were a bit slow downloading? Ron
PS I'm not sure about IBB as the host that I think most of us use? , but the previous host (who stopped being free) If you deleted a picture from your albums, it would also disappear from the forum.
email (option): ronpier@talk21.com
My pictures have links to one of my websites Ron, I thought this was the safe way to do it as I've lost many on other website using their picture posting system.
Mark
email (option): pes.sales@btconnect.com
Really interesting and involving thread. However I belong to the bodge it and hope persuasion. Rick Partington had rebuilt the motor before I bought the bike and he'd opted for a low cost rebuild [motor aside]. The bloke I bought it from sold it as it wasn't any faster than his 16H.
It had the wrong engine sprocket and I knew the timing was off. He'd set it as per M21. Unfortunately the early type M21. It felt a touch flat and was so I reset it with a bit of wire and it's spot on now. I know a lot of you are perfectionists but one doesn't need to be to run one of these.
I've just had the speedo rebuilt and indicated top speed went from 64 to 81:[best tuning mod I've ever had] before it died again. Hopefully it will all get sorted....
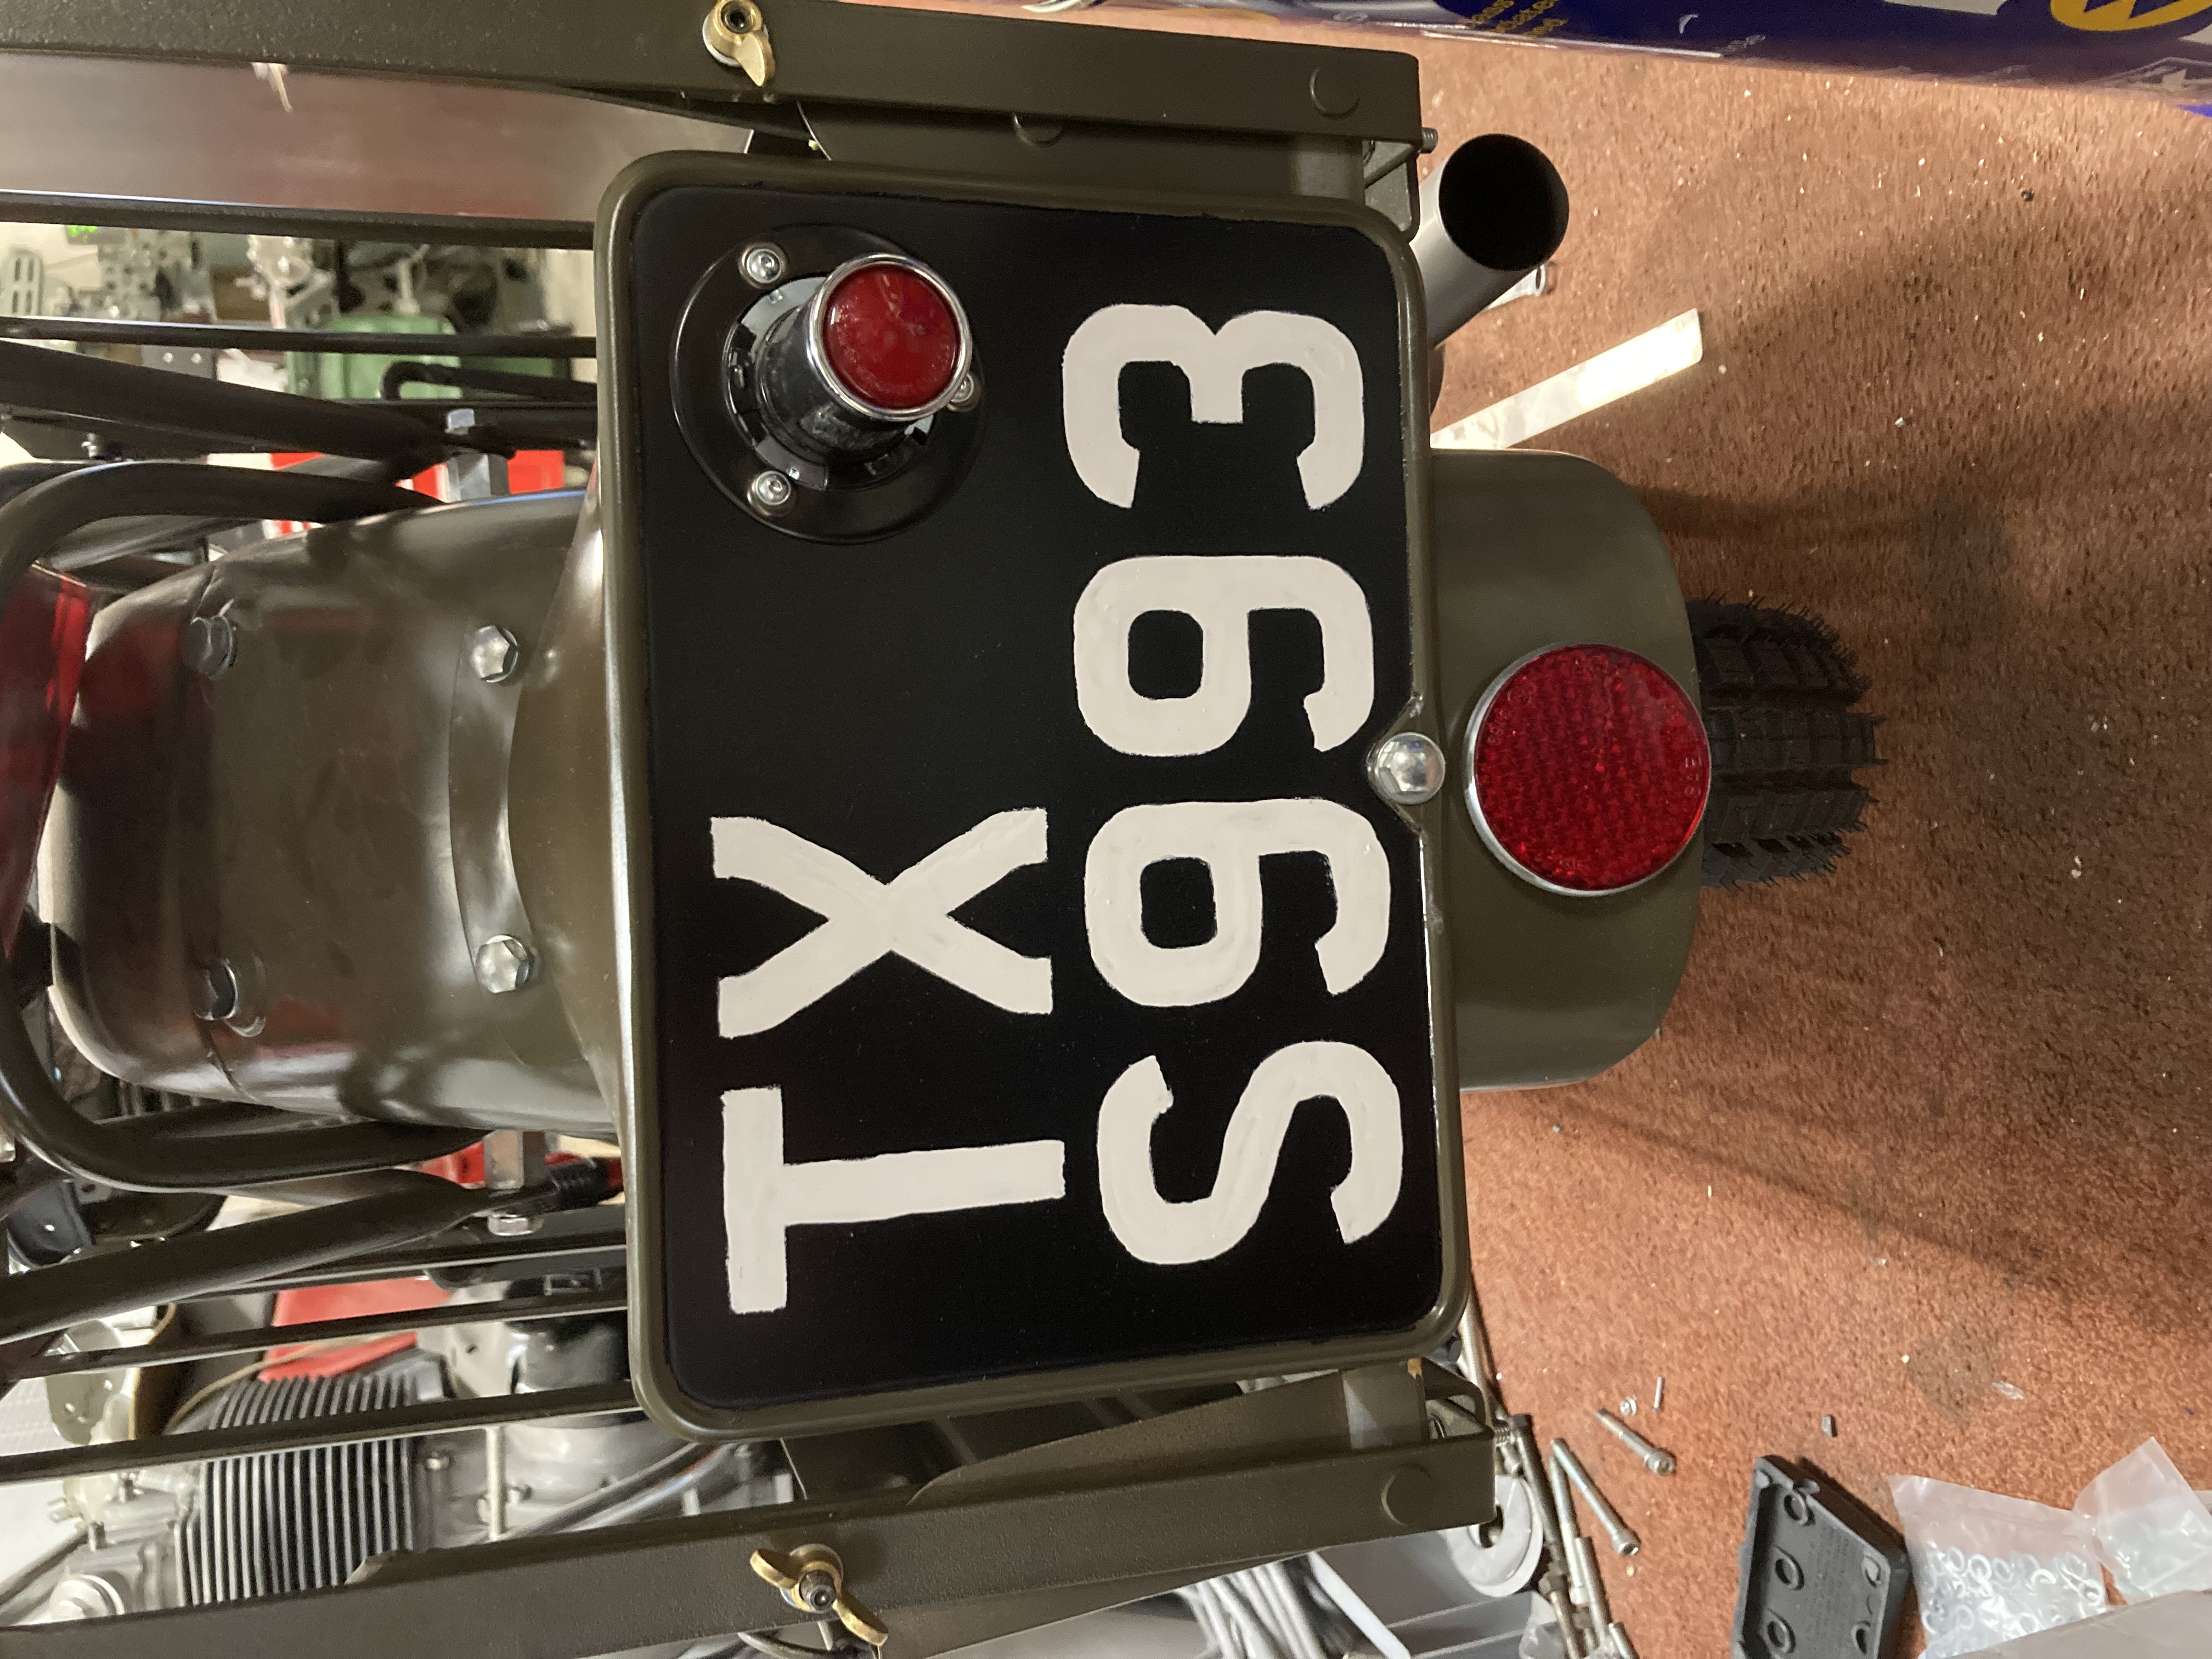
I decided as this bike is well overdue a test ride, I'd ask Anita to hand paint the number plate.
I'm more than happy with it as a first attempt, I can't type what she said when I asked to do the fuel tank!
If I get a chance I'll wire up a brake light for a test ride tomorrow evening.
Mark
email (option): pes.sales@btconnect.com
Have some sympathy for the country boys with slower internet speeds...I have to scroll away for a measurable amount of time to get to the last comment...Time for a new thread!....Ian:yum: ...
email (option): ian@wright52.plus.com
Ian, have you noticed a slider at the right side of your screen? Hold your curser on the slider and move it down the screen.
I'll actually put this in a new thread! Ron
email (option): ronpier@talk21.com
Mark how did you get the ball rolling with Dvla? I have an original reg that the bike had but long before they went digital and I've no proof of it other than the pressed plates, is it possible to apply for the war time reg or is that not an option?
Tod, without an old buff log book, you have little hope of retention of the number unless the original LVLA records survive...but government instructed them to be destroyed in the late 1970s
Do you know which county council issued your original number ? One or two ignored instructions.
Hi Rik
Yes it's 864 BGY so BG being Croydon, London I have emailed a few contacts that point towards the old records in that area but had no responses
Sorry i meant GY
Tod, I was born in Croydon, as the hospital in Purley was full. Three quarters of a century later, I'm still ashamed of it !
Regrettably, the old LCC / GLC were amongst the keenest to pulp records and none survive. You'll have to go the age-related route.
No WD motorcycle had a County Council registration number after September 1939 though, so there is no "correct" way. If you're comfortably off then you could buy a pre-war Middlesex "cherished" number and use that...or fit your plate with magnets and take it off if you think no)one is looking.
Hello Tod,
I took a torturous route with mine.
First I got it MOT'd on the frame number.
I spent too long messing around and combined with a long wait from the BSAOC getting a dating certificate the MOT lapsed.
So I don't know if that helped.
With my DVLA application I sent all the BSAOC info.
After some time I get a date for an inspection to see the bike running!
The inspection consisted of more photographs by a chap admitting to know nothing about bikes.
More weeks pass and I get a registration document for a BSA 500 !!!
Insurance, it's now a 1943 500cc Blue Star!
It does make you wonder.
Mark
email (option): pes.sales@btconnect.com
I know some people do it anyway, but there is no need for an MOT on an historic vehicle, whether for registration or not. Nor does the vehicle need to be running......Been there many times. Ron:relaxed:
email (option): ronpier@talk21.com
This is my issue ron currently my bike isnt at the running stage, i wanted to apply to dvla but this states i need a proof of age which they will accept from bsaoc, i didnt know what the turn around time is for this but if its a while i can get the ball rolling now as i just joined bsaoc for this. Would be nice to ride it by the end of summer
Yes Tod as long as the bike looks fairly complete will do. They never ask to see it running. The inspector (if he's called for) is only there to check the numbers and take some pictures..... The dating letter from the BSAOC or VMCC or MVT is valid for one year. Ron
email (option): ronpier@talk21.com