
If the pattern items don't have the internal thread they are poor patterns as the thread is required for the tool that is used to remove them...
It's better to dispense altogether with the cups, cones and loose balls and fit sealed bearings...The available kits fit correctly, are sealed for the life of the bearing and don't require adjustment...Ian
email (option): ian@wright52.plus.com
Baz the fact that your top cone doesn't slide over the steering stem must prove that the parts are of inferior manufacture. You shouldn't have to remove material from the stem. The threaded cups and the right tool makes them a doddle to remove.
However, I'm with Ian. I bought a set of sealed bearings when he was selling them.....Fit and forget! Ron

email (option): ronpier@talk21.com
Ron, would you be able to post the numbers for the sealed bearings and the most likely supplier.
Regards, Lionel
email (option): Lioneljrudd@gmail.com
They look like custom made bearings.
https://pesltd.uk/?product=66-4149K&ptno=66-4149K
email (option): pes.sales@btconnect.com
Norton introduced sealed headrace bearings with a centre tube for the Commando in 1971...I can say with a fair degree of certainty and experience that it's about the only part of the machine that has never had a tendency to wear out prematurely. :grinning:
They are modified standard bearings so unavailable at bearing suppliers...I believe there are some on ebay or I can supply if you can't find any....Ian
email (option): ian@wright52.plus.com
well i hate to admit it but im having the exact same problem as Baz, ive adjusted them as normal and then even a bit too tight and i still have play when i grab the front wheel and move it back and forth, i just havent had the time to investigate it further
if you figure it out Baz please post what you find
email (option): taybrig@shaw.ca
['I've adjusted them as normal and then even a bit too tight and I still have play when I grab the front wheel and move it back and forth...']
You need to tighten the side damper fully on the forks so that they are 'locked up' before testing for steering head play...Otherwise you will pick up any play in the fork bushes/pins etc. rather than play in the steering bearings when you move the front wheel...Ian
email (option): ian@wright52.plus.com
Ian, email sent
Baz
email (option): binnawan@iinet.net.au
You need to tighten the side damper fully on the forks so that they are 'locked up' before testing for steering head play...Otherwise you will pick up any play in the fork bushes/pins etc. rather than play in the steering bearings when you move the front wheel...Ian
email (option): ronpier@talk21.com
This will sound funny
Measure your balls
London to a brick & on you have been supplied with incorrect metric balls
I had a member with a B33 who could not get it to fit
Had a good look & we found the cups were ground for imperial balls but the ( cheap ebay ) supplier sends them out with slightly bigger metric balls.
Not only do these make the whole assembly taller, the balls do not sit properly in the cups .
I thought they were supposed to be 1/4" balls? 6.35mm diameter.
email (option): pes.sales@btconnect.com
They are...which would mean 7mm (a non preferred size) or even 8mm balls would have to be used to create the problem as described by Trevor...If the set was supplied with those the seller should be sent to a Gulag somewhere...:laughing: Ian
email (option): ian@wright52.plus.com
Mark, et al. Thanks for the feedback re bearings and source.
Lionel
email (option): Lioneljrudd@gmail.com
In my case the bearings were supplied by Ian so i know they are good
I can see the movement at the headstock so i know its there, i just dont know why yet
I decided to go with Ian's taper rollers.
Probably add 3 weeks wait to the job, but worth it I hope.
Baz
email (option): binnawan@iinet.net.au
I guess Ian has given you tips on making sure there is no contact with either yoke against the headstock?.....Don't ask me how I know about this:scream:
It's why I'm fitting those shims in the Photo I posted. :blush: Ron
email (option): ronpier@talk21.com
The bearings are sealed ball bearings, not taper rollers..Baz will get full fitting instructions covering all aspects of assembly...
The bearings were originally modified to suit fitment to swinging arm models and their use for girder fork applications threw up some detail issues early on which have now been resolved...
I should note I don't generally supply these any more since I've retired..I had a surplus set I sold to Baz to help him out..However, I may offer them here as a 'one off' batch at some point in the future...Ian
email (option): ian@wright52.plus.com
I'm curious now Ian, as to whether the ones we buy in are machined as yours?
email (option): pes.sales@btconnect.com
I couldn't say as I don't know what you buy in...However, I should think they are prepared in much the same way for the same application....Ian
email (option): ian@wright52.plus.com
if you figure it out Baz please post what you find
I finally got things working (Murphy's Law !)
The stem nut which came with the bits and pieces was not the correct one! It looked OK, plenty thread but was bottoming out. l Got the correct nut and fitted it and all OK. Such a simple thing. I will still fit Ian's bearings when they arrive. Check you have the exact correct stem nut.
email (option): binnawan@iinet.net.au
Hi Baz...You have email....Ian:slightly_smiling_face:
email (option): ian@wright52.plus.com
if you figure it out Baz please post what you find
I finally got things working (Murphy's Law !)
The stem nut which came with the bits and pieces was not the correct one! It looked OK, plenty thread but was bottoming out. l Got the correct nut and fitted it and all OK. Such a simple thing. I will still fit Ian's bearings when they arrive. Check you have the exact correct stem nut.
Ian, sent you an email.
Bearings are not marked top and bottom.
R18 RS and 6006 RS. Which is top and bottom ?
Baz
email (option): binnawan@iinet.net.au
I guess the one with a bigger ID fits on the shoulder at the bottom of the steering stem. Ron
email (option): ronpier@talk21.com
Ron's correct...The upper bearing won't fit in the position of the lower one and as such they don't need to be marked...
At the moment I am still unable to receive or send any e mails so will have to get back to you later..There was a system fault (not in my computer) that may or may not have been resolved but it's still not working at my end after 5 or 6 days...Hopefully my computer is going to my local shop to have an upgrade in the near future and I'll find out what's going on then...Ian
email (option): ian@wright52.plus.com
Pretty obvious isn't it !
I didn't get past the instructions that said bearings are marked.
Still, if we all knew everything we wouldn't need a website!
email (option): binnawan@iinet.net.au
As Ron mentions there are problems using the ball race bearings as supplied.
Rather than tapping the steering stem into place with a soft hammer, pressing it into place might be a better idea.
I could feel slight indents in the bearings after assembly.
Once the top yoke is tightened down the steering locks.
A small washer is required to fit over the inner race to lift the yoke off the outer.
For longer life a cup washer would be a good idea to keep rain out of the bearing.
Mark
email (option): pes.sales@btconnect.com
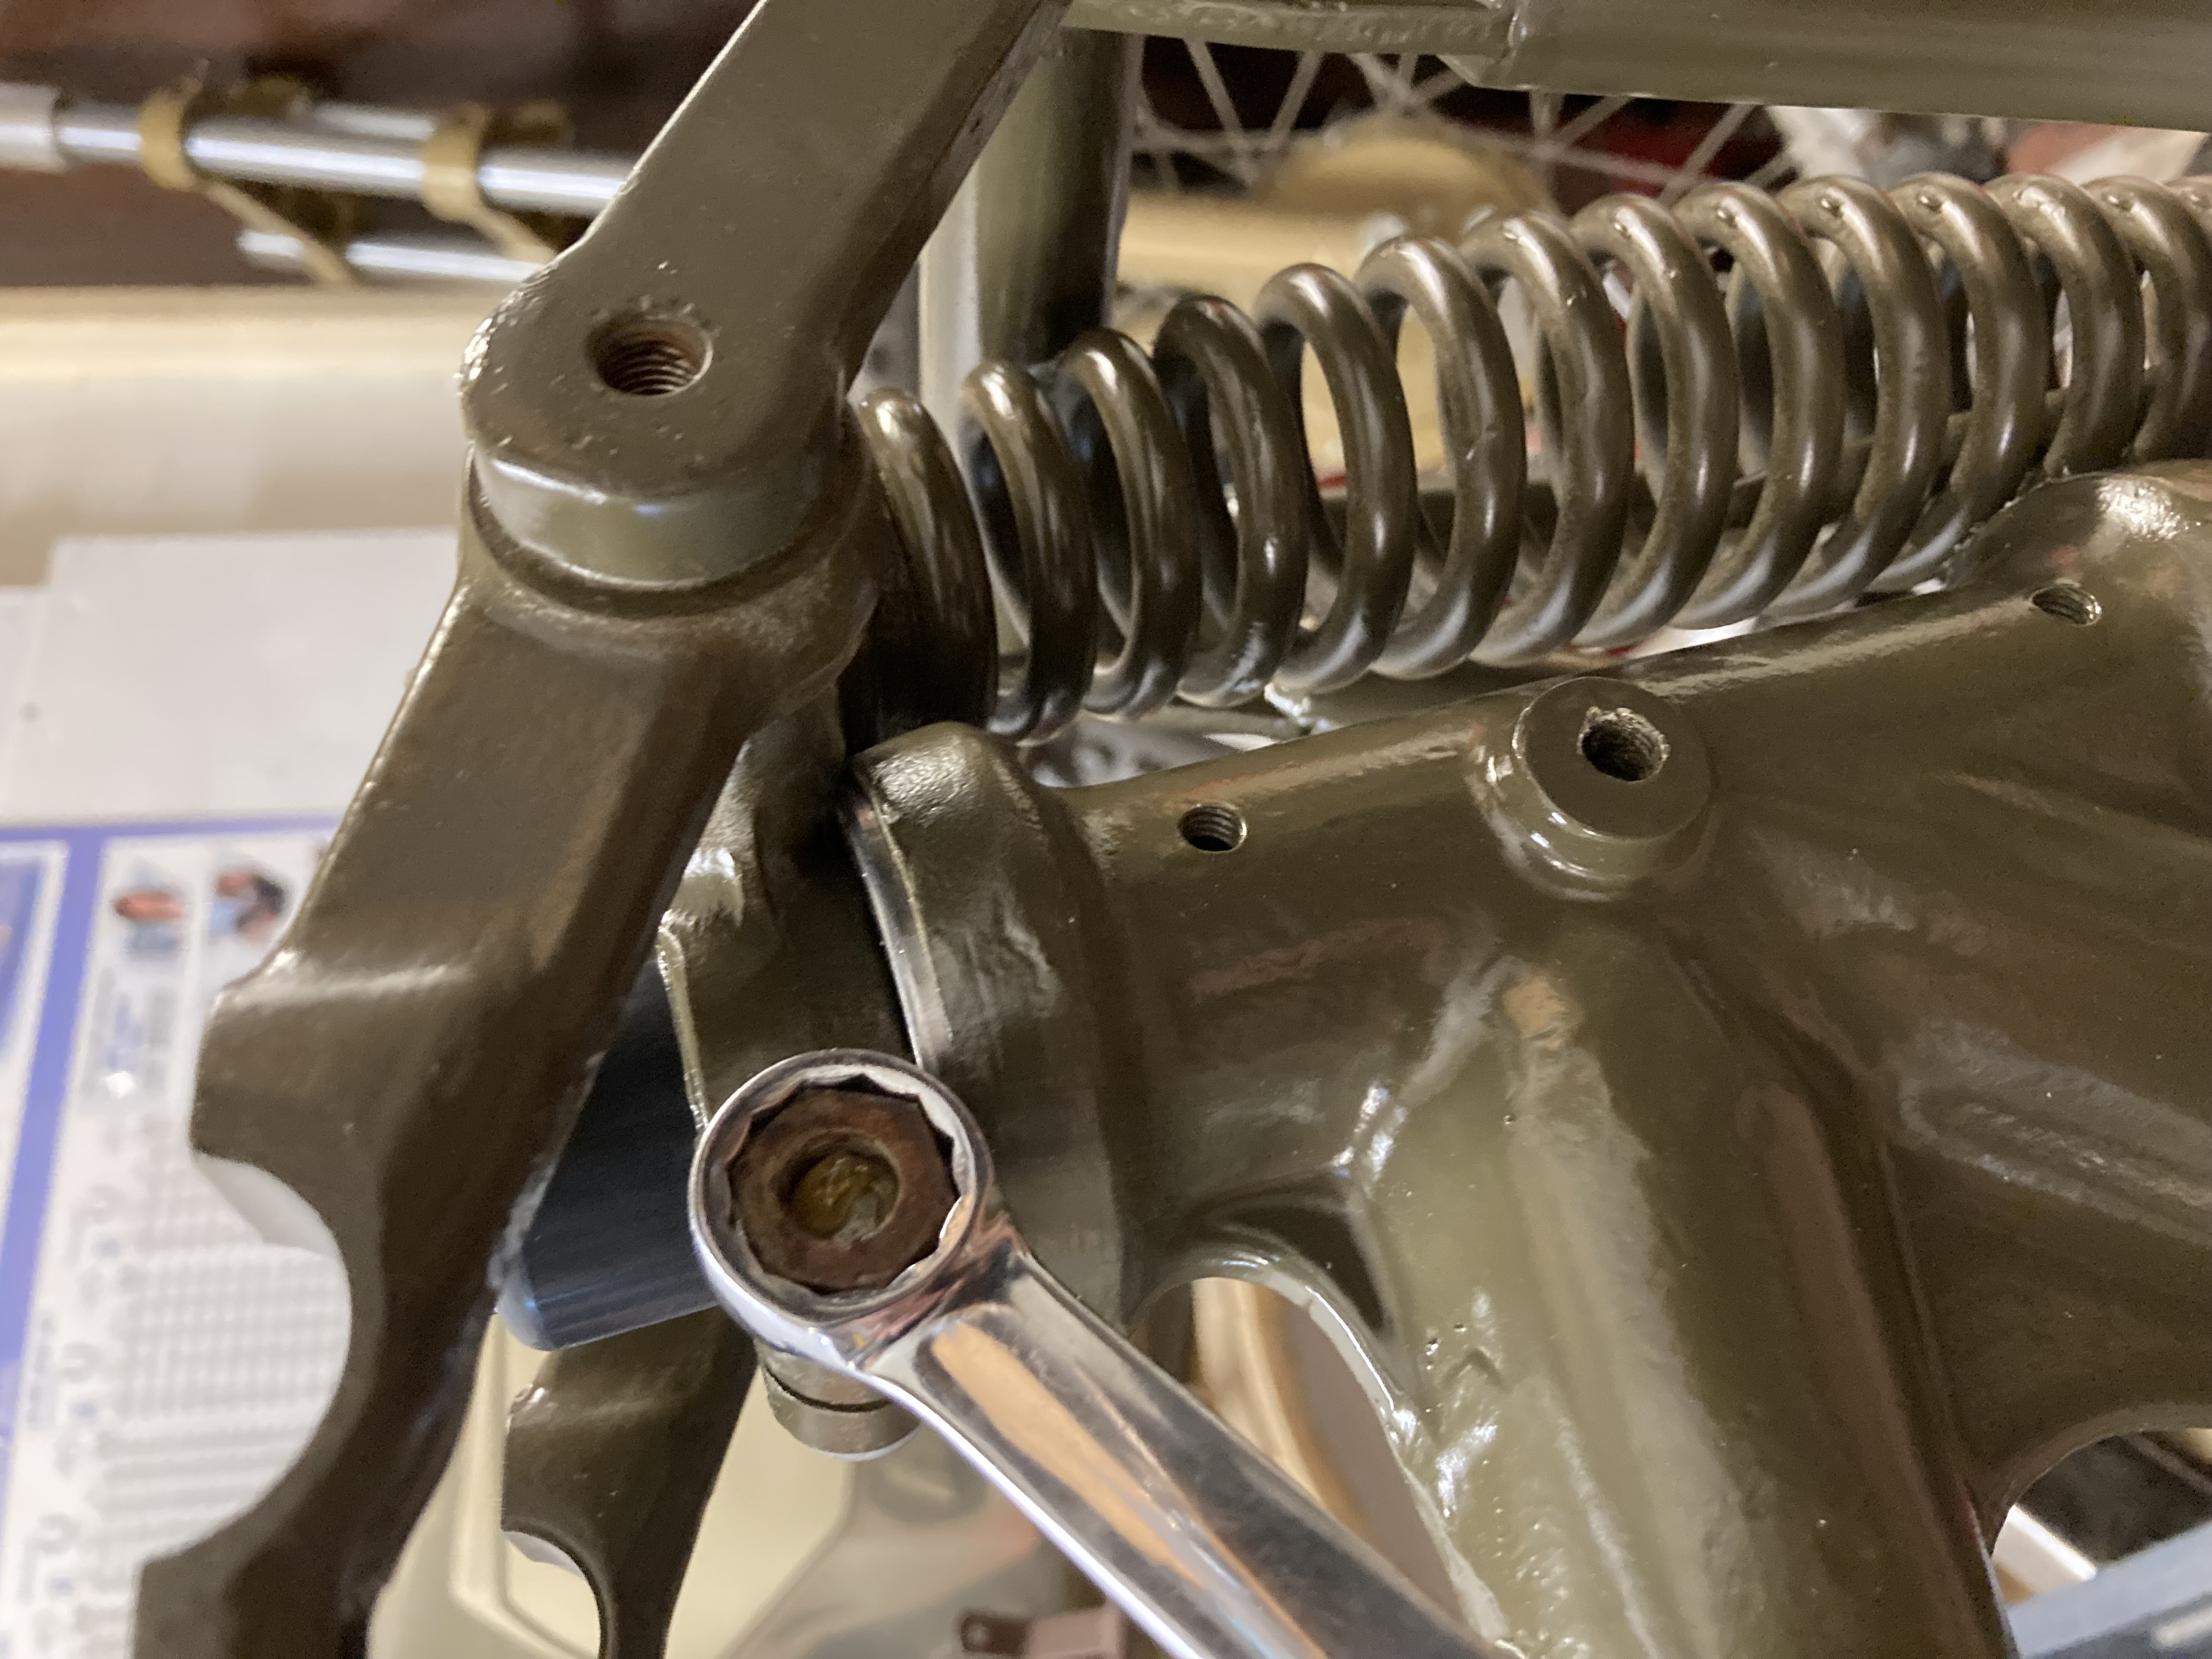
When I replaced my Head stock races I noticed a bit of a design fault , not sure how BSA expected the grease to reach the top bearings, as the grease nipple is below the bearings , you would need to fill the 2 frame tubes with grease first !
As the ends that join the head stock are not capped off , don't think much grease would get on the bottom bearing , well not under pressure!
I capped the Tube's off , and now my bearings will get grease , under pressure !
Did the same with 1/2 a beer can with 2 holes cut to fit over the grease nipples then a single large O ring to hold it out
Now 1/2 a stroke on either nipple has grease extruding from both bearings .
['Once the top yoke is tightened down the steering locks.
A small washer is required to fit over the inner race to lift the yoke off the outer.
For longer life a cup washer would be a good idea to keep rain out of the bearing...']
A long while back I wrote a new set of (comprehensive) fitting instructions that I supply with these bearing kits...The kits were originally provided for swinging arm models only, which have a different set up and thus various additional details must be attended to when fitting to girder fork models...These are all covered in the instructions...
The original dust cover for the cups and cones can be employed with the sealed bearings to provide additional protection for the upper bearing...
Obviously the top nut on the steering stem cannot be fully tightened down unless a tube of suitable length is fitted between the bearings to prevent excessive axial loads...Without a tube the top yoke should just be pressed firmly against the bearing (and dust cover) by hand and then the yoke pinch bolt fully tightened...Then fit the top nut and just nip it down very lightly onto the yoke...A dab of threadlock applied to the thread will prevent loosening...Next fit the damper assembly where applicable....Ian
email (option): ian@wright52.plus.com