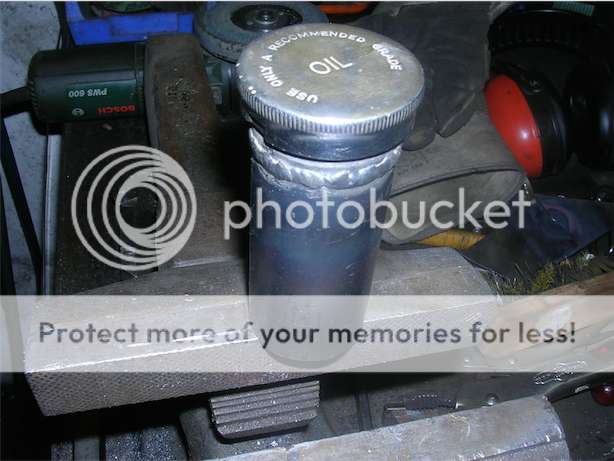
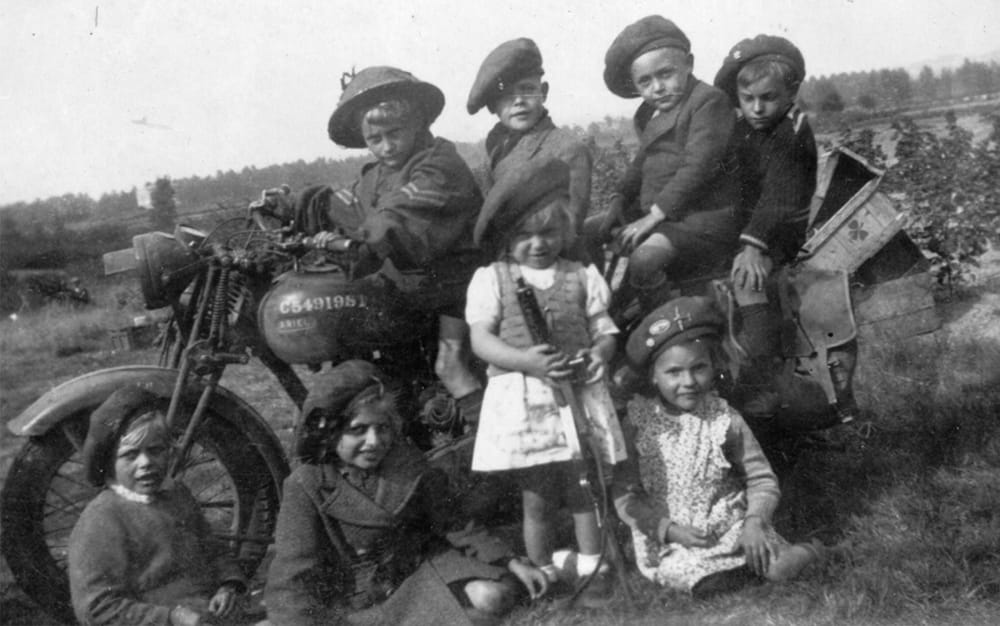
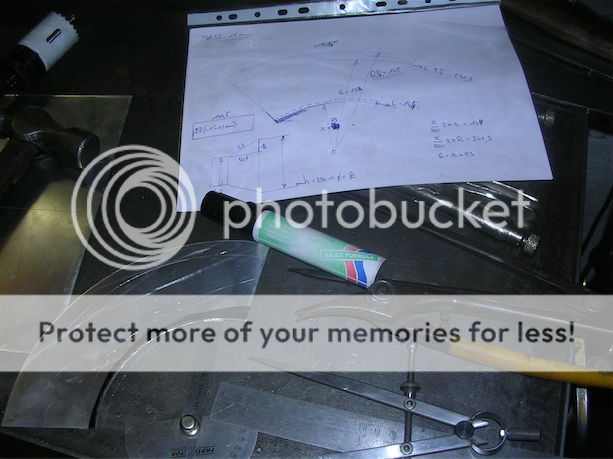
This is the unique oil tank come air filter That Jan made for the Royal Enfield Experimental lightweight that I'm building. Made purely from scrutinising and scaling up from the few factory pictures that we have. A tool made for pressing the louvres and several bespoke one off parts. Plus sheet metal rolling. 


Not only that! But Jan emailed me on Thursday to say it was ready and with a courier service by Lex and John Allison it was here the next day. Ron


And an original!

email (option): ronpier@talk21.com
He is a wizard
Jo'b
email (option): Jonnyob1@googlemail.com
beautiful work from sheet metal, and it fit perfect, very impressive!!
Ron, does the saddle front axle also experimental???
lot of work on this project and very quick made, you are also a sort of wizard Ron....
Arnaud
email (option): leger-arnaud@wanadoo.fr

 Yes Arnaud the saddle pivot is much before it's time, being a Posidrive screwdriver. It's another temporary fit to eventually get the saddle hight correct.
Ron
email (option): ronpier@talk21.com
Ron/Jan
That is spot on, can't wait to see it finished.
Rick
email (option): rbrouard@guernsey.net
Explain more, Ron, please. Is your version a dummy, or does it function as an oil tank and filter? If latter, where is the pipe that goes through the tank to connect carb air intake with the filter? When you look at it, you wonder why not just angle the carb stub so a filter can be mounted inboard rather than have such a complicated, if elegant solution!
A nice job as usual from Jan...My only worry would be the long and unsupported copper oil return pipe...
Return pipes are usually made from steel pipe..The copper pipe, particularly when unsupported over a long length, will be subjected to vibration which could well result in a stress fracture caused by work hardening...
I would have gone with a steel pipe or alternatively added a support bracket for the pipe as near to the unsupported end as possible...
Of course if the bike is destined for the collection and not run very much the problem won't arise for now...Ian
email (option): ian@wright52.plus.com
What? Dummy? Here’s some metal shaping info for dummies!


The oil tank and the air filter are one unit: the air enters at the rear of the assembly, goes through a louvred plate that covers a gauze filter, and then goes through a tube inside the oil tank to the carburettor.


Here’s an extract from the 1940 test report:

Well, after a lot of brainstorming, studying and making sketches, I was quite sure I knew how the system looked like inside. Comparing sizes with other components gave me the dimensions, work could start!
email (option): wd.register@gmail.com
I started by making the oil tank shells. I gas welded a 2” strip to the base of the shell, and made a ¼” radius over a stake. This was followed by hollowing the base on a sandbag, planishing with a flipper and making a ¼” flange.


email (option): wd.register@gmail.com
Then I made the oil filler tube by rolling a flat sheet of steel and gas welding the seam. I turned the top fitting, and welded this to the tube.


email (option): wd.register@gmail.com
Next step: cut out an opening for the oil filler tube in one of the shells, shape the radius over a steel shaft, position the oil filler tube and weld both parts together.


email (option): wd.register@gmail.com
This was followed by some cleaning and grinding of the welds, and I also brazed in the oil in and outlets (made on the lathe):


email (option): wd.register@gmail.com
Next step: the air filter assembly. I started by cutting the various parts, and a 3mm plate for making the stepped louvred cover. I made the step by going round the plate with a chaser.


Then I made a louvre tool, and made slit by slit with a rounded wood chisel. This was followed by pressing the louvres with the louvre tool.


email (option): wd.register@gmail.com
Then I made the air tube, air box and air cleaner:


email (option): wd.register@gmail.com
Measure twice, cut once. I measured at least five times before cutting…


As you can see, I left a ¼” edge to make a radiused transition on the airbox side and a flange on the airtube side. The radius was shaped over a stake. The corners for the airbox had to be heated so that they could be streched enough:


email (option): wd.register@gmail.com
Then the seam between the shells was gas welded, and the seams between the airbox and the oil tank were brazed:


And here’s the finished article:


email (option): wd.register@gmail.com
Really interesting Jan...It's great to see what can be achieved in a home workshop with some ingenuity and a lot of time and effort...
I am a machinist primarily and find that type of work quite straight forward...I've just finished machining an aluminium speedo housing and some alloy fork covers for my TT Bonneville project for example...
Regarding fabrication it's a different story for me...I've repaired/manufactured some more simple parts as I find it's rewarding to do things yourself if possible...As with all manual manufacturing skills it's a case mastering the techniques, learning the characteristics of the materials and importantly, gathering up the correct tooling...
I can't say I'm remotely near your level of competence with fabrication but as always I find demonstrations of other peoples skills both fascinating and informative...
Thanks for taking the time to explain the planning and manufacture...Ian
email (option): ian@wright52.plus.com
My compliments Jan  And thanks for the detailed DIY instructions; curious if anybody dares to follow you...
I have had pattern pieces done for the 16H by Jan, everything fit with absolutely no modifications, Jan, you're a master! VERY impressed especially with the louver making method!
Ron, what is the saddle made of?
It's a rubber trials saddle made by Dunlop originally...
They seem to have been used on a number of military prototypes, possibly because they were lighter than a standard saddle and many of the prototypes of this period were built to very low weight limits....
Rivet counters might spot the rivet deficiency on the pattern item, at the nose of the saddle..Bugger..Now I'm worried, I spotted it as well... ...Ian
email (option): ian@wright52.plus.com
Just seen/read this thread - very very impressive.
Very nice tin bashing - from someone who spends too much time making two stroke exhausts.......
Not just fitted to prototypes either Sam. My 39 KC10 had a Dunlop rubber saddle fitted as standard. These ones of course are repros. Any originals that I've come across so far have deteriorated too much for my liking.
My mission this afternoon after a pleasant ride out in the sunshine this morning to the Sammy Miller jumble, was to address the saddle hight and missing rivet. I'm working from just pictures and quite a few things have had to be corrected or adjusted. I'm doing my best to stay one jump ahead of rivet counters, but I know I never will.
 Ron
Ron 

email (option): ronpier@talk21.com
Some more information about the saddle: the motorcycle press had been invited during one of the test sessions with the lightweight motorcycles. Arthur Bourne (“The MotorCycle”) and Graham Walker (“MotorCycling”) both published an article on this subject in their 25th July 1940 issues. Both articles show pictures of the Royal Enfield “pilot model”. But on the day the press was there, it was completely dismantled, after it had finished its 10.000 miles test. Both pictures don’t show a lot of details, but in one of the pictures it can clearly be seen that the saddle is no longer the rubber item made by Dunlop.

In M.E.E. test report B.382 (Source: National Archives), I found this information:
“ An aluminium saddle for fitting to the W.D. Norton 16H motor cycle, was supplied by Norton Motor Cycles Ltd., for test and was found to be unsatisfactory. A steel saddle was then supplied with a vulcanised rubber top. This again was a most uncomfortable saddle to ride on, and Norton Motor Cycles Ltd. Submitted a further sample steel saddle with a vulcanised rubber top, but modified in shape. At the same time a similar type of saddle was supplied by the Enfield Cycle Co. Ltd. For fitting to the 350 c.c. Royal Enfield lightweight motor cycle.”
The weight of a standard saddle was 4 lbs. 14 oz., the Norton saddle was 5 lbs. 8 oz. while the Enfield saddle was “only” 4 lbs. 2 oz. Road miles and cross-country miles were covered between June 3rd and August 12th. The conclusion of the M.E.E. was quite clear:
“A metal saddle with vulcanised rubber top is considered most unsatisfactory for W.D. use, and apart from the possibility of it being more easily decontaminated than the standard saddle, shows no advantage over the standard saddle. It is most uncomfortable for the rider, 20 miles being about the limit of endurance over cross-country.
It has not been found that the standard saddle fails to stand up to cross-country work. While one or two standard saddles on test machines have not proved satisfactory, the large majority have been in good condition at the end of reliability mileage.
It is noted that the main trouble experienced with the standard saddle has been the failure of the saddle springs and these are the same as fitted to the metal saddle.
Provided that suitable measures can be taken to make it practicable to decontaminate the standard saddle, it is recommended that a metal saddle be no longer considered.”
email (option): wd.register@gmail.com
The saddle looks awesome! Just thick rubber over a metal frame? That bike is going to be gorgeous!
and in the centre of the table there is the oil tank/ filter with is meshpad (maybe)dismantled , it very like the one you make Jan.
maybe the 2 only picture of this unique part dismantled, unique like all the other parts of this bike!!! maybe the handlebars are standard??, very funny that the air filter is in the oil tank, like on the Triumph 3tw where the air tube came accros the tank, army exigence, or just thecnical evidence? ( Royal Enfield WD/D have the oil tank just Under the engine, why they take it just Under the carb??? as the engine, gearbox, and bottom of the frame are unchanged....
strange question,i know but just for my education..
Arnaud
email (option): leger-arnaud@wanadoo.fr
Yes Arnaud, strange indeed that they didn't use the model D oil tank. I now have a spare one and of course I had to weld up the big hole in the R/H engine plate. Perhaps they felt the need for some gravity for the oil?
The handle bar is the standard bar as used on the D and very early C. I got the air/mag levers cast from an original off my WD/D and Jan made the other parts. Ron
email (option): ronpier@talk21.com
The twist grip is the internal pull type and the light switch is a Miller Bakelite affair clamped to the handlebar. The like of which I've never seen before. So far, the best I've come up with is a Bakelite Miller dip switch. But Lex is teasing me that he might have something at home  Ron
Ron

email (option): ronpier@talk21.com
Arnaud
Good spot Arnaud! Just zoomed in on the old magazine picture, and you can see half of the opening for the mesh filter, the other half of the opening is covered by the filter itself which is standing against the oil tank.

email (option): wd.register@gmail.com
And nice to see it mounted yesterday! (in the flesh, so to speak)
Cheers,
Lex
email (option): welbike@ welbXXX.net
outstanding work Jan compliments 
Ron bike looks great!
Absolutely brilliat work Jan 
Ron, you're very lucky that Jan's an Enfield man and could make this for you. That's great stuff 
email (option): horror@blueyonder.co.uk
Thanks for the kind words everybody! 
Ron just sent me this picture: painted, correct decal applied, fitted to the bike... 
Jan

email (option): wd.register@gmail.com
fantastic
very good & great work
cheers
Hussein

email (option): sl_hussein@yahoo.com
a cracking job by Jan , I don't think there are many fabricators who would bother like Jan,
email (option): warbikes at geemale dot comm
One offs or small volume production of old bike parts isn't a way to get rich unless, somehow, you can get people to pay an appropriate hourly rate...
Generally that's difficult and it's enthusiasm for old bikes and the determination to make things available that does it as much as the financial reward...Ian
email (option): ian@wright52.plus.com
Rest assured Ian. Jan won't be taking his family on any exotic holidays from the proceeds of this project. We just try to help each other, but I have to admit, it's definitely a bit one sided at the moment!
  Ron
Ron
email (option): ronpier@talk21.com
Well, it was me who talked Ron into this project in the first place... So I feel morally obliged now to help him a little bit...  And isn't he doing a great job!
  Remember that we started with only an engine and three photographs!
Jan
email (option): wd.register@gmail.com
Well done indeed, guys.
Ron,
let's hope you wont find an original one on you next visit to an auto jumble !!
Highly unlikely Michael. As far as we know they only ever built four of these bikes. However there is a hint that maybe a couple more went to Australia, but our contacts with access to the AWM are not responding lately Ron
Ron
email (option): ronpier@talk21.com
Time for a small update… Ron has also asked me if I could make a silencer for this project. I have got an original Enfield silencer here that has gone through a vivisection, and with the dimensions of another (complete) original silencer I had enough information to start making a small batch: one for Ron, one for my WD/C project and one for my WD/CO project.
The exhaust gasses enter the silencer and go through a baffle with a perforated tube behind. When the gasses have gone through the perforations, they are in the first “chamber” of the silencer. An “S” shaped deflector plate guides the gasses to the second “chamber”, where the opposite happens: through the holes of the perforated tube, through the tube and the baffle and out… This is half of an original system and a principle sketch:


email (option): wd.register@gmail.com
I used some angle iron and a wooden pole to “roll” the silencer body. The seam was gas welded, the tube was squeezed in the vice to obtain an elliptical section. This was followed by planishing over a tube (there is a larger thick wall tube inside the silencer body, for the planishing).


email (option): wd.register@gmail.com
Jan.... that is amazing!!! Fantastic workmanship 
email (option): horror@blueyonder.co.uk
They are amazing! I think Jan should give up his day job and make Royal Enfield silencers....Make a fortune and retire young
Mind you the delivery system has gone to pot this time The oil tank arrived here within 24 hours
Is anyone passing Jan's house and coming near mine
Ron
email (option): ronpier@talk21.com
The baffle construction really does demonstrate why modern pattern items with no filling are so damned noisy and blatty sounding. Jan's and Ron's bikes are going to sound fantastic !
It's going to take Ron ages to drill out those baffles so it sounds loud

email (option): horror@blueyonder.co.uk
very impressive!! making all these drilling in the small tubes with a manual drill!! Jan you are incredible!! do you sleep the night??? 
beautiful work on this unfoundable part ,and yes i think they sound very good!
felicitations
Arnaud
email (option): leger-arnaud@wanadoo.fr


