
My bike is all apart and would like to know how to mount the front wheel to the forks.
Thanks. Charlie
email (option): vhalftrack@aol.com
Hallo Charles,
there is an exploded view of the front hub in Dragonfly's parts list, if i'm not mistaking. With all the many rings on the right place, so that the wheel turns free when you tighten the main bolts on both sides.
It may be worth checking that.
How does the axle go onto the slot on the front forks. At first I thought it just slid on but the slot that goes to the hole for the axle is to small.
Charlie
email (option): vhalftrack@aol.com
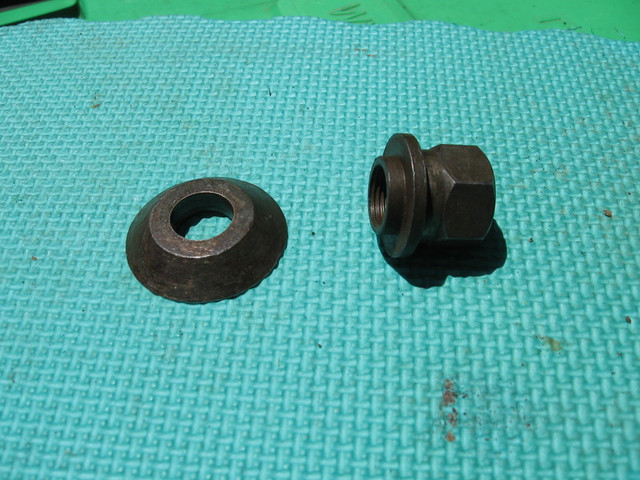
Charles, have got the nuts unscrewed? The original wheel nuts have a shoulder that fits into the larger hole above the slot.
Here is a picture I just took of the fork/axle on the brake drum side with the nut unscrewed - you can see the axle has plenty of space in the slot.
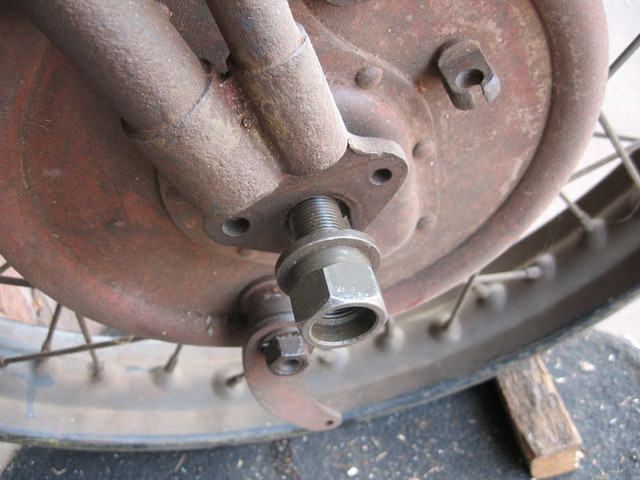
This photo shows the larger diameter shoulder that sits into the recess in the fork - this is too large to come out of the slot (well, when it was new anyway).
Maybe I have the wrong wheel/axle because the axle is too big for the slot. The bike was all apart when I got it. It came with both wheels but no forks. I bought two sets of forks and the axle doesn`t fit either one
Charlie
email (option): vhalftrack@aol.com
Indian forks??
Not sure. How do you tell?
Charlie
email (option): vhalftrack@aol.com
Well, the quality is rubbish and parts are made out of cast steel instead of forgings, which creates a safety problem. Often parts are chromed that shouldn't be. Casting numbers will be indistinct or missing. When viewed next to an original set it becomes obvious.

Indian

Original
Charles, the original WM20 front axle is 5/8" and an old set of forks I measured roughly with a ruler show the slot section about 11/16" and the round section for the shouldered nut at 3/4".
That should let you determine if the wheel or the forks are the odd ones out.
Did a quick measurement and my axle is 5/8 ,slot is 5/8 and the round section for shoulder nut is 3/4. So it looks like my slot is off by a 1/16. Could I file it down?
Charlie
email (option): vhalftrack@aol.com
Well thats pretty much proof the forks are repro and have never had a wheel in them before. Unless the've been painted and thats stopping the axle going in?
damn you photobucket ...lots of photos have gone missing on here . anyways
pulled my front wheel out to change tyres .
first question :
i am missing the conical spacer 24-7051
anybody know the thickness?
can see it here :
second question :
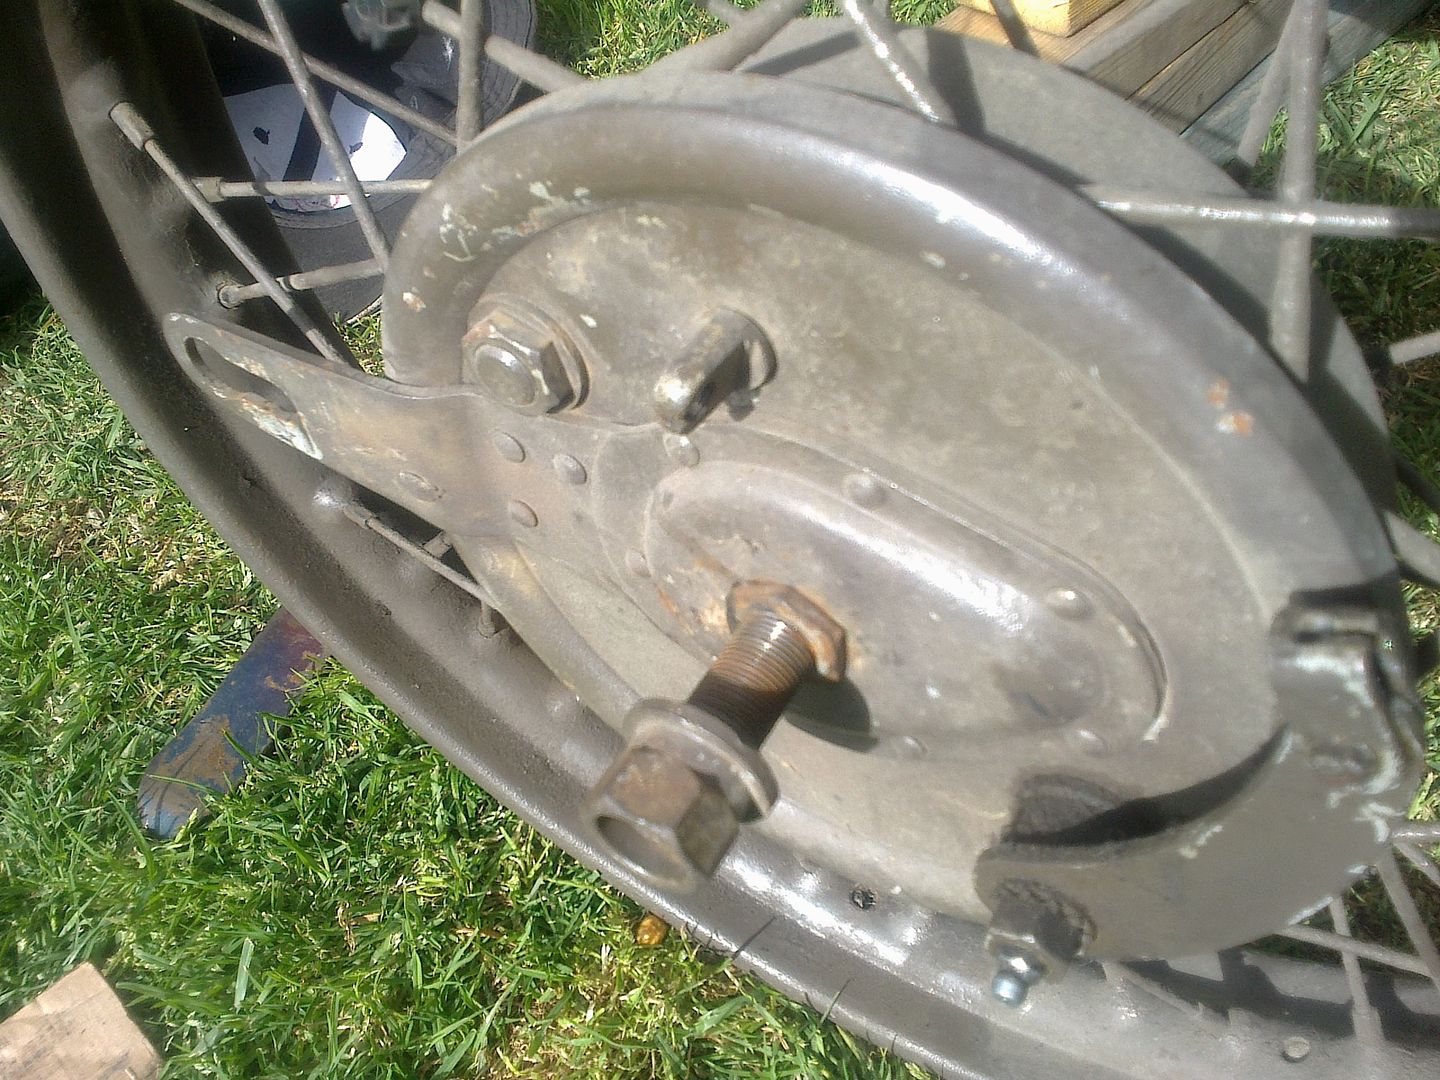
this is how the front backplate is on the axle
the parts drg on draganfly website is a bit indistinct with order of assembly .and i have seen the tech section wheel building pdf with dimensions but am unsure where exactly the brake packplate sits looks like part 42 is a shouldered nut that the backplate sits on ?
question : should the lock nut be holding the backplate on the axle ?-or should it be behind ie hub side - or not even there ?
should the backplate be loose on the axle ?
Here is the order of assembly. The nut should be inside the brake plate and run down to the end of the thread. Bearing adjustment is done at the other end. The tapered spacer sits loosely on the outside of brake plate. I can measure one later if no one gets there first.Or you can just buy one from Drags or Russell's. Ron

email (option): ronpier@talk21.com
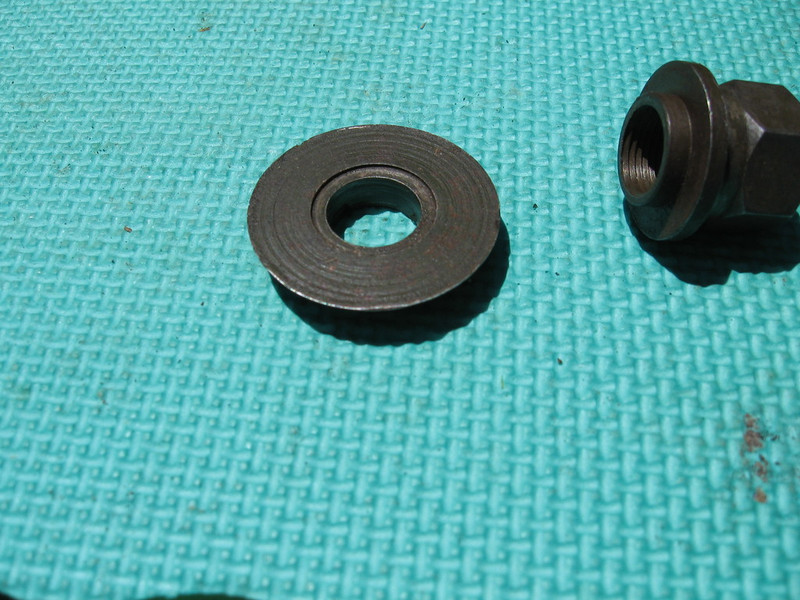
I just measured a spare spacer which is 1 11/16" diam at the wide end and 5/16" thick.
Ron
email (option): ronpier@talk21.com
ron - thanks for the dimensions.
i figured out the nut - its actually part number48 in tha diagram -and should be on other side of axle to clamp speeo drive and spacers on.
no wonder my wheel wasnt centred ...
Hi.
Sorry to jump in, but how many spacer/washers should be on the speedo side? The photo and Drags say 2, Russell's say 1 I don't think that I had any on mine when she was
on the road last.
Dave
email (option): jeepfinger@blueyonder.co.uk
If you are going to make this spacer it has a relief on the rear as shown. Item 42 in the diagram above has a shoulder that fits into the brake backing plate and this relief appears to be there so the backing plate is firmly gripped.
I can measure that tomorrow if you do need that dimension?
Sorry to jump in, but how many spacer/washers should be on the speedo side? The photo and Drags say 2, Russell's say 1
I don't think that I had any on mine when she wason the road last.
Dave
Dave it's a strange thing that BSA fitted two spacer washers here and they are clearly shown in the parts list. But I have seen bikes fitted with two and also one. As it happens my WM20 is fitted with one 'extra thick' washer and my M20 special has the two as stated. So unless Les is selling the extra thick spacer washer, I'm not sure if he is right
Ron
email (option): ronpier@talk21.com
Thanks Ron,
Yes it does seem to be a bit confusing. I don't know what the thickness should be.
I don't have any Mic's  to measure the thickness, but will be able to hopfully this week.
Dave
email (option): jeepfinger@blueyonder.co.uk
Dave, this old discussion has some good dimensions info and touches on the 1 or 2 washer topic.
HTTP://pub37.bravenet.com/forum/static/show.php?usernum=3155626639&frmid=16&msgid=1253103&cmd=show
Item 46 is very important as if that is left out the speedo drive can be deformed (as was done on one of my M20's at some point).
I can measure that tomorrow if you do need that dimension?
ray - its Ok part 42- the shouldered nut was there.
i actually have the part part
just need the spacer= thanks for the relief info
Just a quick question here. Between which spacers/nuts etc. does the speedo drive fit?
email (option): meck04@bigpond.com
Mark. Refer back to the parts list drawing I posted. Spacer washers 47 and nut 48 are on top of the speedo drive. Washer 46 sits in a recess inside the speedo drive. Ron
email (option): ronpier@talk21.com
Hi Ron and Ray,
Ray thanks for the link to the other thread. It was very helpfull in giving the thickness of the said washers.
Ron, I managed to measure the thickness. My neighbour had a set of Mic's, he is an ex BSA employee, and is 96, and was working at BSA until Feb 1942 when he was called up.
We both measured the thickness, the washer was 0.125 thou, the same as what Neale mentions. So it is not one of Les's thick washers.
Dave
email (option): jeepfinger@blueyonder.co.uk
Yes that's 1/8" Dave which sounds exactly right. Two needed to make up the 1/4" required spacer. God knows why they didn't just produce a 1/4" spacer which is what mine appears to have. Maybe it was to do with having a choice depending on the splay of your forks Ron
email (option): ronpier@talk21.com
all good on the conical spacer - picked one up today at Modak Motorcycles , Melbourne for $14 -Aussie pesos...
saved me messing about with washers..etc...
Thanks Ron. So it sits between 46 and 47?
email (option): meck04@bigpond.com
Well yes, but I would say that 46 is really part of the speedo drive as it sits in a recess inside the drive to protect the monkey metal. Ron
email (option): ronpier@talk21.com
Got it. Thanks Ron.
email (option): meck04@bigpond.com
Hi Ron,
Yes your dead right, it's a silly idea having 2 spacers instead of the one. I have 2 so shall see how it goes, when I get around to that job.
I got one of the inside speedo washers from Les last year, mine was missing
Dave
email (option): jeepfinger@blueyonder.co.uk