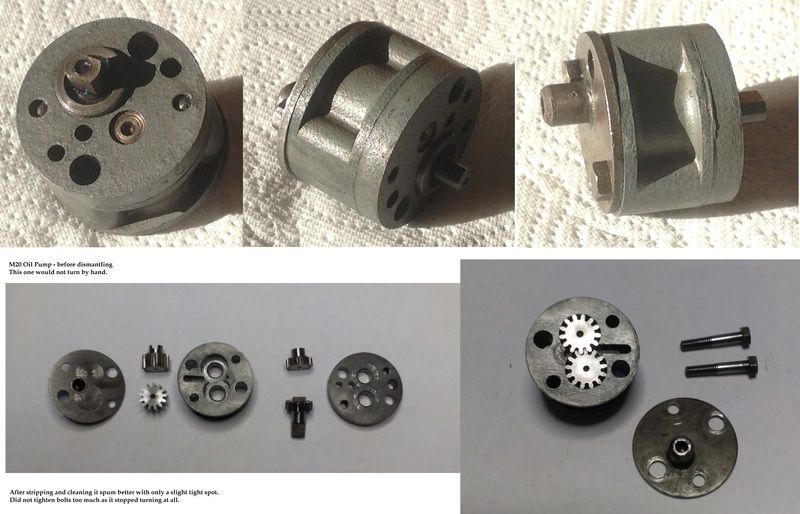
The guy I bought my '58 M21 from had a passion for taking things apart and then putting the component parts into various margarine tubs before moving on to the next item. Fortunately he seems to have got distracted after removing the oil pumps (yes, seems I have a spare!) and they look complete and unmolested.
After all the work I'm putting into this project I want to make sure all is tip-top and I want to check the operation and condition of the pump(s) before choosing which to use. Firstly I understand there are two types: the early 12 tooth and later 13 tooth. I checked in some old threads here and understand the two types are interchangeable although the component parts are not - the later 13 tooth seems to be the pump of choice but how do I identify them - what teeth should I be counting?
Next step is how can I check the operation of the pump out of the engine? I've seen the parts manual and there seem to be no seals or other "service" parts so is it just a case of dismantling and checking all parts are complete and without obvious wear - can it really be that simple? :-)
Gary.
email (option): gj.owen@hotmail.co.uk
The 13T refers to the number of teeth on the pump gears...These have a different tooth form to the 12T type and as you say, should not be mixed...
If you haven't taken the pump apart yet, simply remove the two small hexagon headed bolts..They hold the assembly together...
It will then readily come apart and you will be left with the steel base plate (with captive ball),the pump body, the alloy drive end plate and the four pump gears...Those are retained into the pump body only by the end plates..
You will see there are two narrow gears and two wide ones...The narrower gears are the feed gears and the wider ones the return gears...The latter have a larger pumping capacity and ensure the crankcase is scavenged...
Firstly the spindles on the gears that fit into the pump body (return gears) and the spindles that go through the alloy end plate (feed gears) should be a free fit and not restrict the gears rotation..
If they are tight ease the holes carefully with a half round needle file or a piece of fine emery paper wrapped around a suitable piece of rod...
Try each gear individually...When they are all moving freely clean everything off, reassemble the pump and tighten the two bolts fully..
The pump should be free to turn by hand..If it is tight strip it again and remove all the gears...
Tightness is caused by deterioration of the Mazac pump housing and end plate..When Mazac deteriorates it tends to expand putting pressure on the gears when the bolts are tightened...
First place the alloy end plate on some fine emery, on a flat surface and lightly emery it to remove any high spots...
Next take the feed gear that has the pump drive spindle on it, apply some fine grinding paste to the lower face and lap the gear into the pump body in its normal position until the recess in the body has a flat surface...
Repeat the process with the other three gear recesses...When that is complete thoroughly clean all the parts and reassemble the pump fully. Try turning it again...If it is still tight repeat the lapping process, looking for 'witness marks' caused by the gears contacting the pump body to indicate high spots...
When the pump turns freely with the bolts tightened next fit two 1/4" bolts through the holes that the pump mounting bolts fit through...Put nuts on the other end and tighten both nuts..This simulates bolting the pump into the engine.
Check the pump again for free rotation...If it now goes tight you will have to do some more lapping!...If it turns freely it is ready for use.
When you build an engine, after heating the cases to fit bearings etc. the next job is to fit the pump and pump drive shaft...This allows you to check the pump is free by turning the upper end of the drive shaft with your fingers...
A tight pump will lead to premature wear of the oil pump drive spindle and crankshaft pinion gears so should be avoided...
I have yet to have a BSA pump that doesn't pump...That is never an issue, but having lapped in scores of them I just regard it as another patience test each time!...Ian 
email (option): ian@wright52.plus.com
Thanks For a very helpful and easy to follow set of instructions Ian- one for the technical archive maybe?
Gary

email (option): gj.owen@hotmail.co.uk
Gary

Good idea Gary and already done.
Henk
email (option): ahum@quicknet.nl
Gary

Good idea Gary and already done.
Henk
Henk, Gary made his suggestion in January. Where have you been for the last ten months ?

I tried to be cynical Rik. 
email (option): ahum@quicknet.nl
Draganfly used to advertise with steel body oil pumps.
Would they be any better ?
Anyone tried one ?
Something else; i've never even seen my oil pump since I bought the bike in 1973.
It pumps all right, but should i take in out and check ?
(some people say "if its not broke, don't fix it" but I'm starting to worry now...)
No need to take it out if it is working.
The one in my bike works. My spare engine didn't have one so stripping one I got to ensure it is able to work. Before I took it to bits it would not move freely. It wouldn't turn easy even with pliers. So using this opportunity to learn how to service one. Probably never taking my working bike oil pump out.
Paul Crisp
email (option): bsa945@btinternet.com
You can leave it if it's running...
However, bear in mind the 'tight' condition arises from a deterioration in the material of the Mazac pump body..This is an age related problem and can happen while the pump is in the bike...
It can even happen to a NOS pump whilst on the shelf as well...
I have stripped many engines that were running with an overly tight pump..
Of course, the engine has plenty of power (even the M20 ) to drive the pump in this condition...The result though will be a prematurely worn oil pump drive...
Dropping out the pump is a relatively easy job with the BSA so I would say it's a job worth thinking about during the winter months when the bike isn't in use as much...Ian
email (option): ian@wright52.plus.com
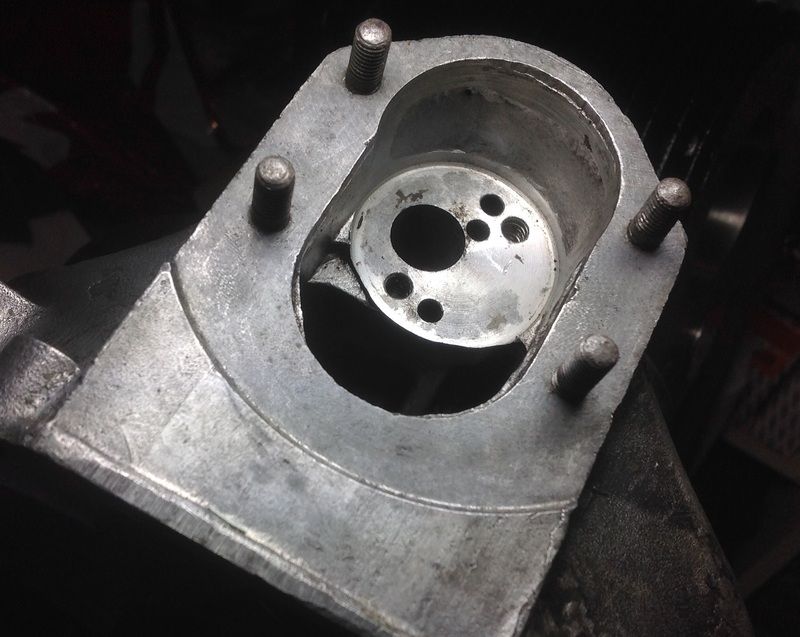
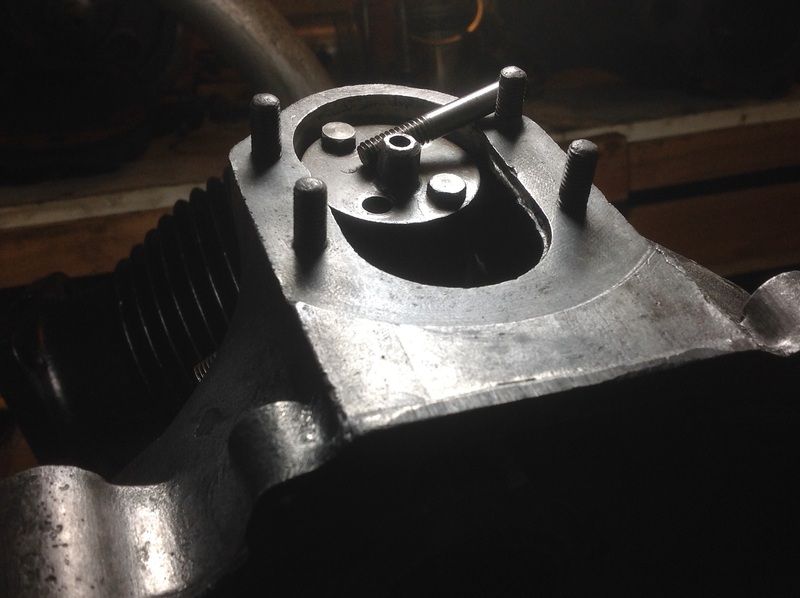
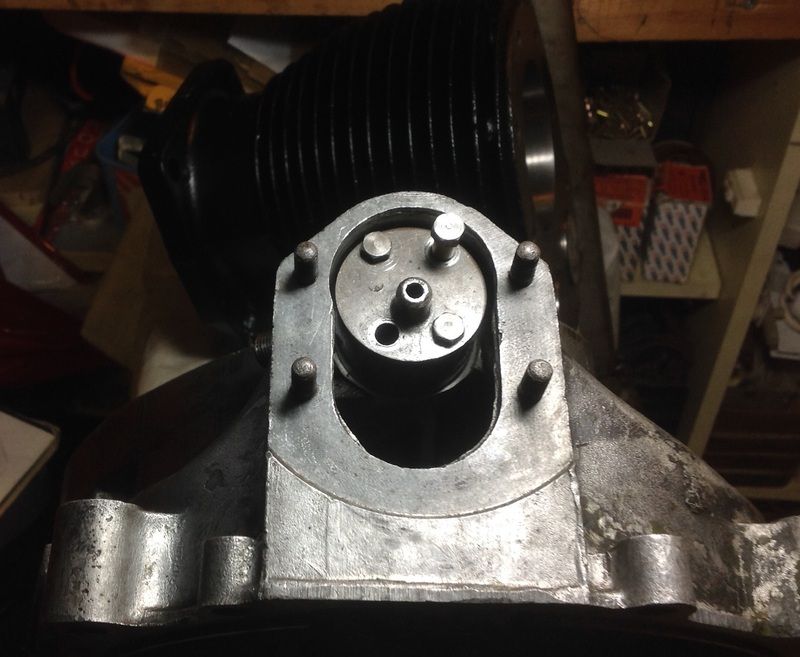
Anyone know what size and part number the fixing bolts for the oil pump are. Not the ones holding it together, the ones to mount it to the bike.
Cannot find a part number for these?
Paul Crisp
The thread of the bolts are 1/4" Whitworth but they have reduced flat heads..Part number 65-2604...Ian
email (option): ian@wright52.plus.com
I would start by running the tap down the bolt holes...it is quite possible that the threads have been burred by the use of worn/damaged bolts previously...
This will ensure the crankcase thread is good...Then retry the bolts...
If they are still tight use a WHITWORTH die to run down the thread taking the minimum of material from the bolt and then try it again...
If you run a die down the bolt first you may still find it is tight in the hole but you will now have an undersize bolt which may be loose when you tap out the hole...
email (option): ian@wright52.plus.com
From the point of view of 'best practice' it's worth noting here that UNC and Whitworth are not interchangeable threads..
Whilst the pitch (TPI) numbers are common up to half inch the thread form is quite different..
Whitworth has a 55 degree included thread angle and UNC has a 60 degree angle...The base and crests of the thread teeth are also different...
So, whilst you can physically mix the two, the fit of the nut to the bolt and vice versa would not correct in that case...
It should not be regarded as good practice to mix the two forms and this should be avoided if possible..Ian
email (option): ian@wright52.plus.com
I normally bin the original bolts as they are a pain to undo once fitted especially when engine is fitted into bike.I replace them with allen bolts with a drilled head so I can lockwire them, the advantage of using drilled allen bolts is you can just nip them up then lock wire them, this also helps to prevent distortion of the pump body..Dave
If the thread in the hole is damaged/burred which is possible as it's an original not a new thread, and you reduce the bolt with a die to try and make it fit it may still not go in...
If you then tap the thread out in the crankcase, the bolt, which has already been reduced in diameter in an attempt to make it fit a damaged thread, will then be undersize and thus slack...
It seems more logical to ensure the old thread in the crankcase is functioning properly before thinking of altering a new bolt which may have nothing wrong with it...To check the thread on the bolt a whitworth nut should be used..
Any comments regarding threads are only to point out that mixing threads is not good practice and a die of the correct thread should be used to clean up threads...(or the appropriate thread file)..not a nut of the incorrect thread...
I'm not being either pedantic or critical...I just think it is best to describe the correct methods ...Ian
email (option): ian@wright52.plus.com
Yep
Got a die and tap set for the 1/4 inch Whit thread.
Used the taps to clean out the thread in the casting and it worked, the New bolt fits smoothly in now. No movement, no slack.
Paul C
