Thanks Stev will contact tomorrow, Andrew.h.
email (option): warbikes@gmail.com
Don't take any crap Andy !!! (I'm sure there won't be any) but you have my permission to use my order !!!!!!
email (option): sjmwdbikemad@aol.co.uk
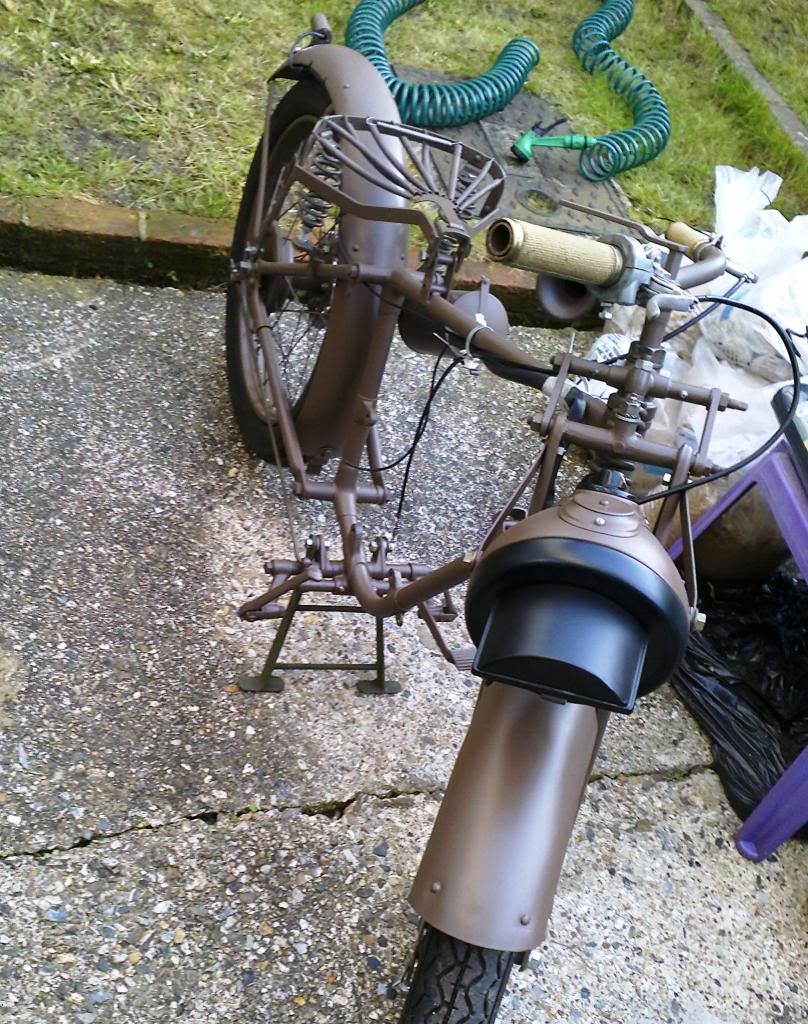
Few more bits added to Vidya's ML !! Wheels only temporarily in, also (civvy) temp stand fitted with slave bolts............but handlebars now added, plus headlight, blackout mask (thanks Mick !!) and wiring harness (all two wires of it to the tail light and mag flywheel coils ! Correct "strips, aluminium, pliable, (x 2)" provisionally fitted to secure the harness and control cables...........many jobs yet to do, including NOS fork spindles to fit but a doddle on the ML............plus more spraying to do.........
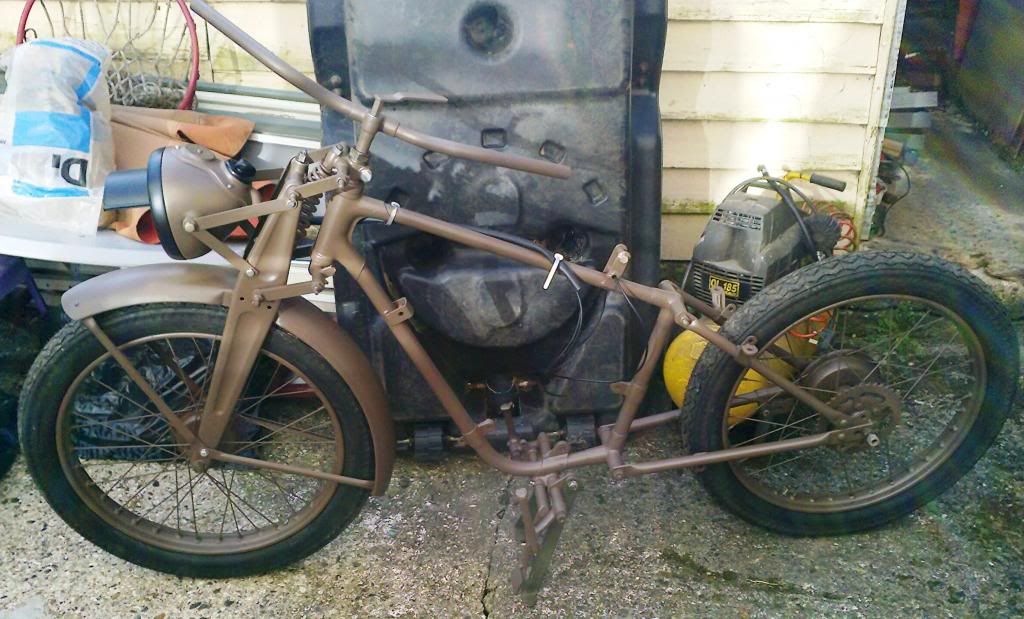
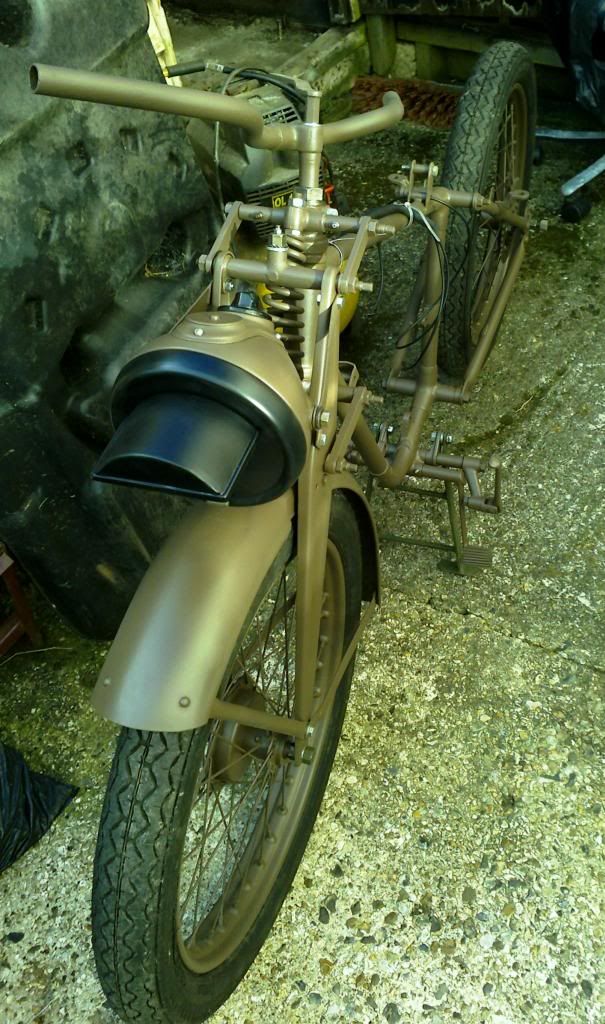
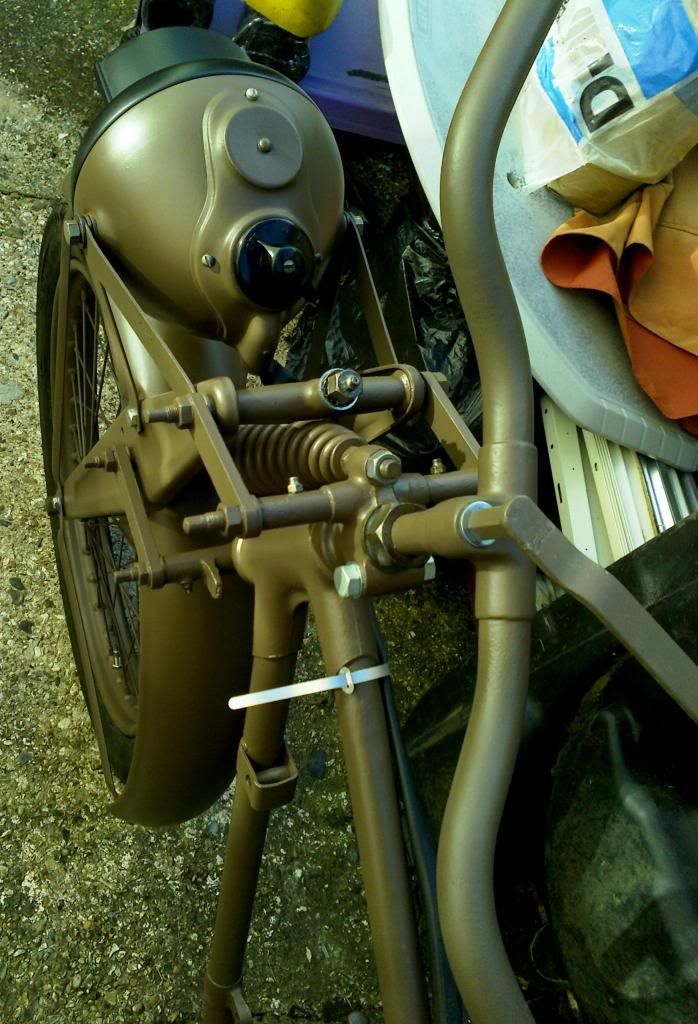
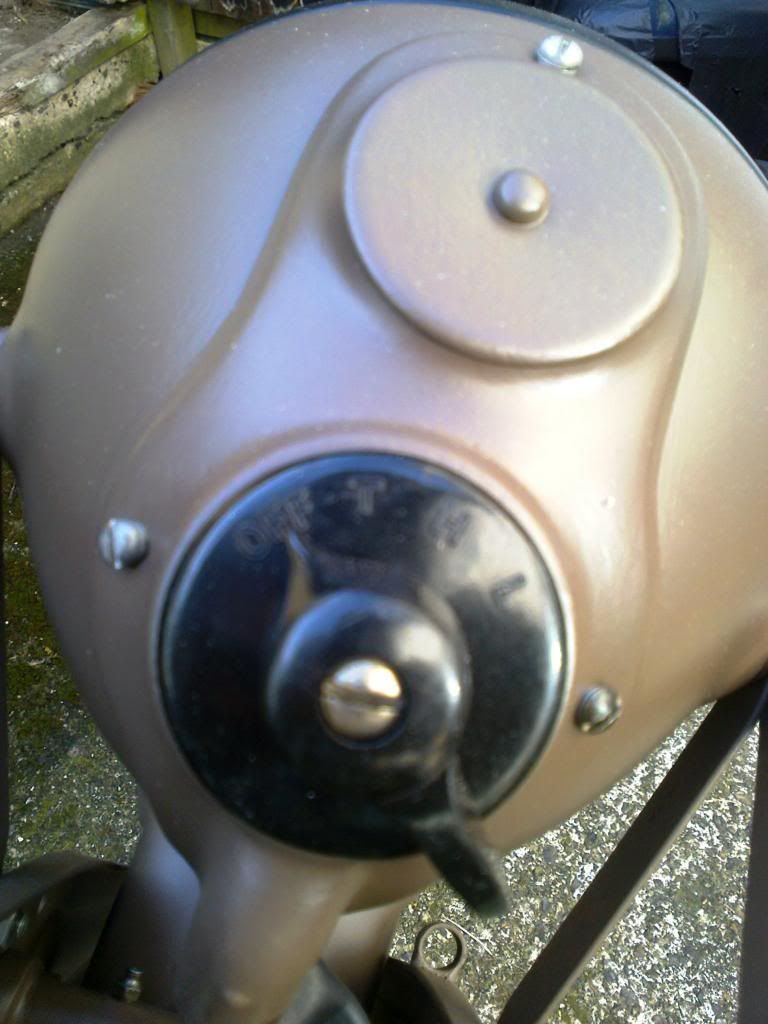
And so it continues.......more items added......headlamp and blackout mask now in place together with all wiring through to the tail-lamp in correct rubber-covered wire..........headlight has the unique ML switch with the "L & H" positions reversed (so reads "Off, T, H, L" and is internally not the same as other switches, the central rotor in particular being different....also not the lack of the Lucas name on the face of the switch....).........
Rear mudguard added, plus toolbox and a few other bits...........
Plan is to complete the rolling chassis then get to work on the engine......other than a basic strip-down, service and general check-over no real issues expected as it hasn't really been used since I last put her together back in the early 1990's !
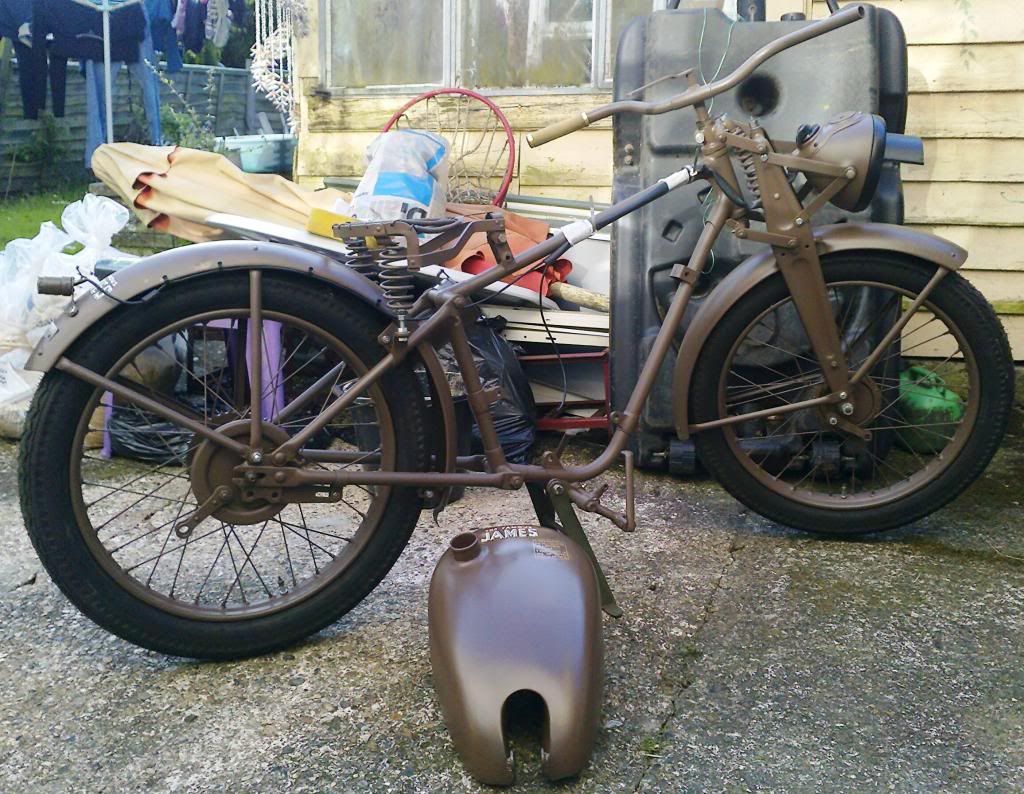
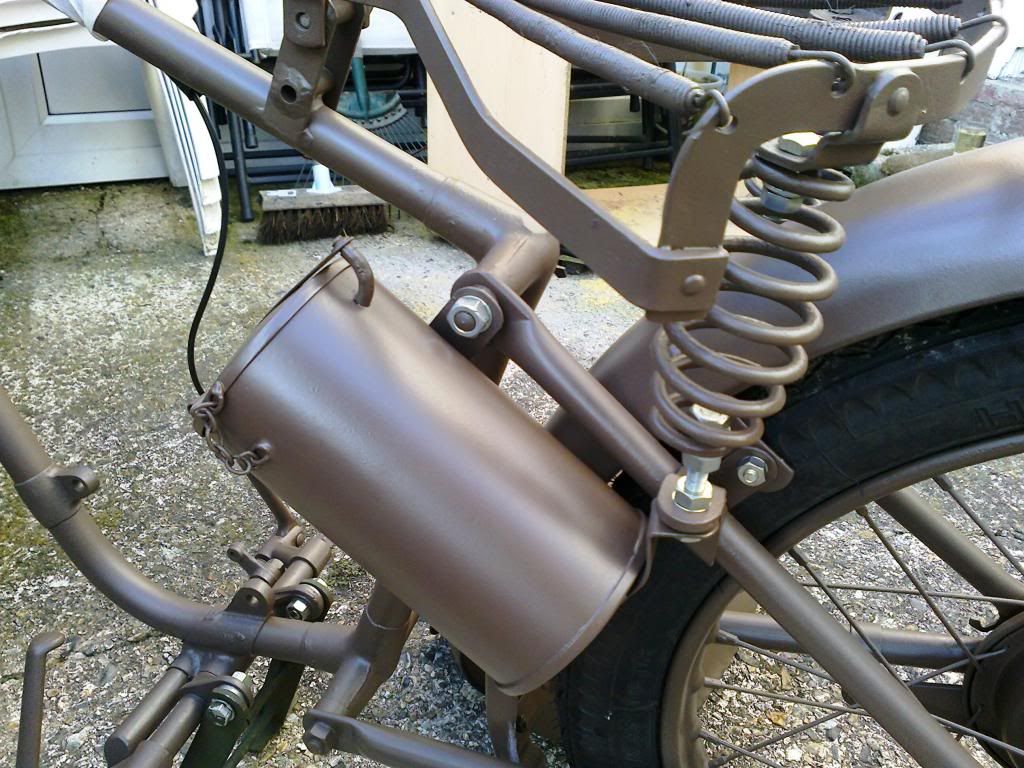
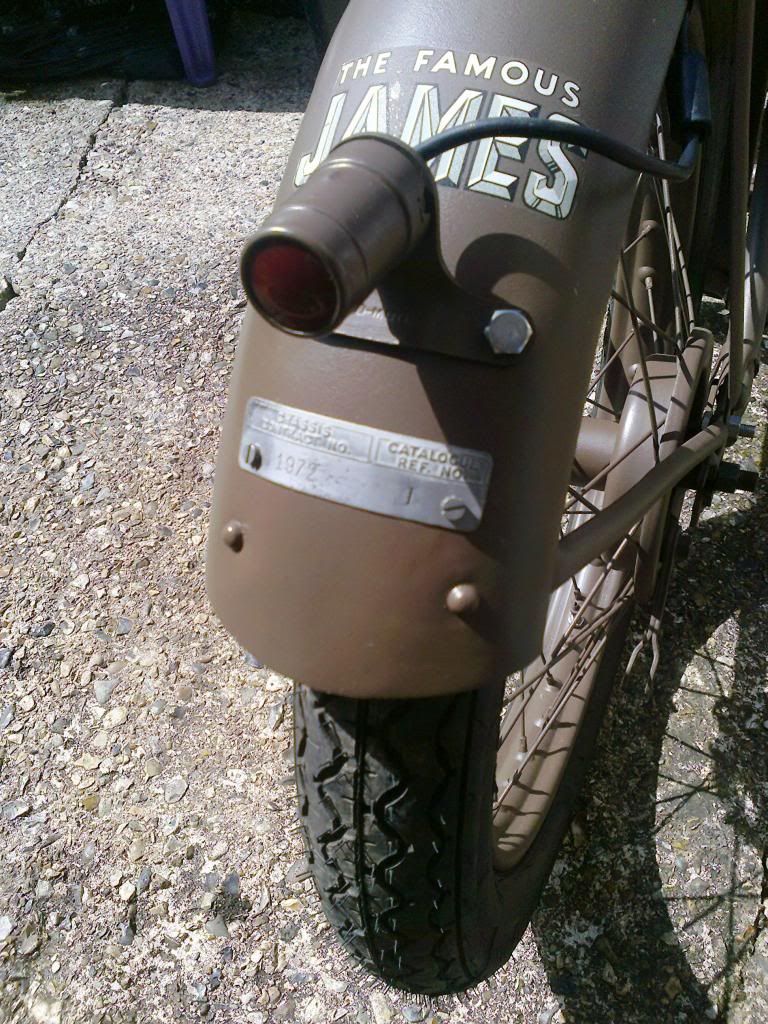
Note the steel contract plate (1st ML contract) circa 1943 and the L-WD-MCT1 (NOT "1A") tail-light...... Generally, the contract plates were affixed by small dome-head copper rivets but they can be a complete arse to fit and you risk damaging the paintwork whilst doing so thus I opted for a pair of small screws instead (ex-WD stock though !
  ) After cleaning-up, I completely varnished the plate to seal it........after all, these steel plates are prone to corrosion.........
 This should hopefully preserve the finish.....
It's looking good, thanks for posting nice clear pictures of the assemblies as these will be a great help when I start mine.
email (option): davmax@ntlworld.com
You're welcome Dave, and thanks for the kind comments. This is the first time I've ever posted a "as I go along" restoration and as you say, if it helps others out then it's a good thing.........there seem to be a fair few ML owners on this Forum......
New-Old-Stock carb and choke assembly for the ML........note that it is factory-finished in SCC No.2 Brown............I don't really need to fit this as the one on the bike is sound, but...I have one so why not ?
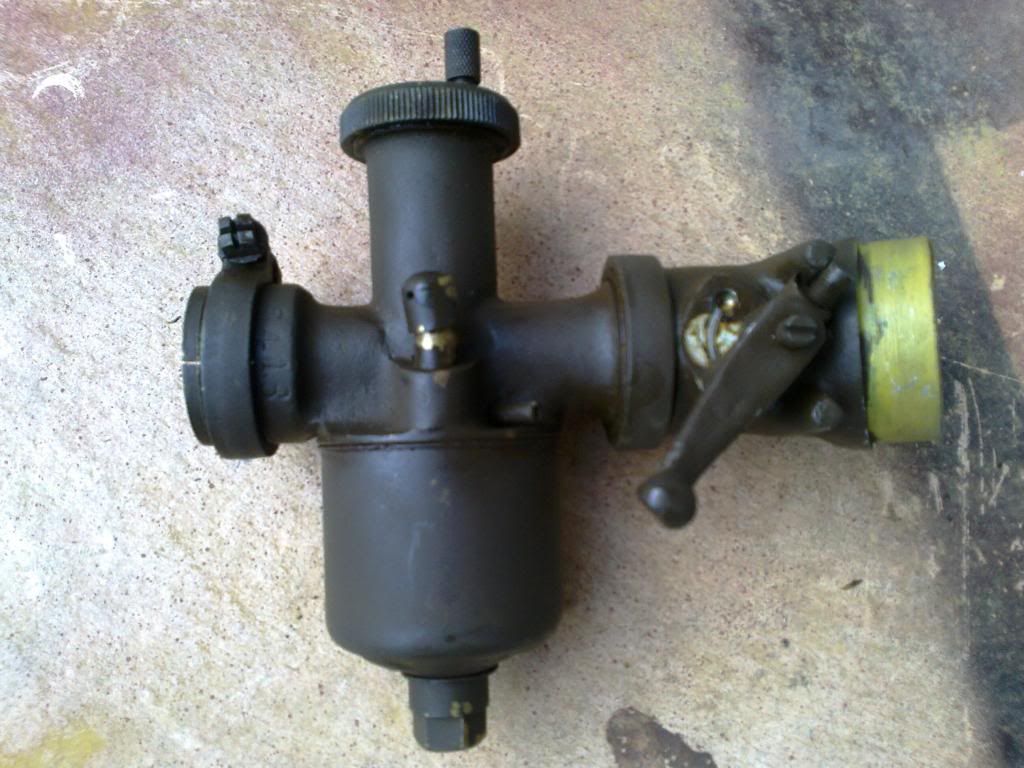
Here's that NOS carb (Villiers Type 3/1 - the Flea fitted a 3/2 which was basically the same but with a different internal valve and needle)........look at the 71-year old SCC No.2 colour against my few weeks old SCC No.2 Brown copy........not a bad match, and as with everything, exact shades did vary......
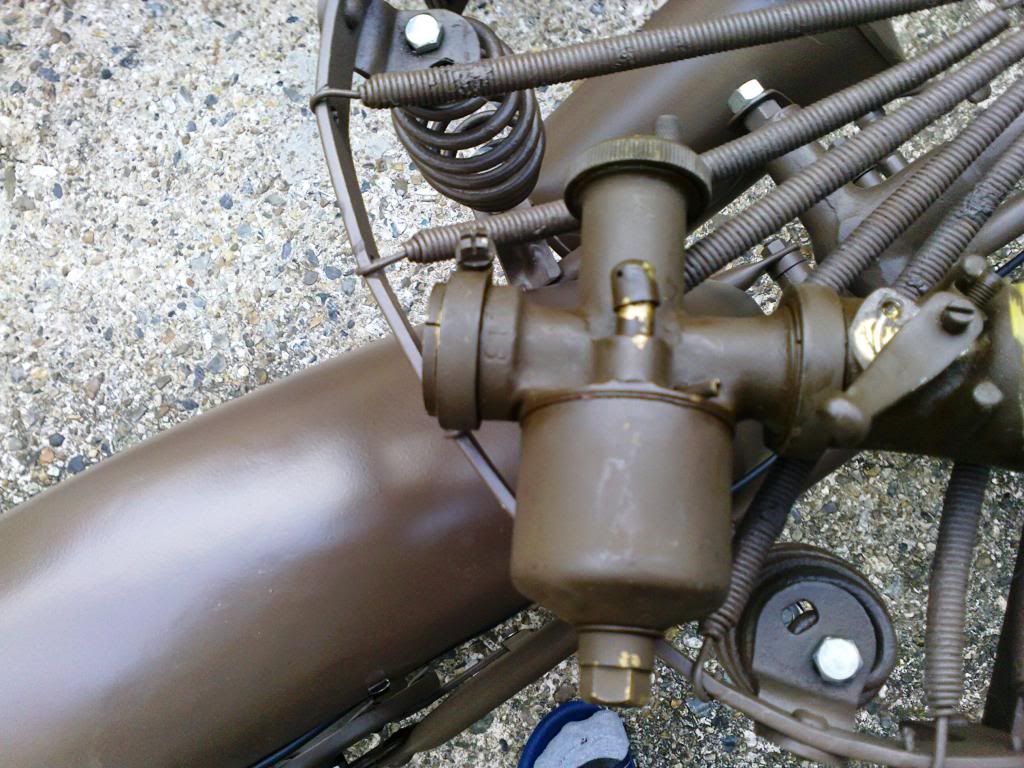
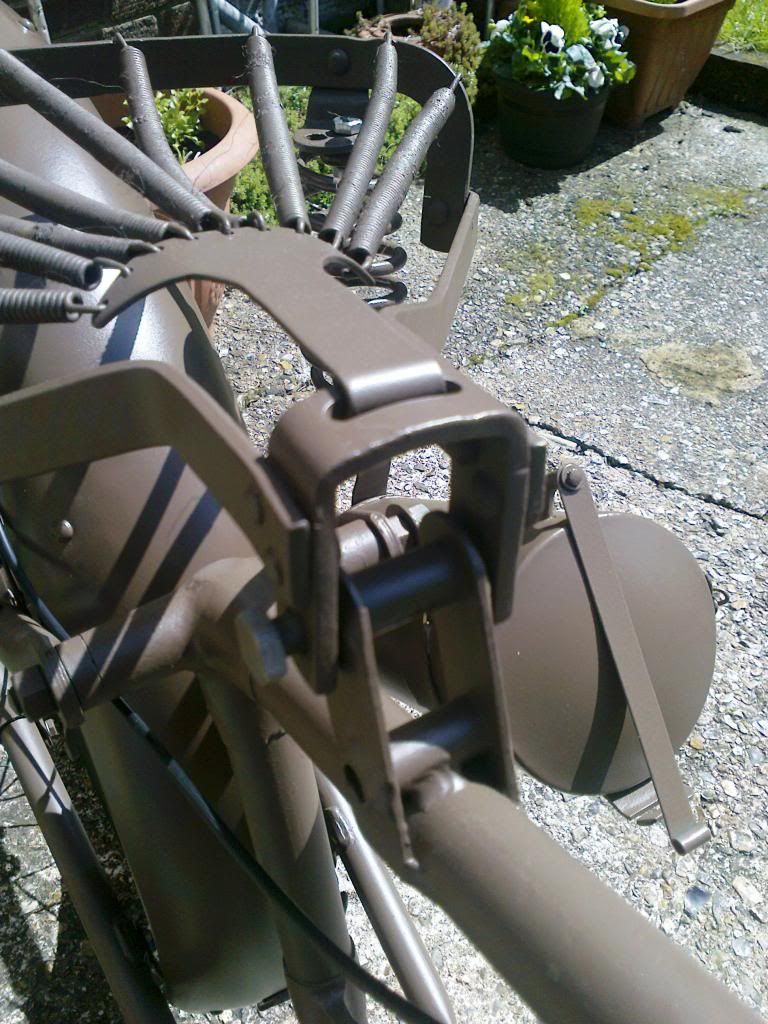
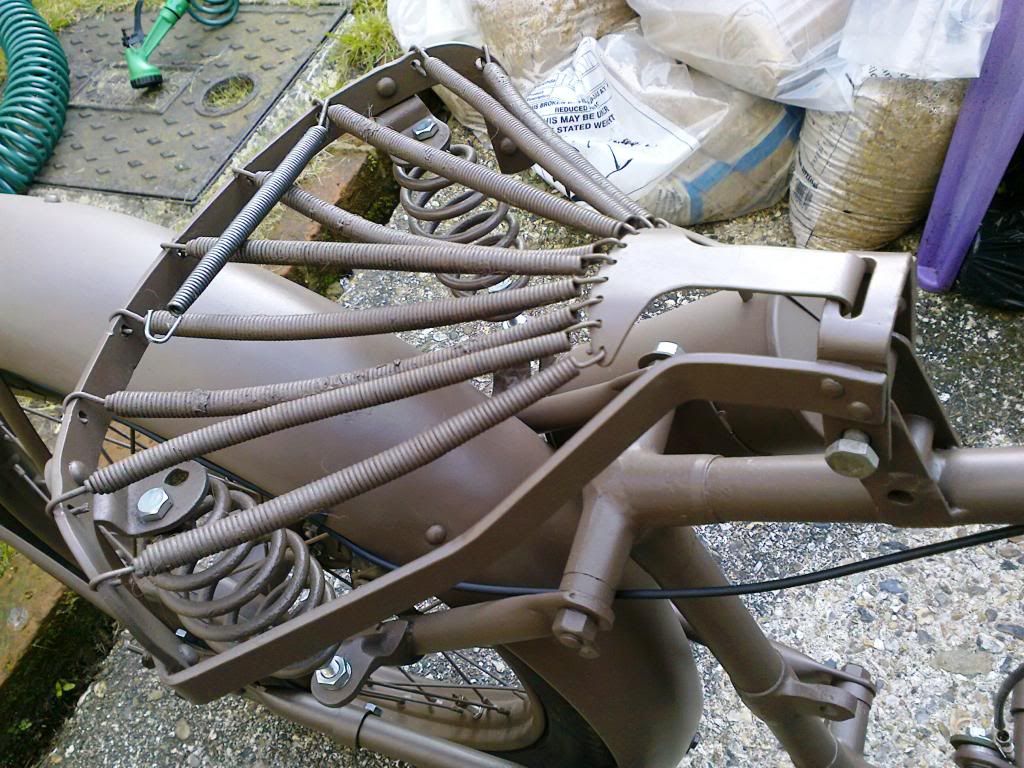
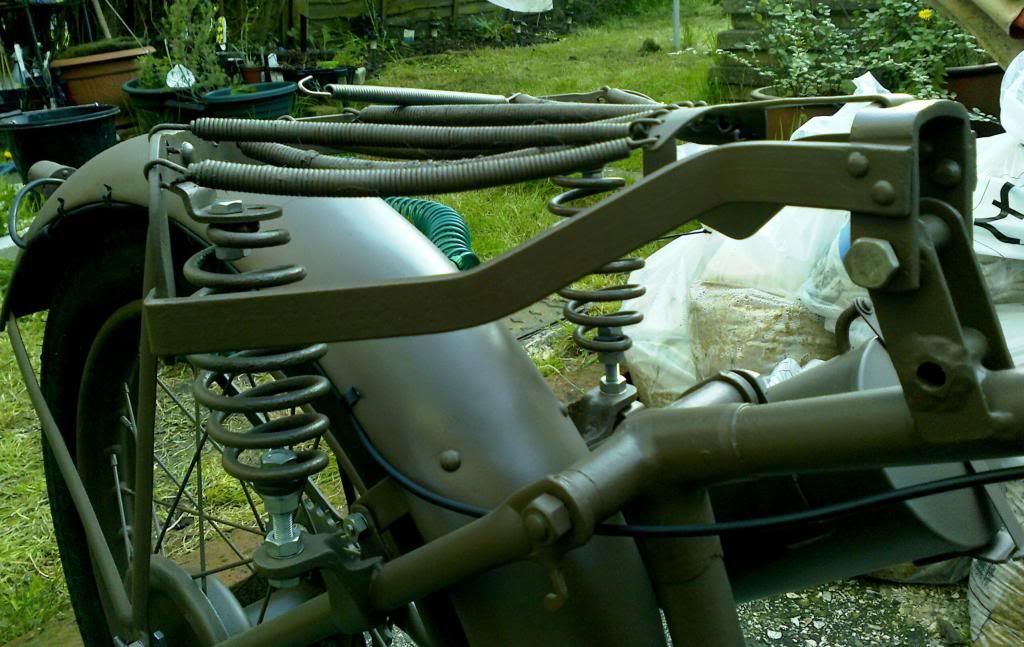
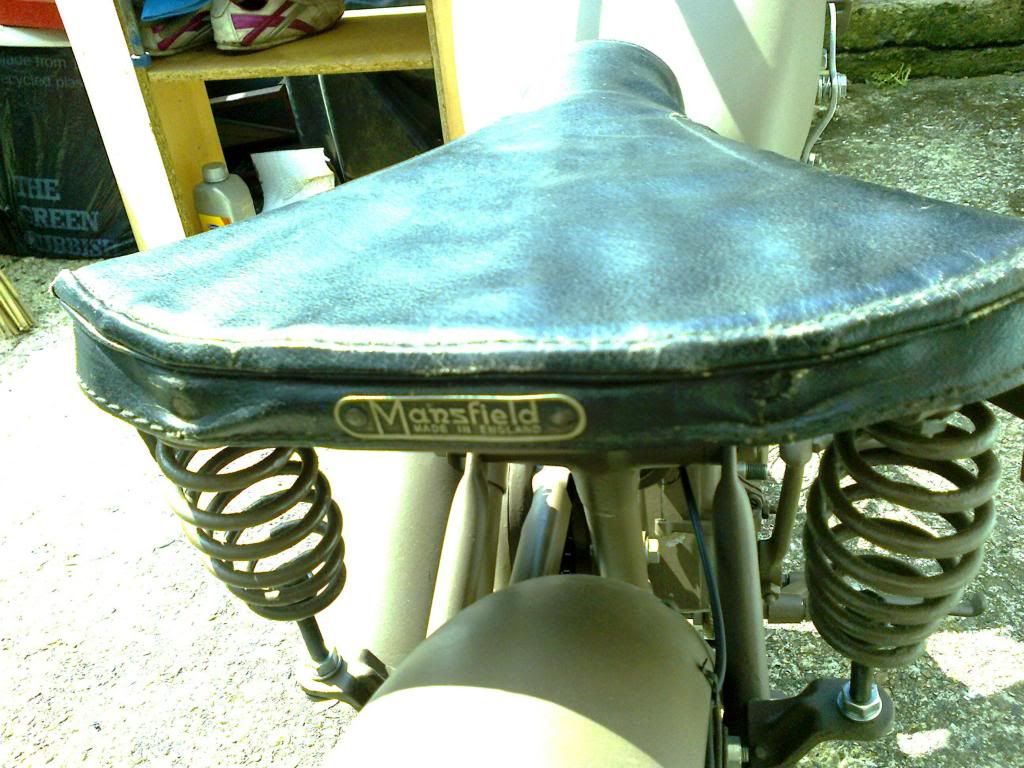
Note also, THE correct Mansfield saddle frame beneath......fitted to both the ML and Flea........note the main-spring brackets.......TWO position holes.........anything other than this and you may find "fitting" and "alignment" issues.............this is the original and correct WD ML/Flea Mansfield saddle frame........
Now that a saddle frame to look out for!I have quite a few Mansfield saddles, but none have the spring mounting brackets like that.
Can you please take some more pictures of the toolbox from a couple of angles and a few measurements please?
email (option): davmax@ntlworld.com
Dave...wildo......
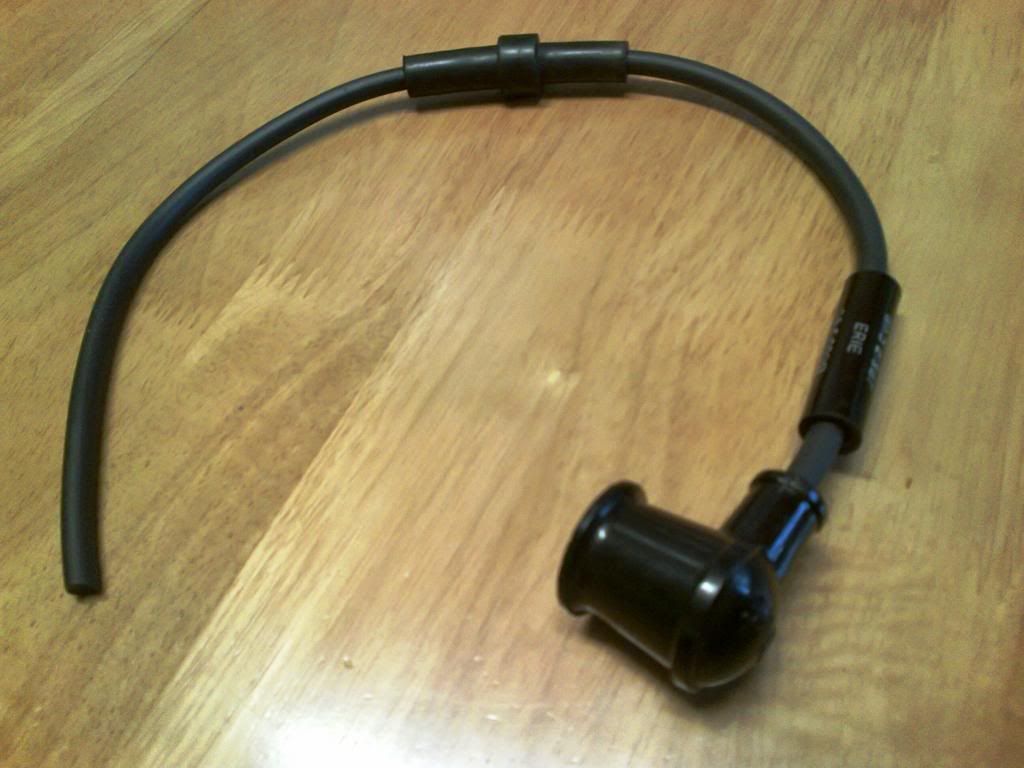
Now, this is the correct James ML HT lead arrangement.........huge pre-war Lodge plug cap (NOT suppressed !!!), WD suppressor and the WD Immobiliser (thanks Uncle Ron ! - I'd run out of 'em  )............NOT shown is the end that connect to the engine flywheel ignition.......added later........correct rubber-covered lead too.........
Couple of points here........the Lodge plug cap also used on the WD Flea....it is black plastic/bakelite and rather hard to source today.......if fitting to any plug, you need to use the old fashioned double-width "knurled" screw-tops on the plugs in "reverse" (eg - with the "knurled" bit at the top......this fits snugly into the Lodge cap making a firm connection............
Other point to mention is the WD Flea did not use the immobiliser (only the suppressor) on the lead...........this was because the design of the Flea's HT lead meant that the entire ensemble could be detached as one.......
The Lodge plug caps are hard to find today and are essentially a 1930's design......
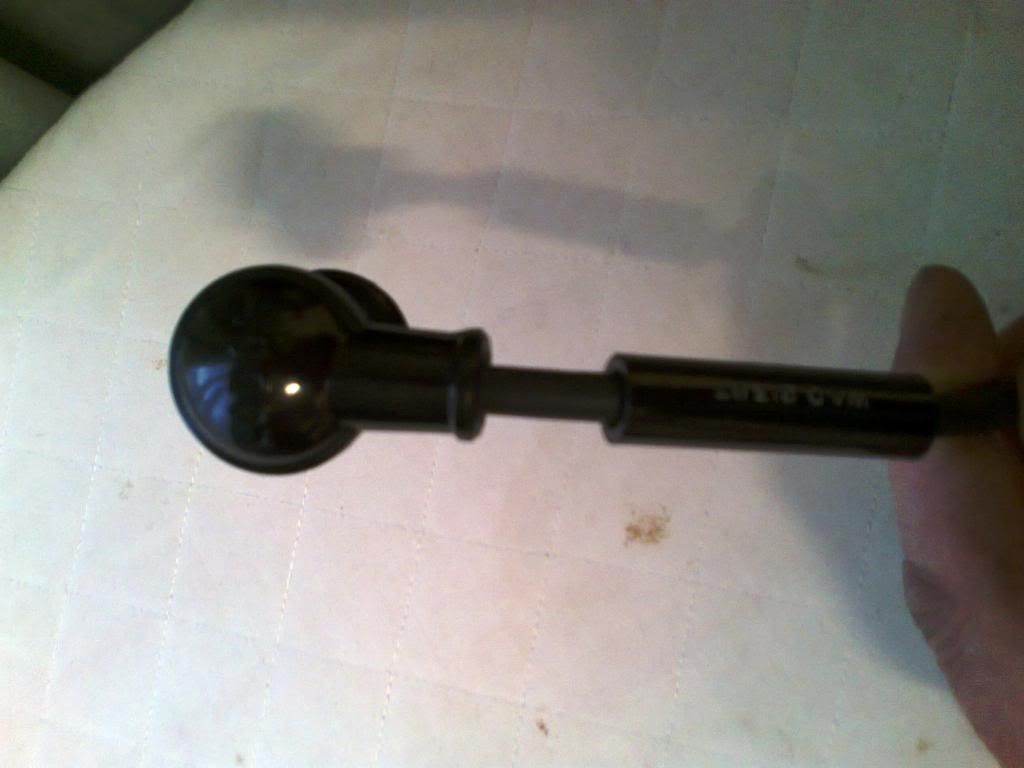
Thanks Steve! Can I have it's diameter and length please?
email (option): davmax@ntlworld.com
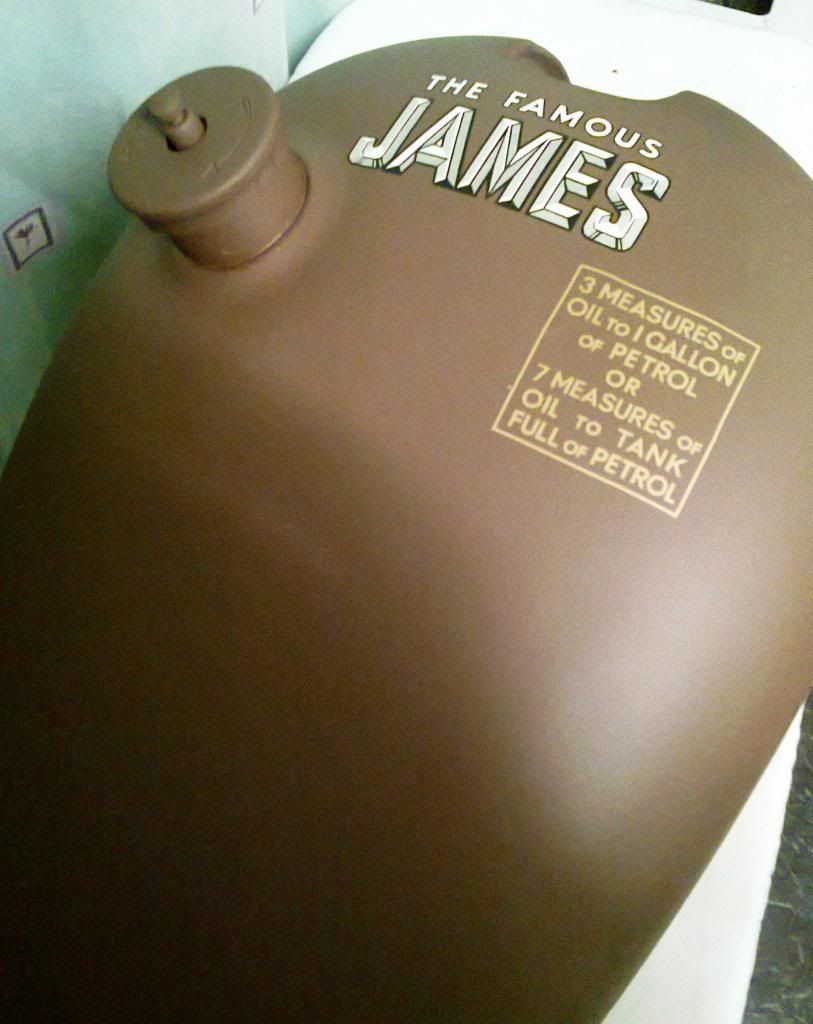
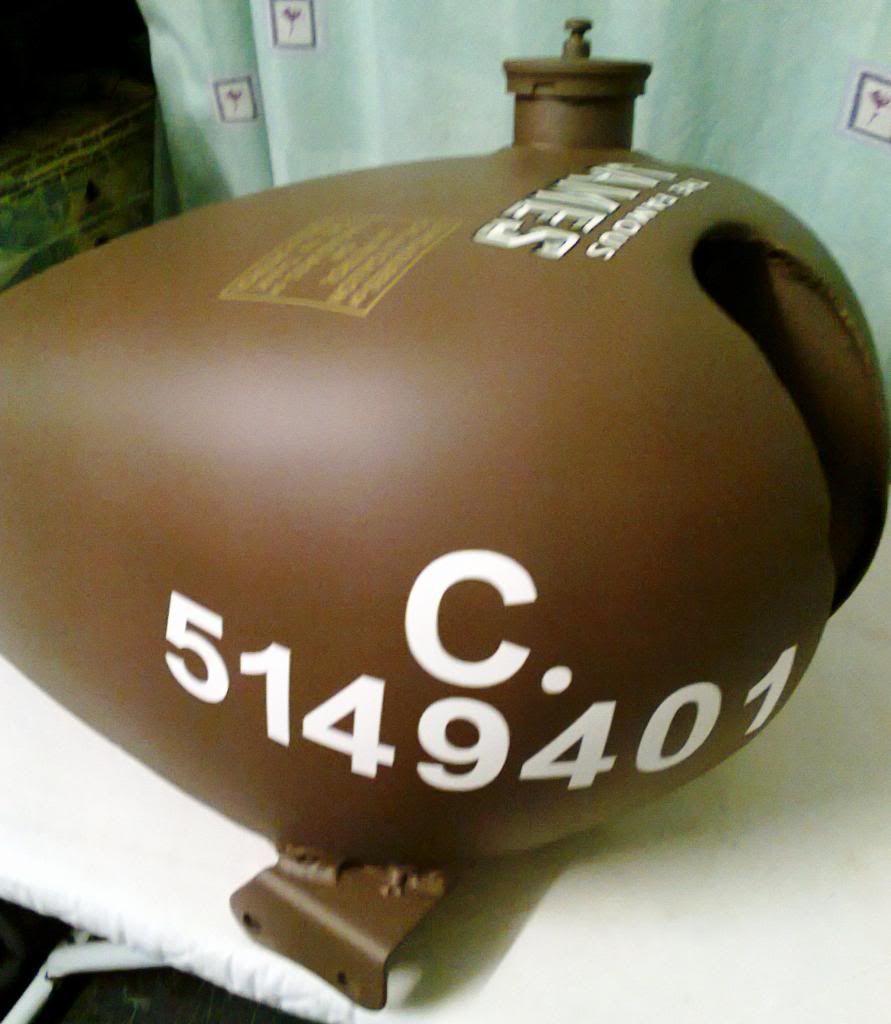
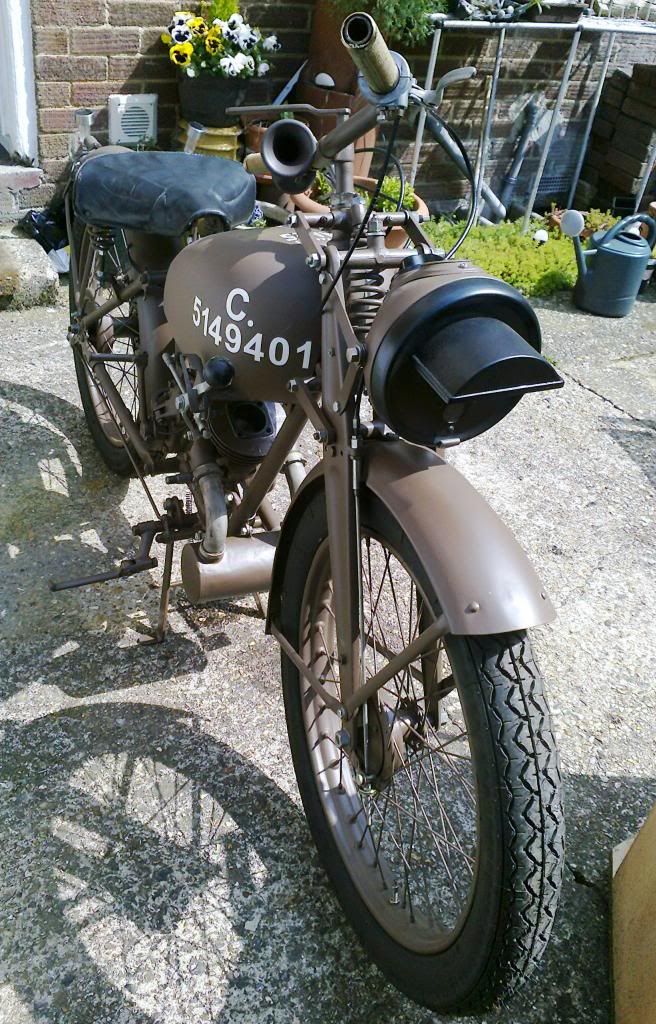
Work progresses......fuel tank now finished and marked with the correct wartime C-number.........note that ML's had a peculiar marking system with the "C" above the number plus the "full stop" or "dot" after the "C"............
I love this SCC No.2 brown copy....it's very close to NOS parts I have........
Also today found a NOS ex-WD ML front brake and clutch cable complete with all fittings, buried in my "cable" crate still covered in cosmoline grease.....two items to deduct from the small list of required parts.........control cables are encased in a black-lacquered-braided outer...........
Great job Steve. Any chance of getting a full photo of the saddle (Mansfield?). Never did know if mine was correct. Thanks. Henri
email (option): unpob@yahoo.com
Yes indeed Henri ! I will get this done tomorrow.......frame and cover photos.......
For info, the saddle is the same as fitted to the WD/RE Flea.....same part numbers..........also used on both models post-war.........however, there are a number of other lightweight saddles out there that are not quite the same in fitting, bracketry, etc, as a number have found out..........if you haven't got the correct saddle then you may have certain fitting issues.......
Thanks for all of that. On another note...
Did you know this:
I have just received the sad news that Alan Abrahams, James Marque Specialist for the British Two Stroke Club and creator of the "Simply Wizard" web site for all things James, has died of cancer. He will be missed by his family and the many friends he has made around the world.
Mark Gattenhof,
Wyoming, New South Wales
email (option): unpob@yahoo.com
Few more jobs done in the sunshine today.........NOS carburetter completely stripped down, cleaned and oiled........
Webbing grips fitted to the handlebars plus most of the control levers 'bar the decompressor that I am still looking for.........NOS clutch cable, front brake cable and assembly and throttle cable fitted in place after a good degrease and oil..........twistgrip is also ex-WD NOS.............
Jobs done on the wheels today included hub bearing adjustments and NOS rear-sprocket, bolts and nuts fitted to the rear wheel.......note that the NOS WD sprocket is in cadmium/dull chrome plate, not painted...........NOS rear wheel adjusters also fitted..........wiring loom is loosely held in place at present by tape and the pair of "strips, aluminium, pliable" (ex-WD NOS) also in place and ready for final tightening when everything fitted..............few other nuts and bolts fitted.......
Next job is to tackle the engine that has not been run for over 20 years since last restored (this bike has been sitting in a museum)......it will be ignition overhaul, a re-lube, clutch strip-down and clean-up and that's about it.......
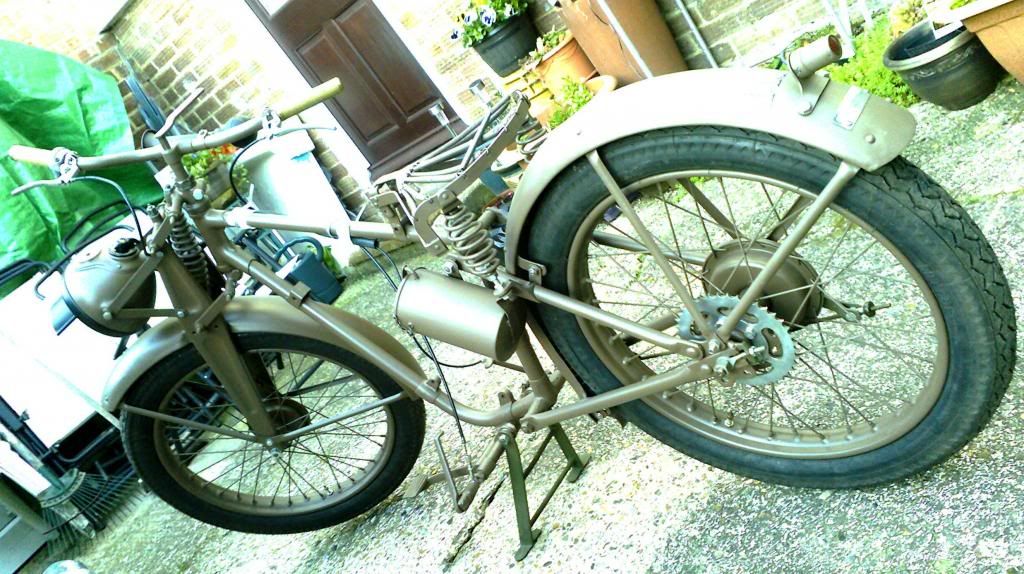
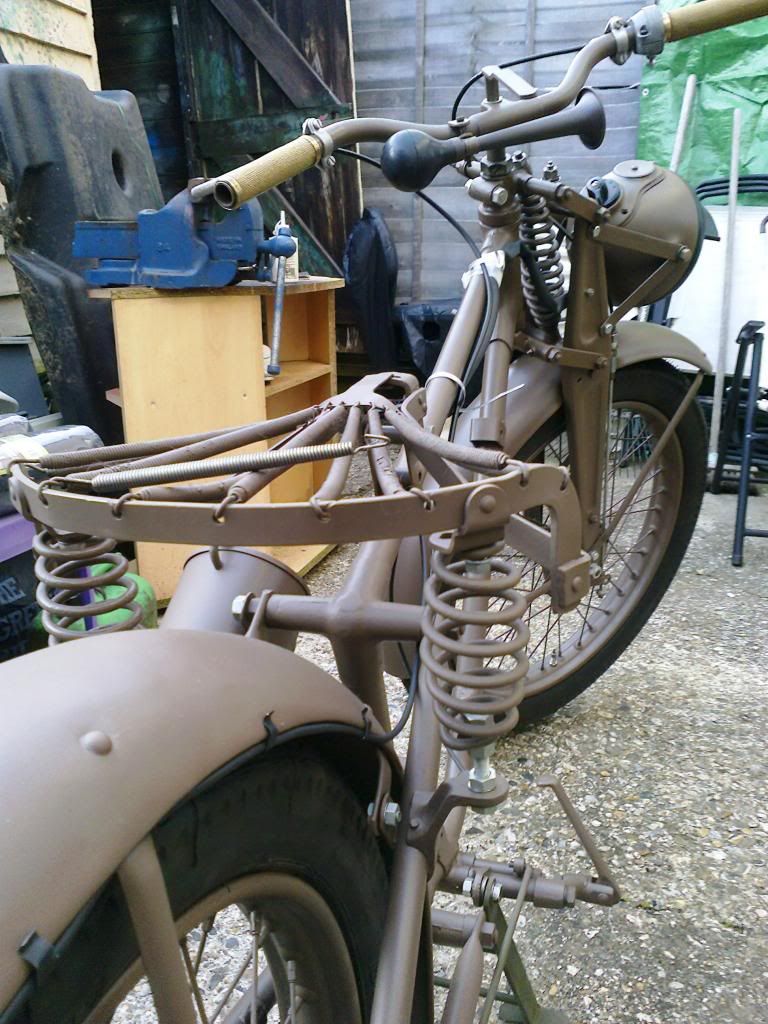
Henri, and for others interested, some shots here of the correct ML Mansfield saddle frame and fittings........mattress springs are a bit tired so will be replaced with new ones in due course before the original cover is re-fitted...........note that the Flea uses the same saddle as the ML (a check of the parts lists and numbers confirm this).....
Hi
Nice work.
I have just rebuild my engine of my Triumph 3HW :)
I go running in the engine now and next winter i go sandblasting, paint etc him.
email (option): joma_1@hotmail.com
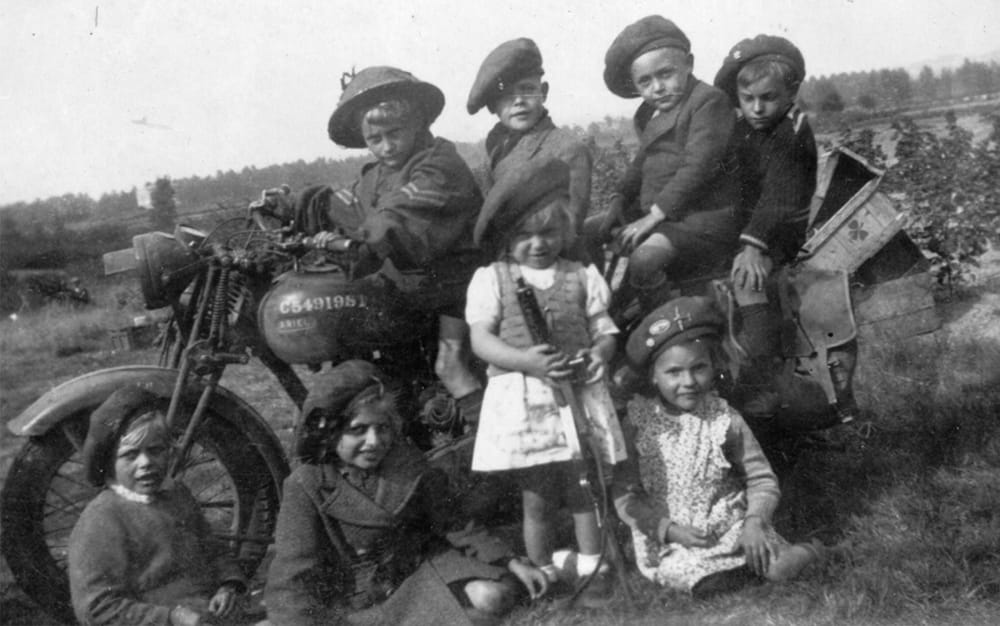
Thanks Johan ! I am trying to get this little bike finished in time for Normandy this year as she will be going ! There will be a few of us over there on ML's and quite appropriate too as these little bikes were well-used around the Normandy landings area as photos prove............
Only issue may be my 6'4" height - v - the size of the ML !!! Oh well, always one to try something new..........
Hi again
I will go also to Normandie, but im a little to late for a logement i think.
And maybe my son will go whit me. I was there in 2009
I have also a Ford gpw from 1942 and many Flandria (made in Belgium) mopeds :)
Grtz from Belgium
Johan
email (option): joma_1@hotmail.com
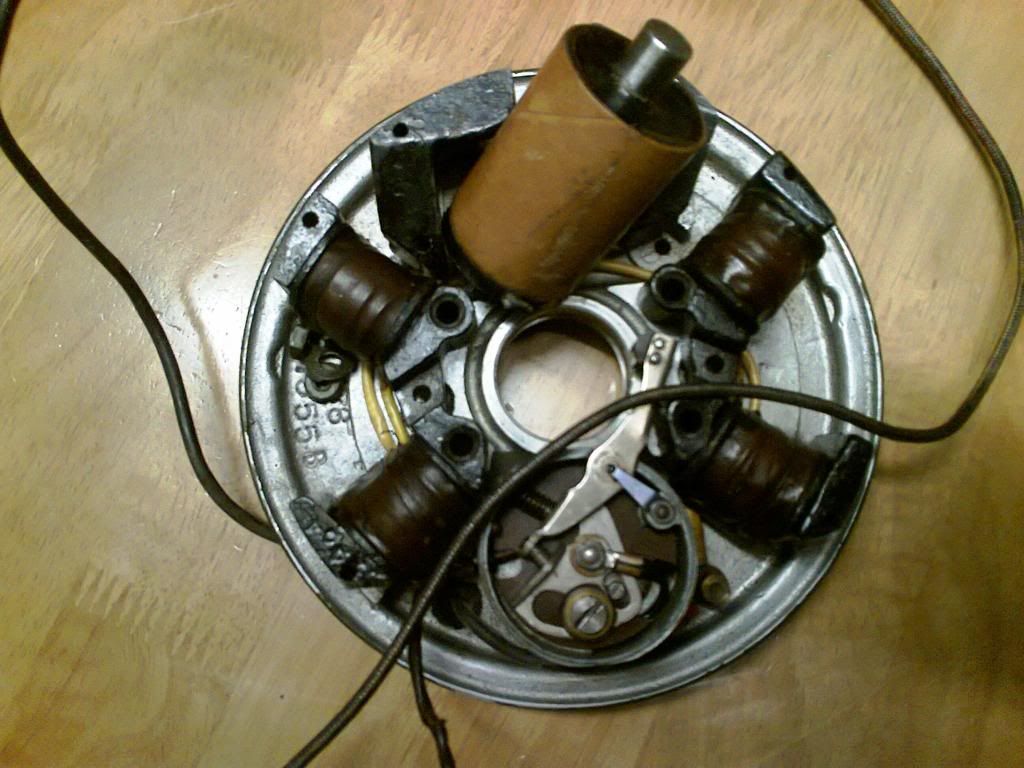
Started on the ML's engine today...briefly.....took the external magneto flywheel off plus back-plate........the pair of twin coils are those for the lighting, the larger one, already detached, is for the ignition..........
Alarm bells rang following stripping when I noticed that the ignition coil was wrapped in green-colour PVC insulation tape (since removed)....can't see why ? The coil itself looks to be a modern post-war replacement........perhaps of dubious quality ? Either way, this ML sparked and ran prior to stripping.......
Purists will note that the magneto plate is fitted with a post-war ML ignition points assembly, complete with easy-adjust cam.........After WW2, Villiers improved upon the ignition points assemblies, first model was better then the "cam" adjuster type shown...........quicker to adjust and needed only a screwdriver and feeler gauge rather than points spanners...........all assemblies however are interchangeable with the original type........
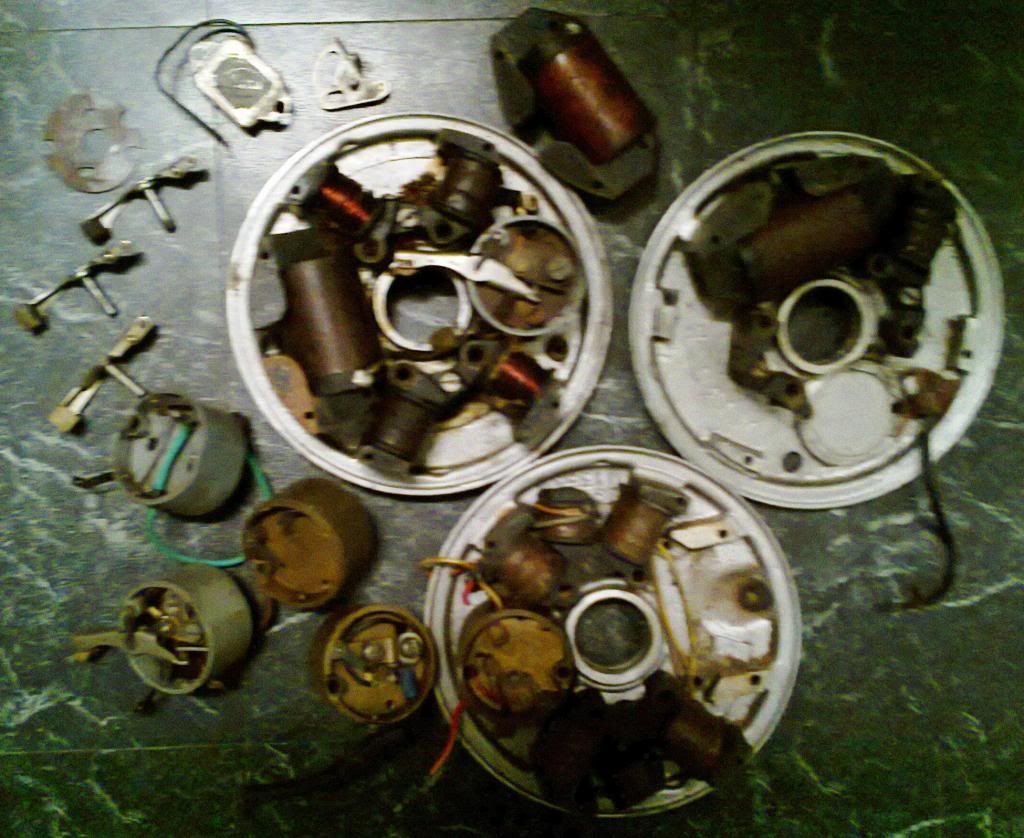
Ignition condenser is located beneath the points assembly box.......I have a NOS Villiers item so this will be fitted.........as for the ignition coil, note from the other image I have plenty of spares plus points assemblies of all types and years (and more, not shown).........key with 2-strokes is get the ignition coil and condenser sorted and everything else is basically down to adjustments............ 
Assembly begins over the next few days.........
Thanks for posting the seat frame photos Steve.
Henri
email (option): unpob@yahoo.com
You're welcome Henri ! 
More work done today...........
NOS fork spindles fitted........such an easy task on an ML  Little wear on the old ones but as I had a set of new ones I thought "why not ?".......also, little if any wear in the forks which are not bushed anyway............
NOS carburetter stripped, cleaned and checked ready for fitting..........
As for the engine unit, I decided that as it has had little if any use over the last 20 years I'd concentrate on the clutch-side and kickstart cover......the latter has a bit of play in the kickstart-shaft bush but having found a NOS gearbox cover plate and kickstart shaft among my spares I decided early on to fit this..............
Took the original cover off..........to my surprise I found around half a dozen loose washers to pack-out the mainshaft adjuster trunnion........there should be only one steel and a thick felt washer beneath...........play when assembled and adjusted should be almost zero..........why had this been done ?
Well, examination of the NOS cover complete with bush against the original cover, plus a check of the parts list and maintenance manual, revealed that the original cover fitted had lost the shoulder of the kickstart bush, creating about 3/16ths extra play.......hence a previous owner fitting numerous packing washers to compensate...........NOS one fitted with the correct two washers (felt and steel) and job done 
Gearbox internals displayed no wear, and as for the clutch assembly and primary chaincase inner, all very clean, no visible wear or play, and everything as it should be...........
Engine unit now painted in SCC No.2 brown overall (as it was originally) and ready to fit back into the rolling chassis.........ignition flywheel will be fitted later when my new ignition coil arrives from Villiers Services........cheaper ones on Ebay, but decided to go with a known, reliable version from a reputable seller where the item is made to original specs...........along with a new condensor, this should provide a reliable iginiton..........
I left the remainder of the engine alone.......it has seen little use, is on +15 thou oversize and has excellent compression and induction.......
Pics will be posted later........
Here is mine done. The little clips from Drags for the tail light cable are perfect. I thought they were stainless, but in fact they are zink plated steel. So I just sprayed them with etch primer and satin black. I've also bought a bulb horn off ebay that needs painting and a handlebar clip to find. I will also one day find the correct decompression trigger and Lodge plug cap. I've left my NOS headlamp with it's stencil markings and tail lamp in their original Olive Green.
Ron 


email (option): ronpier@talk21.com
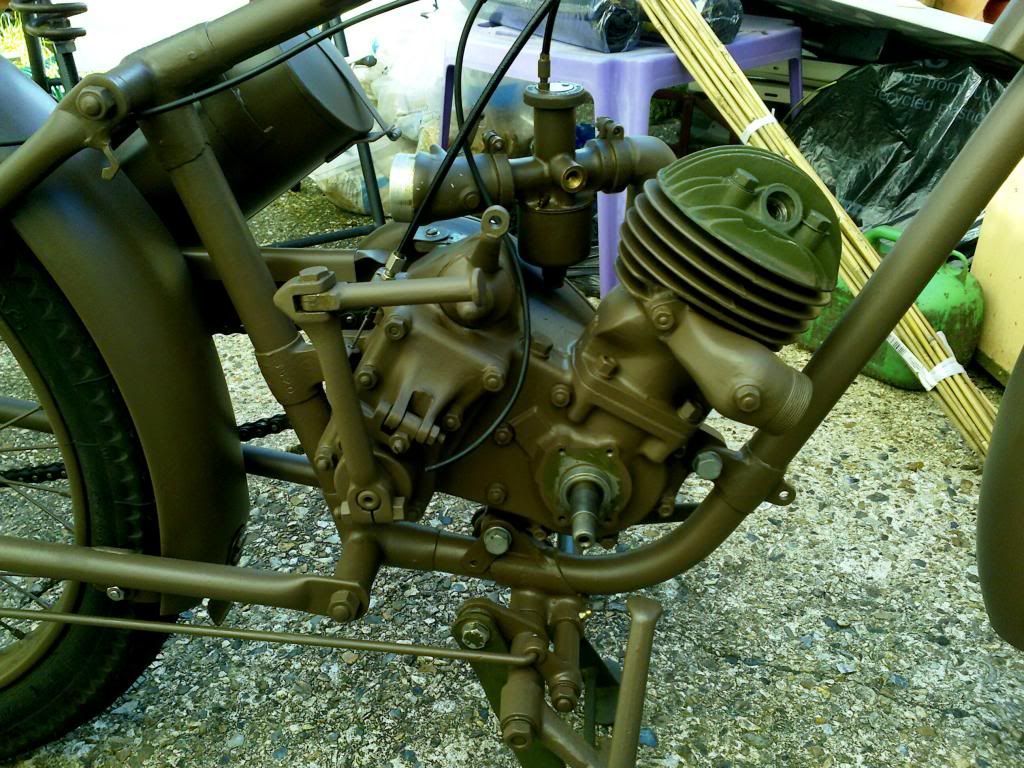
Few more jobs done on the ML today.......engine/gear unit now back in the rolling chassis.........clutch cable connected and overhauled NOS carburetter fitted (still in SCC No.2 brown)..........this is what the right-side of the ML engine unit looks like without the magneto flywheel added... NOS gearbox cover since fitted due to the wear and bushing problems with the original.....new clutch operating arm also fitted.......control cables are laquered braided cable and all ex-WD NOS............
One new saddle mattress spring fitted....other replacements on order to replace the tired originals before the original Mansfield saddle cover is re-fitted..........
Rear chain and chainguard now fitted also........and forks complete with NOS spindles now adjusted correctly......
Note that the bike still carries a "slave" stand...original to be fitted when repaired.......and ignition flywheel will be fitted when my new coil arrives next week.......... Current cylinder head (in green) will come off to time the ignition correctly prior to a re-paint in SCC No.2..............
Hoping to get this little bike finished in time for Normandy !!
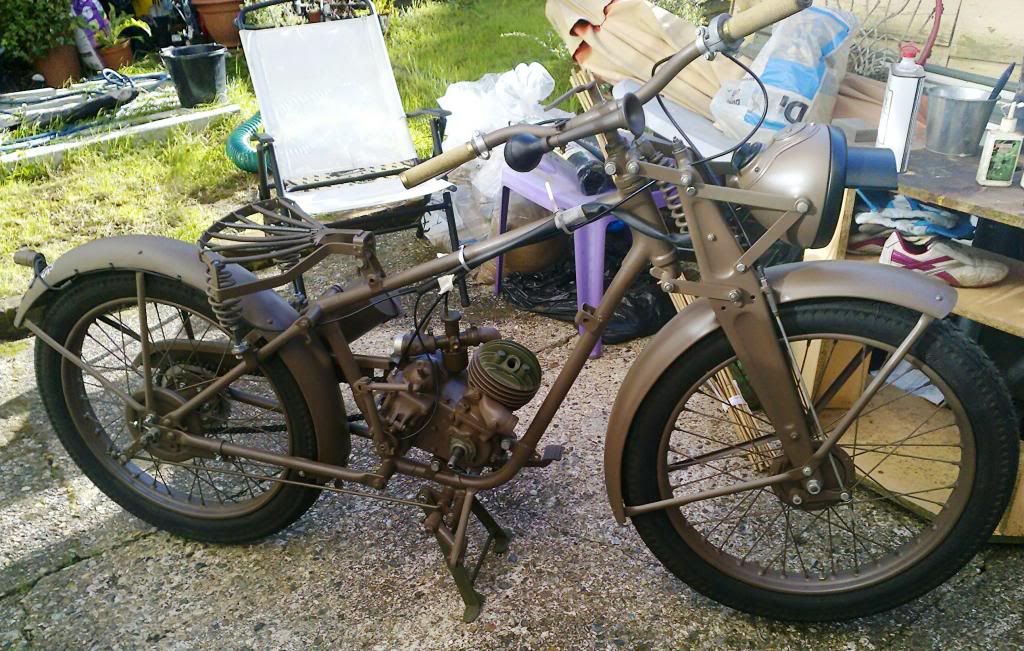
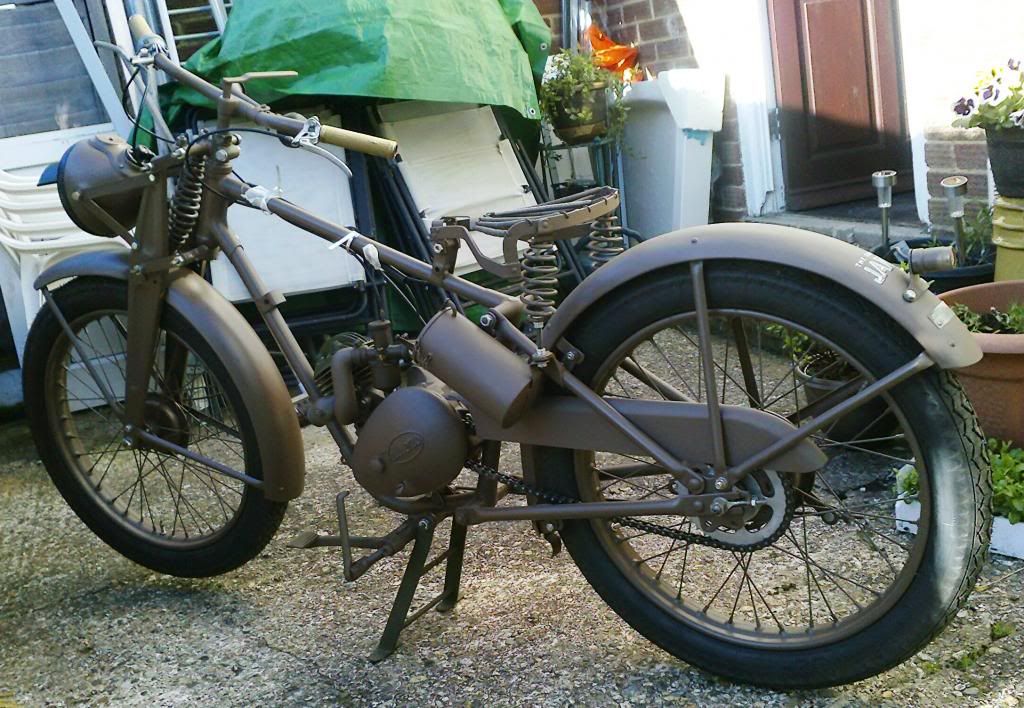
Steve, just out of interest. Have you any idea what those redundant holes on the rear frame were ever used for Ron
Ron
email (option): ronpier@talk21.com
Not a clue Ron ! They were seemingly deleted on late civvy ML production (47 - 48)..........
I can only think that they were a pre-war thing ? The ML was based upon the pre-war James K17 model (hugely rare today) and just maybe the frame was used for that and other models then in the James range....those extra holes having some obscure purpose ?
Not a lot to do now........
Ignition flywheel magneto awaiting an ignition coil prior to fitting, hence the cylinder head being off.............
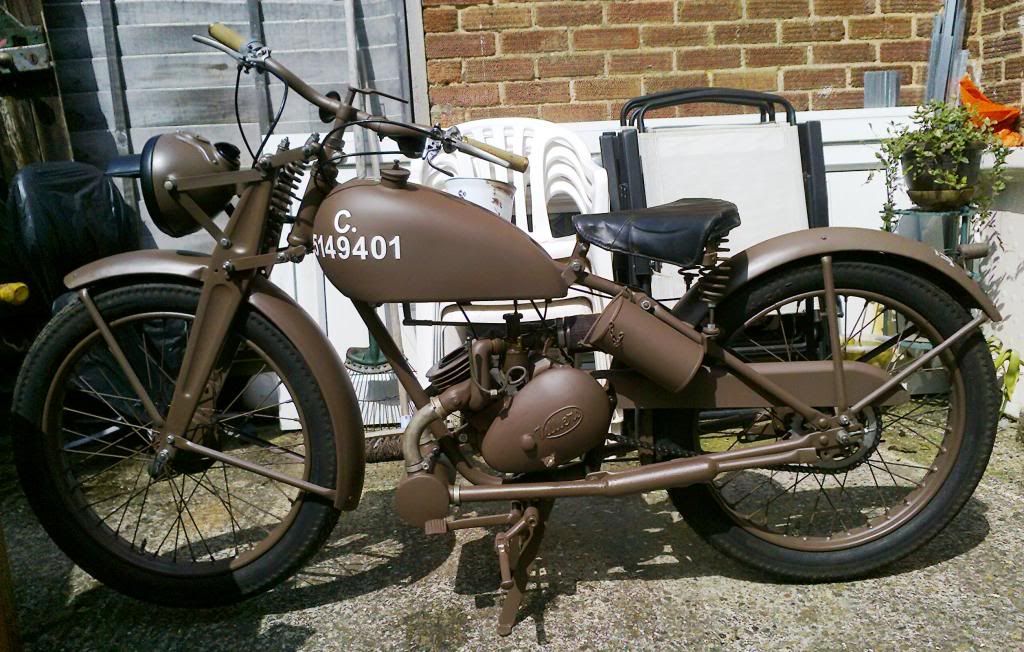
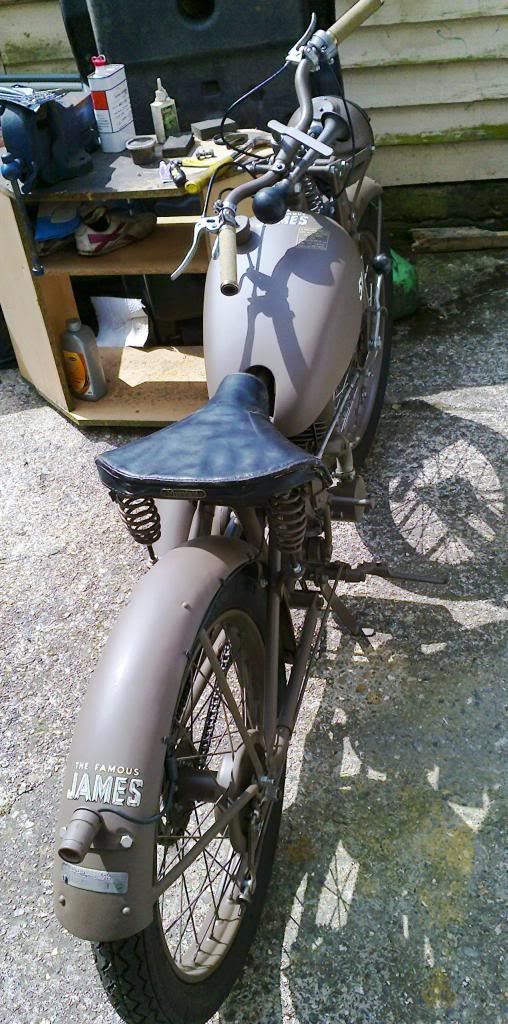
But pretty much everything else now sorted..........original "Mansfield" saddle cover now fitted, fuel pipes and NOS cables in place, correct stand now fitted, all adjustments made, and I guess that this old girl will be up and running again by next week.....
Perhaps the easiest restoration I've ever done, helped by the fact that she was pretty complete and original when acquired plus I had sufficient NOS and used parts to complete.........
Here's the picture of my frame, the frame was shoved under a large shelf with loads of heavy stuff put around it and it was pretty dark so I didn't pull it out, but I certainly had a job reading the number as it is so faintly stamped, anyway it reads ML 60354 if anyone can shed any info on it. The number is in the correct place, just above the bottom bearing on the right hand side, I even tried to highlight the number with chalk but it wouldn't show up for the camera so as I was trying to decipher the number I had to chalk it on the down tube as I read them. I will take some better pictures when I finally get round to pulling it out from the shelf

email (option): davmax@ntlworld.com
Hope you're not going to destroy the paint job on the tank Dave...It's part of its history you know...
 ....Ian
email (option): ian@wright52.plus.com
Brilliant isn't it?!!!
email (option): davmax@ntlworld.com
Dave, according to the book, the last frame number delivered to the WO was ML 8500. Ron
email (option): ronpier@talk21.com
Ill have to double check them, I'm sure I checked them once before and it was a military one, maybe I read it wrong, it is under a dark shelf in the back of the workshop with loads of stuff in front of it and I didn't have my glasses
email (option): davmax@ntlworld.com
And post-war civvy version carried on the with numbering right up the the high 20,000's............

It definitely must have read it wrong because it doesn't appear that they went as high as 60 thousands, I'll pull it out later this week and try again!
email (option): davmax@ntlworld.com
Steven ,
Thats a job to be proud of & no mistake !
You are obviously a highly talented engineer .
I have seen Dave Plumbs "Flying Flea" , again superb workmanship !
Hope to be able to get close to that level when I decide to go through My WM20 ?
Steve ...
Thanks for the compliment !
The ML is all-but-finished now............just needs the ignition timing sorting and then up and running..........
Sadly, other work got in the way of that final hurdle........new workshop construction started and now 70% complete.........
Hopefully, completion within 2 weeks and thereafter bike-restoration recommences.........
Hi Steve, how are you getting on with the ML assembly? I am in the process of assembling my engine and need to time the ignition. However, where do Ifind the timing mark on the flywheel and how do I time it? Cheers JT
John it is best to set the timing before you put the head on. The points should just be starting to break with the piston 5/16" BTDC.
There is a mark on the engine just in front of the HT lead and there should also be a mark on the rim of the flywheel. I never rely on this as invariably the flywheel is off another engine and the mark is out. Once you have set the timing you can then put your own mark on if you want. Ron.

email (option): ronpier@talk21.com
Ron, that is really helpful. I have two flywheels and cannot see a mark on either of them like the one in the illustration. I will time it as you suggest. JT
