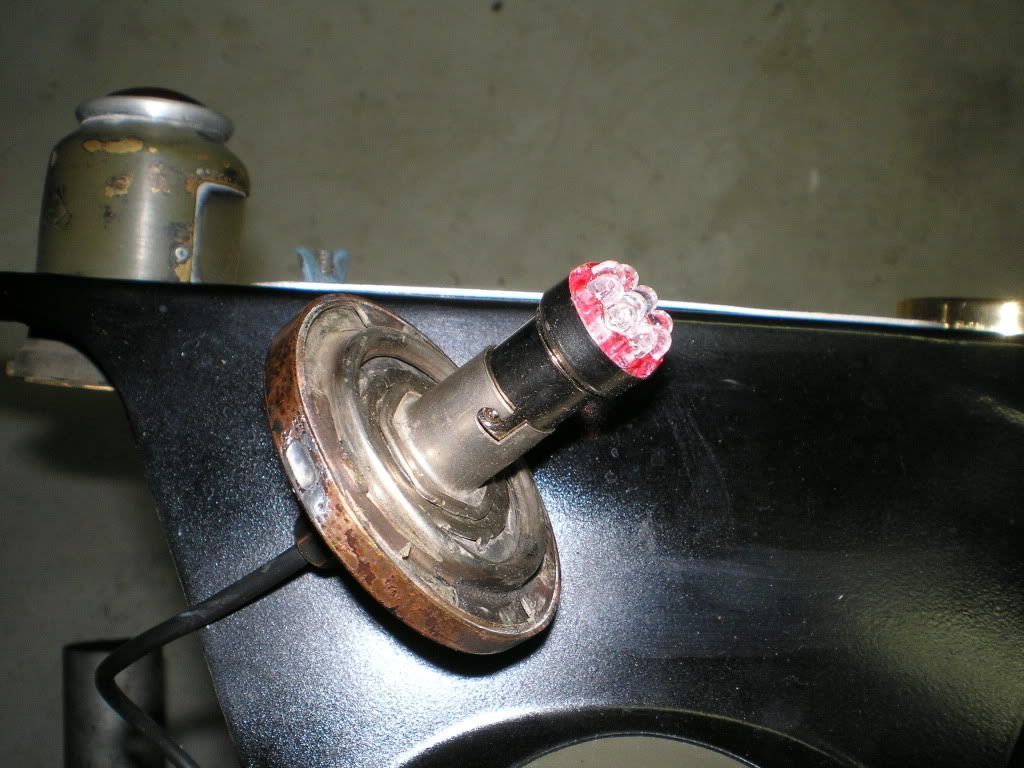
It's been a while but I'm now using a system with Henk's clever +/-ve earth 7 LED bulb caps in the original MT110 housing and incorporating a resistor as detailed by Wookie to provide a brake light function. This has enabled me to retain the unmodified lamp and original single wire connector.
Henk's 'bulbs' draw 90mA. The advantage of using the LEDs is that there is minimal current draw when compared with a similar system using conventional bulbs.
I ran the cable from the switch up inside the rubber harness tube to the headlamp as a dry and convenient location to hide the resistor. I've been experimenting with various resistors and have ended up using 68 ohm. The compulsion to run daytime lights here meant that I needed a significant difference between tail and brake light functions. Even with this resistor in place, the tail light function is still bright.
Although I've left it visible for the photo, the resistor is now wrapped and insulated.
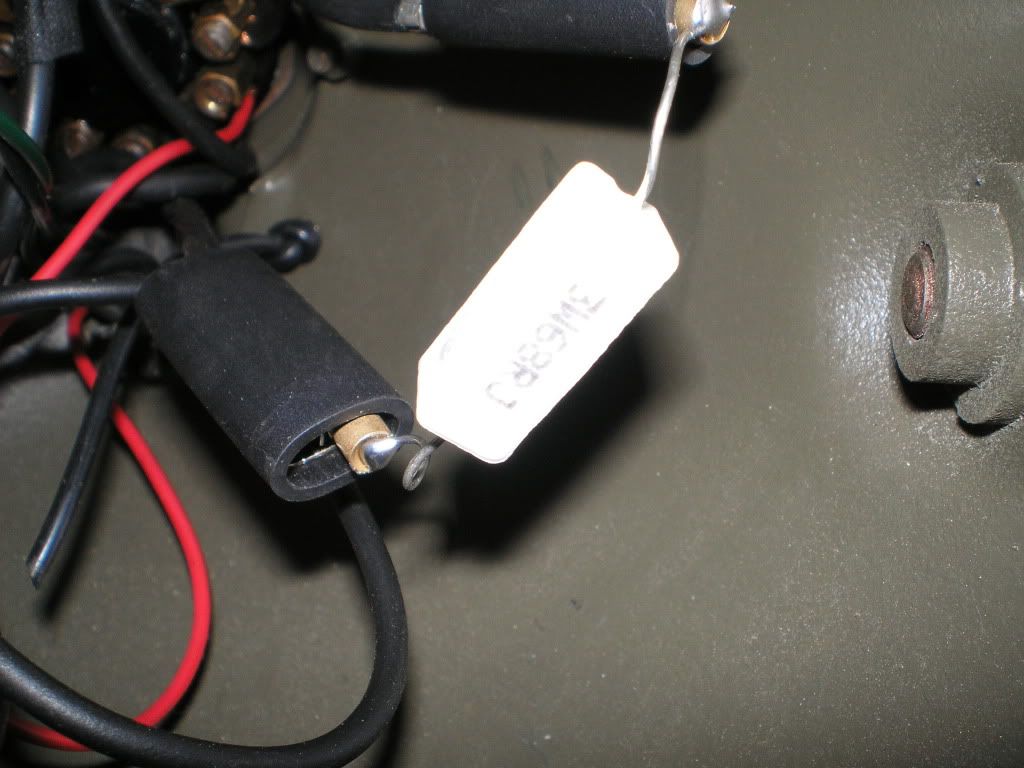
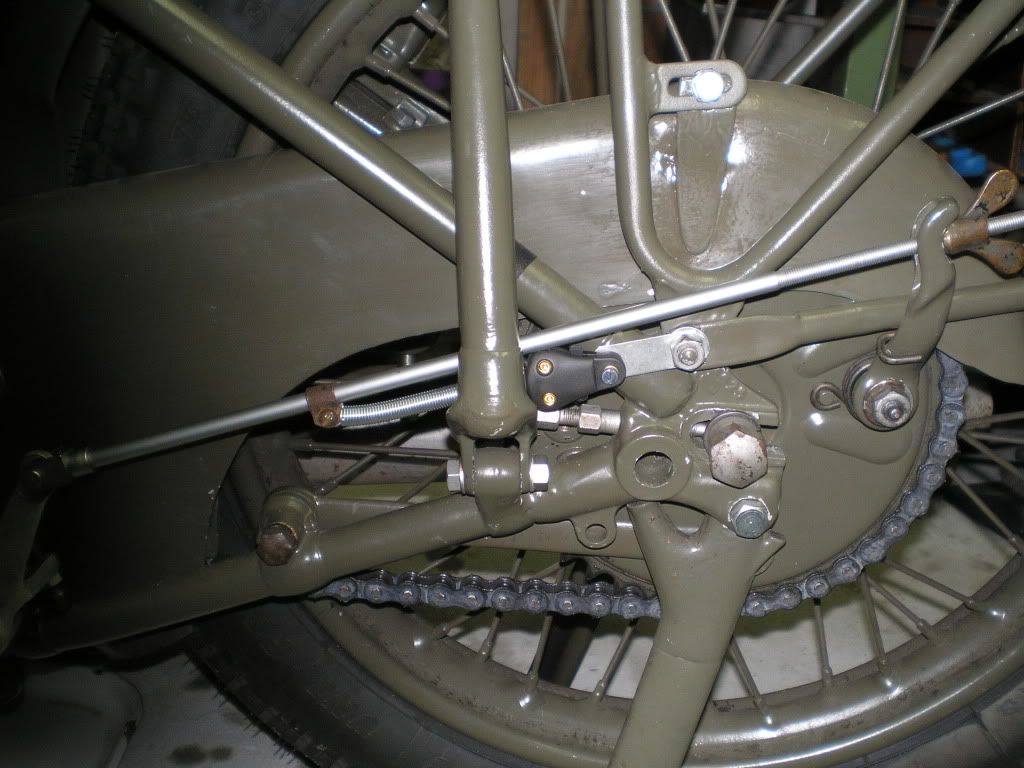
Brake light switch location is a direct copy of Mick Holmes' system. The wires to battery and up to the headlamp are hidden along the back of the saddle stay. The switch still needs to be camouflaged a bit.
Ah I like the LED conversion, mine's the same but with a 15w bulb reduced to about 5w for tail light. I use a 1 Ohm resister and a diode to stop the brake light turning on the head light as the current runs both ways on the circuit. 1 Ohm was just right with ordinary bulbs, any higher and it didn't work at all. As the bulb is a 15w running at 5w most of the time, the bulb should last forever..... I hope :-)
What about the dipswitch?...they didn't have that either originally, but it is compulsory in the UK with a 'standard' MOT. It's also a lot more visible than a brakelight switch...particularly if you have that secreted under the panniers when fitted...Ian
I wasn't really aiming that comment at your bike specifically Rik...rather as a more general point concerning any bikes such as my own that didn't have the switch fitted originally...it seems odd to 'jump through hoops' over the presence of the brake light set up and at the same time ignore the dip switch which is a similarly 'non original' part on many bikes and is also more visible....Ian
To be honest Ian, my main concern was to retain the original MT110 and not have to butcher the bulb holder. In some odd way, I also wanted to use the existing brass screwed connector and going to a two-wire setup would have meant re-working the rear of the lamp.
The pre-war Norton wiring diagrams include the optional brake light wiring which would have used a two-wire system but presumably with a different lamp. I don't know which one.
My brake light system only shows from one side of the bike.
The only deviations from standard that I've knowingly introduced are to the electrical system. However, I'm compelled to have a brake light and also to run daytime lights (I cheat on that by using a 10w halogen pilot). Our charging systems were not designed to run constantly as well as operate a brake light.
It's really quite easy to convert. Take the bulb out and see if the little disc has one solder spot or two. Yours prolly has one. Rummage in your junk box for a similiar disc with two solder spots. With a small soldering iron, melt away the existing solder and remove the wires. Solder in the appropriate color coded wire, and you should be all done. Then you will have a terminal for each filament of a stop/brake light.
15mm bayonets are available with parallel pins so that isn't insurmountable (you just have to be careful that they're the right way round).
However, it doesn't get around the single wire connection with the nice brass ( ) screw connector on the MT110.
A twin wattage LED unit that required no modification to the holder would not be available and as I mentioned, due to the stupid daytime light rule, I have to try to keep the electrical load down.
Just to reiterate, if you don't have a diode after the resistor you will be using a lot more power than you think when you light the brake light. The current will try to light the headlight, it probably wont light up because of the resistor but will still be using current. So you wouldn't want to sit with you rear brake on for ages, especially without the engine running.